Welcome to part two of the My Airstream Kitchen series. In part one, I shared all of the juicy details about our tiny kitchen, including where it all goes, and how I keep it organized. This time I’ll divulge my secrets for Planning, Prep & Preparation. Get ready…it’s a long one.
Planning
I’ve always been a planner and list maker. I am one of those people who likes to research and plan and then research and plan again. I can’t help myself. Meal planning and grocery lists have always been part of my repertoire and I’ve become even more dedicated to this practice since we began living on the road. Quite often we end up somewhere for a week, or longer, without great food options nearby. So unless we want to eat canned soup for two weeks, planning ahead is a must.
The List & Meal Plan
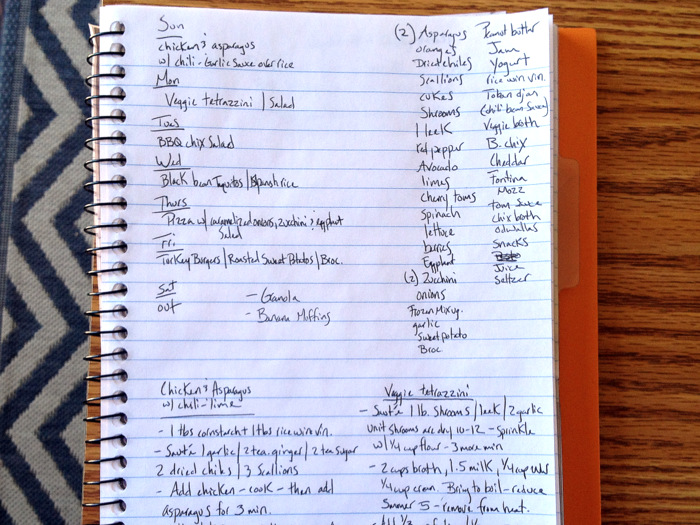
I write out my grocery lists and meal plans by hand. I fully embrace technology in nearly every other aspect of my life (maps, books, communication), but for some reason, I can’t shake the handwritten grocery list. I’ve tried a few grocery list apps for my phone and they just never really felt right. Instead, I have a dedicated notebook where I write my lists & menu plans.
I follow the same formula every week. On the left-hand side are the days I am planning for with meals underneath. I only write down dinner because we almost always have left-overs or some variation of left-overs for lunch. Breakfast is either yogurt with granola & fruit, yogurt with fruit and toast, or eggs with fruit and toast. No need to write that down. Although I do mark down if I need to make a new batch of granola so I will remember to add any needed ingredients to the list.
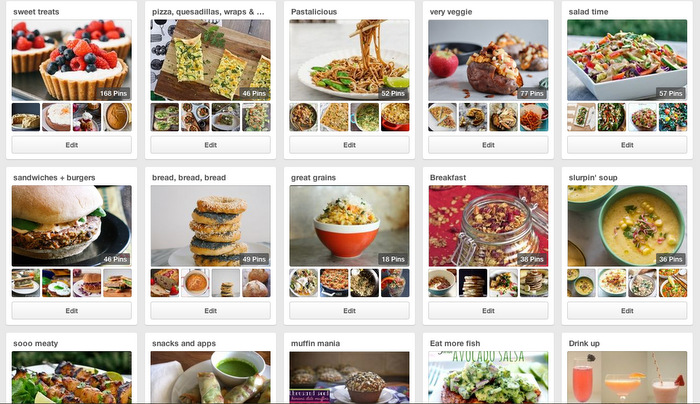
On the right side of the page is the grocery list. I make two columns, one for veggies and fruit and one for everything else. At the bottom of the list I hand write any new recipes I plan to make that week. I get new recipe ideas from the many, many food blogs that I read. I then add them to one of my Pinterest boards, and when it’s time to make the weekly grocery list I go back and peruse the pins.
It’s really hard to read a recipe on my laptop, or even the ipad, in my tiny kitchen. So my method is to jot the recipe down and then read it from my notebook. Often I will write the recipe in my own form of shorthand. Which means omitting the majority of measurements, spices, and cook times.
This allows me to use the recipe as just a guideline and truly make it my own. The only time I follow a recipe exactly is if it’s for some kind of baked good. I’ve learned the hard way that precise measurements and strict adherence to directions are really the only way to have success with baked goods.
Prep (Shopping)
Grocery shopping in a different town every week used to give me anxiety. I’ll never forget very early on when I was forced to do my grocery shopping at a Walmart…for the first time ever. Where I grew up we didn’t even have a Walmart in the state until I was in high school. And even then it wasn’t a Super Walmart (the kind with groceries).
No one did their grocery shopping at Walmart, just the idea of it seemed absurd to me.
It’s a little embarrassing to admit now, but that first time I may have cried a tiny bit while standing in the produce isle surrounded by sprouting potatoes and wilted lettuce. I’ve since learned how to survive a grocery trip to Walmart, along with countless other stores — big, small, nice & not so nice.
Finding the Store
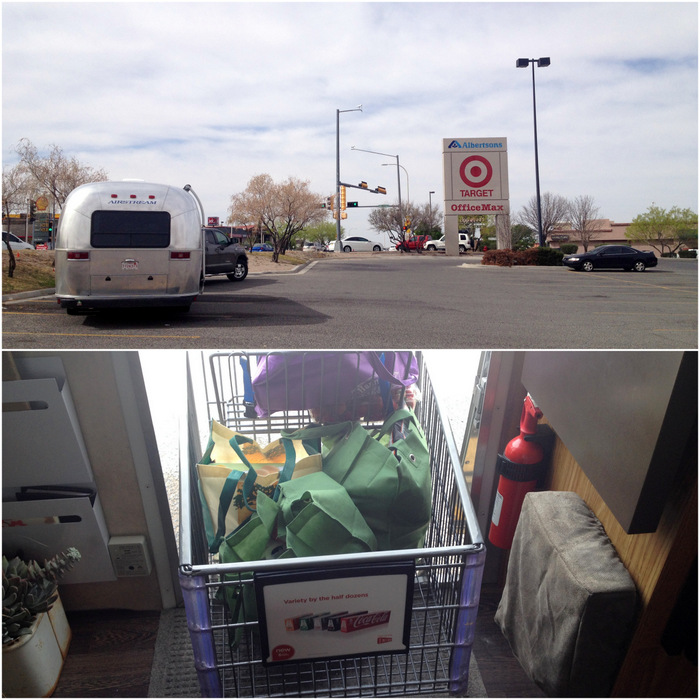
The number one thing I’ve learned about successful grocery shopping while traveling is to plan ahead. And by that, I don’t mean planning meals and writing a grocery list. I mean I look ahead to where we’re going and what kind of grocery store is in the area. If there is none, or if I Google “grocery store, middle of nowhere, USA” and all that comes up is a 7 eleven, I know to stock up really well before hand. Sometimes if we’re on the way to an area without a good grocery store we’ll make a stop en route with the Airstream in tow. This has become my favorite way to grocery shop. There’s nothing easier than driving the cart right up to, or in some cases into, the house.
Flexibility
Like most people, when I lived in a stick n’ bricks house I went to the same grocery store every time. I had the layout memorized and could whip through a week’s worth of shopping in a matter of minutes. That doesn’t happen anymore. I’ve learned that even large grocery store chains often have different layouts in different towns, so grocery shopping takes longer than it used to. I’ve also learned to go with the flow if I can’t find a certain ingredient or brand that I normally buy. It would be wonderful if every town had a store that carried my favorite brand of rice, or a huge selection of fresh organic veggies, but that’s not the case.
The reality is that more often than not I won’t find everything I want to buy, and that often means last minute substitutions on the fly, or going without that one thing for the next week or so. Sometimes if I see something I really like, but can’t always find (Hint of Salt Nut-Thin Crackers & King Arthur White Whole Wheat Flour come to mind), I’ll buy a couple. But I try not to do this too much since we have limited storage. Which brings me to my next point…
Where Does It All Go?
If you think that our tiny space means we can’t carry around a full pantry with enough ingredients to make nearly any meal, think again. When we first moved into the Airstream I was pleased to discover that I was able to fit everything I consider necessary for my style of cooking in the panty with only some minor space issues.
When I say everything I mean five different kinds of flours, numerous bottles of oils and vinegars, nuts, dried fruits, too many varieties of grains to count, and much, much more. How does it all fit? Strict organization and these magical plastic bins that are just the right size for our pull-out pantry.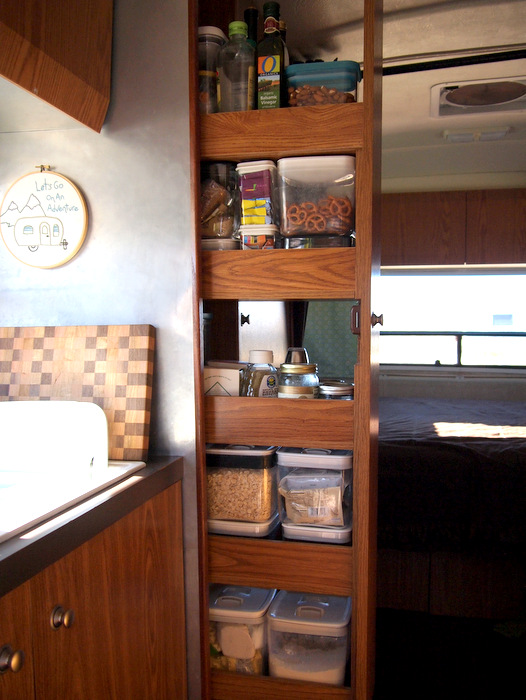
The pull-out pantry contains 17 plastic bins of assorted sizes that hold everything from flour and oats to granola bars and pretzels. These bins ensure that everything has a place, and everything stays fresh. Some bins I pour the food directly into, and others are stuffed with partial bags containing misc. grains, dried fruits, and other pantry staples. It’s not a perfect set up. To get to the bins in the back of the panty I have to remove the ones in the front, and sometimes I buy too many almonds or two much quinoa to fit in the designated bin. But for the most part, it’s been a great solution to utilizing every last bit of the space in this tall, skinny cabinet.
And then there’s the other cabinet…
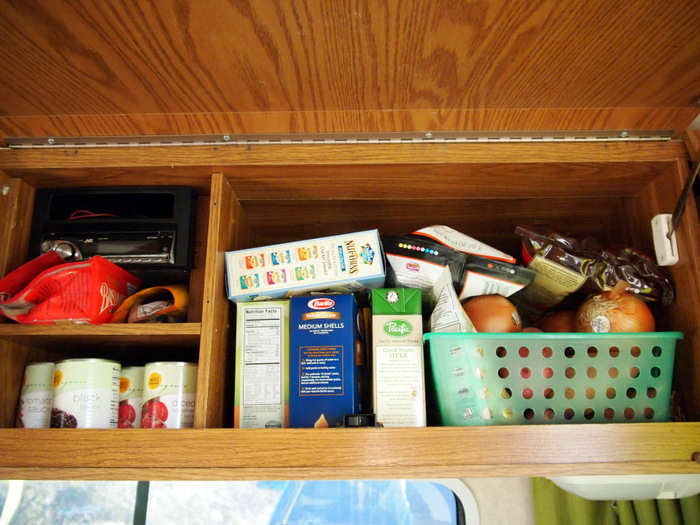
This is the second food pantry, which suffers from a messy complex compared to its neat counterpart down the hall. Here is where we store a few cans, a basket with potatoes and onions, boxes of pasta and crackers, and a bag or two of snacks. Behind what you see in the photo above is another layer with bottles of seltzer and baking items that don’t get a lot of use, like a bag of cornmeal and cocoa powder.
I’ve thought about incorporating the bin system up here as well, but since this cabinet is located at the front of the Airstream that means the back is curved to fit the roof line. Curved cabinets and square bins don’t mix well, so, for now, this is what it looks like.
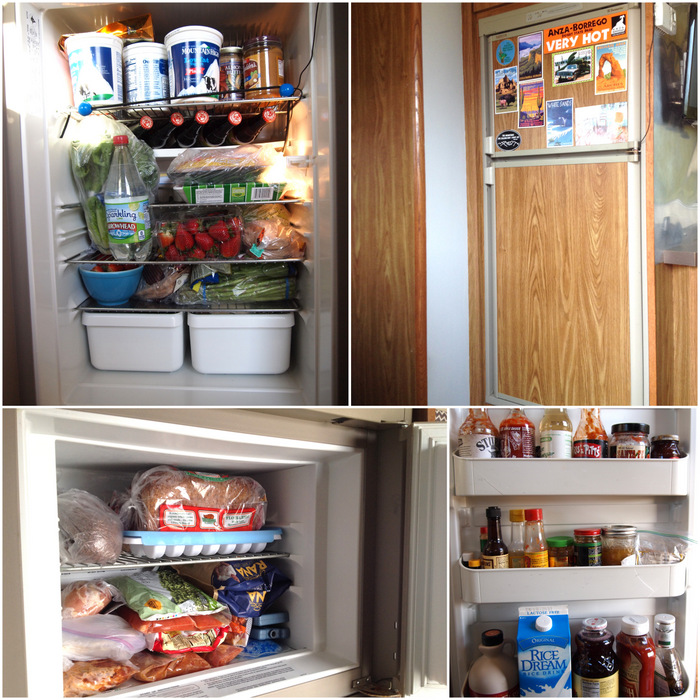
Moving on to the fridge. Like most RVs, our Airstream contains a small fridge with an even smaller freezer on top.
These photos were taken right after a trip to the grocery store. As you can see it’s a challenge to fit it all in, but we manage. Fresh vegetables get prime shelf space, as do the numerous containers of yogurt that we always have on hand. Vanilla for breakfast and plain for making sauces and baking with. The freezer always has a few bags of frozen veggies, a loaf of bread (the only way to keep it fresh here in the southwest), and numerous portions of homemade sauces, casseroles, and stews. Oh, and the bag of frozen ravioli that I always keep on hand for those nights when I just don’t feel like cooking.
Preparation
Okay, we know what we’re going to make, we shopped for the ingredients, and we managed to jam it all in the fridge. The only thing that stands between us and a good meal now is the preparation. If you haven’t guessed by now, I like to cook. I like to cook a lot in fact, and I like to try out new recipes that challenge my skills and my tiny space.
I also do all of the cooking. Tim has never had much of an interest in cooking, and that’s fine with me because I am not much of a collaborator when it comes to cooking. Or to put it another way, I am a control freak about my kitchen and it’s best that he stays out of my way! Back when we lived in a full-size house Tim helped with meals by chopping vegetables and making the salad while I prepared the main course. When we moved into the Airstream we quickly learned that two people in this tiny kitchen does not work at all. So these days I am in charge of all things food related.
What we eat
We don’t claim to eat any certain way. We’re not vegetarian, vegan, plant-based, gluten-free, dairy-free, pescatarian, pollo-vegetarian, flexatarians, or anything else that falls under a label. We prefer to eat a whole food diet based on real food, prepared in our own kitchen, using fresh ingredients.
Does this mean that I make everything from scratch and we never go out for burgers or occasionally eat a bag of BBQ kettle chips? Umm…no, definitely not.
What it does mean is that we strive for a balance of healthy eating at home with the occasional indulgent meal out thrown into the mix. Sometimes this balance is not so balanced. For the most part, we eat a 100% whole foods, non-proceeded diet when it comes to meals made at home. Meaning we stay away from flavored boxed rice or pasta, pre-made sauces and seasonings, lunch meats, cans of soup, and pretty much anything else that contains processed unnecessary ingredients.
Where we fall short of the whole foods diet is when it comes to snacks. We always keep granola bars on hand (sometimes I make my own, but not recently), Tim loves his pretzels, I love my crackers, and we both love chips. So not perfect, but for the most part, our diet is fairly healthy. And we do eat meat a few times a week, but at home, I only prepare poultry with a very occasional piece of pork thrown in.
Where & How It All Gets Made
Last time I showed you my kitchen and three burner stove with a tiny amount of counter space. This time I’ll show you how I manage to prepare meals in such a small area. I figured the easiest way to do this was to take photos of a few meals being prepared. Here we go…
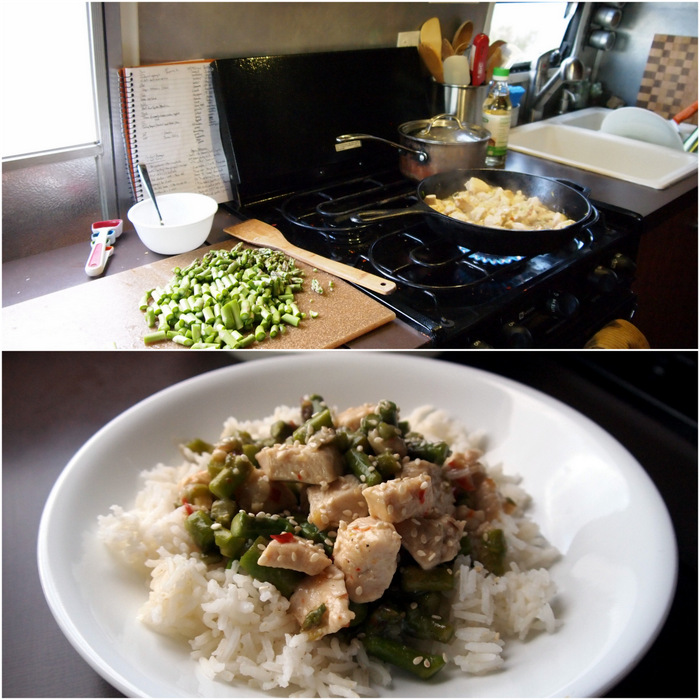
A Stove-Top Meal of Chicken & Asparagus with Chili-Garlic Sauce
*Note: if you follow the link you’ll notice that the recipe actually calls for pork instead of chicken. I just subbed boneless chicken breast for the pork.
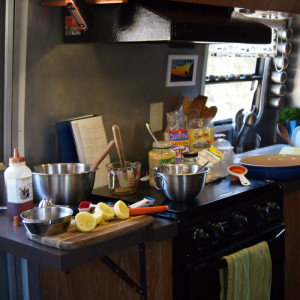
All preparation for stove-top meals is done on my flip-up side counter. Sometimes if I am feeling especially organized, I’ll put the cutting board on the top of the closed stove and chop everything ahead of time. For this meal I was making rice, which I wanted to start way before the rest of the meal, so that wasn’t possible. This dish is great for a tiny kitchen because the chicken and veggies are cooked in the same pan. Which means less clean-up at the end.
A Stove-top + Oven Meal
I am always surprised to learn how many people don’t use their RV oven. Why not? Sure it’s small, and it has a hot spot on one side, but for the most part, I love my little RV oven and can’t imagine preparing meals without it.
(If you’re unsure about using your RV oven check out this article I wrote for Do It Yourself RV.com: 6 Tips for Successful Baking in Your RV Oven.)
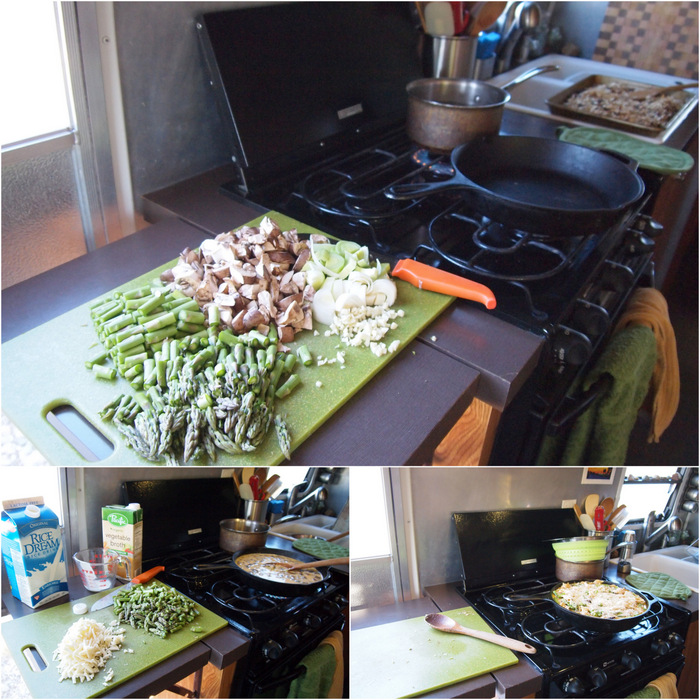
Vegetable Tetrazzini was a new recipe for me, and we really liked it. Good thing because it made a huge amount. Enough for lunch the next day, plus two portions that I added to our stock of freezer meals.
This meal is a great example of how staying organized and cleaning as you go is the key to successful tiny kitchen cooking. Here’s how it all went down:
- While the pasta was cooking I chopped all the veggies and threw everything but the asparagus in my trusty cast iron skillet.
- After the veggies cooked for a bit I added veggie stock and milk for the sauce.
- While this was simmering I grated some cheese on the now half empty cutting board.
- The cheese, cooked pasta & asparagus went in the pot and I let it cook for a few minutes to thicken the sauce.
- Breadcrumbs were sprinkled on top, and into the oven it went.
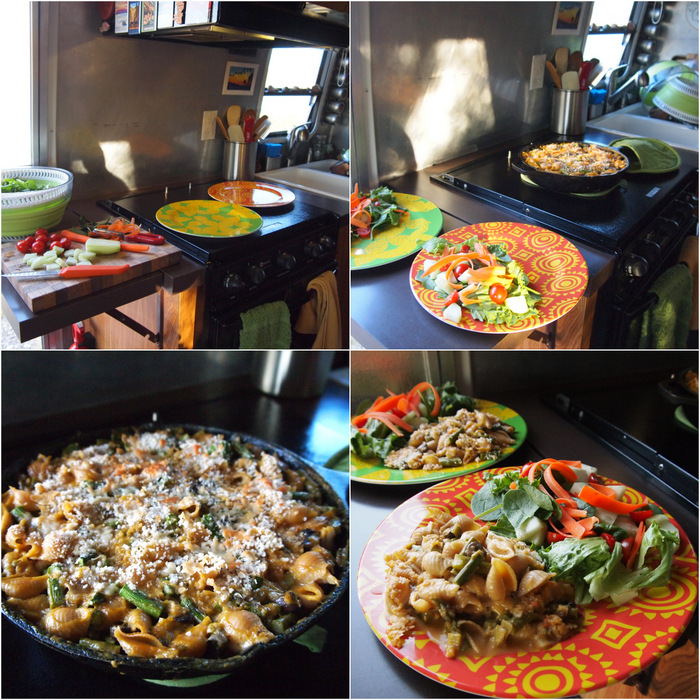
This recipe called for transferring the vegetable pasta mixture from a stove top pan to a casserole dish before putting it in the oven. I’ve recently decided that it’s so much easier to just make the whole thing in my cast iron skillet and pop it in the oven. Less mess and less clean up. If you’re in the market for a good, inexpensive cast iron skillet I would highly recommend this one made by Lodge.
While the Tetrazzini was finishing up in the oven I washed all the dirty dishes I had made so far, closed up the stove to give me more counter space, and prepared a salad. I always make individual salads as opposed to an entire bowl, because we don’t have space in the fridge for a leftover bowl of salad.
By the time the tetrazzini came out of the oven the salads were ready and any dishes I dirtied while making them were washed. After we ate the only clean up was two plates, two forks, and the cast iron skillet.
Let’s talk Grilling
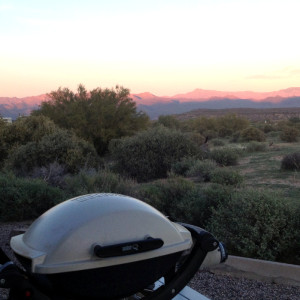
We have a Weber Q portable grill.
This is a very popular grill among RVers. It’s not unusual to walk around a campground and see multiple RVs with Webers outside.The Weber has been a great grill for us. It’s small, light, portable, and a good quality product.
Tim installed a 15′ hose that connects to Airstream’s propane tanks so we don’t have to worry about carrying around extra bottles of propane*. Good thing because the grill gets a ton of use. Sometimes if it’s hot outside and I don’t want to heat up the Airstream by using the stove or oven, I make several all-grilled meals in a row.
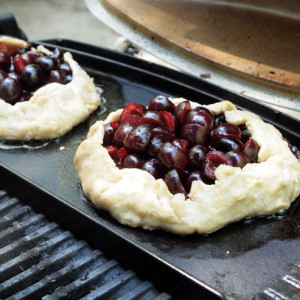
And it you think that you can only cook meat on a grill, I am here to tell you how very wrong you are. Grilled veggies — in foil, on skewers or in a veggie basket — are amazing, as is grilled pizza. We have a cast iron griddle that fits on our grill and I have been known to use it for french toast, eggs, cornbread, and even mini cherry pies one time.
*If you want to learn more about how to install a propane quick connect hose, click here.
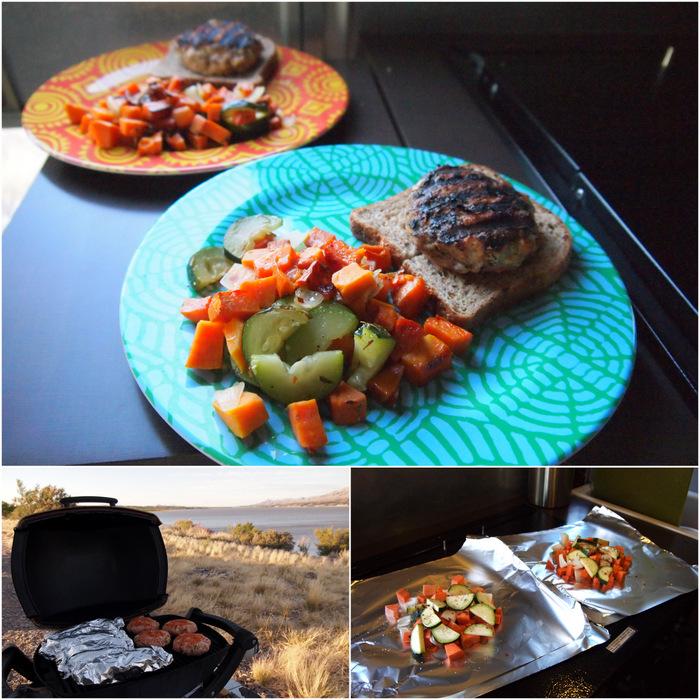
Last week we had a few days where the temps soared into the mid-80s, so one night I decided an all-grilled meal was in order.
First I made foil packets with sweet potatoes, zucchini, onion, fresh thyme, salt & pepper, all drizzled with a little olive oil. After they had cooked for about 10 minutes I added some turkey burgers to the other half of the grill. I don’t have a turkey burger recipe to link to, but I generally just mix ground turkey with some shredded zucchini, finely chopped onion, and a small amount of sharp cheddar cheese. They get seasoned with my favorite all-purpose spice rub that I make in big batches and put on everything. That’s it! Grilled meals are so simple and the best part is that they require virtually no cleanup.
Baked Goods
Not everyone is into baking. I know tons of people who love to cook but hate to bake. I get it. It can be fussy, frustrating, messy, and time-consuming. It can also be incredibly rewarding to shape your own loaf of bread or roll out a homemade pie crust. Not to mention soooo tasty!
I personally really enjoy baking and have for a long time. I go through phases in my life where I bake more than others, and right now I’m definitely on a baking upswing. Lately, I’ve been baking some kind of muffins or bread every week.
Baking in my tiny kitchen does have its challenges. The oven, which I proclaimed my love for earlier, has a hot spot that can turn the bottom of cookies and bread into blackened pits of despair. To solve this problem I have a pizza stone in the bottom of the oven to help distribute the heat more evenly, and I always rotate my baked goods several times during cooking.
Another issue is that oven is not always true to the temperature you set it at. I use an oven thermometer and have determined that my oven is a bit low so I turn it up about 10 degrees.
Then we come to the space issue. Making things like bread and cakes take up a lot of space — and make a lot of dirty dishes — which take up more space. Sometimes things get out of control and at the end I have a gigantic mess to clean up.
Sometimes I use up all the room in the kitchen and have to start putting things on the table in front of the couch. But sometimes, I manage to figure it all out and can turn out a gorgeous bread, or batch of muffin, with virtually no mess to show for it. Only sometimes though.
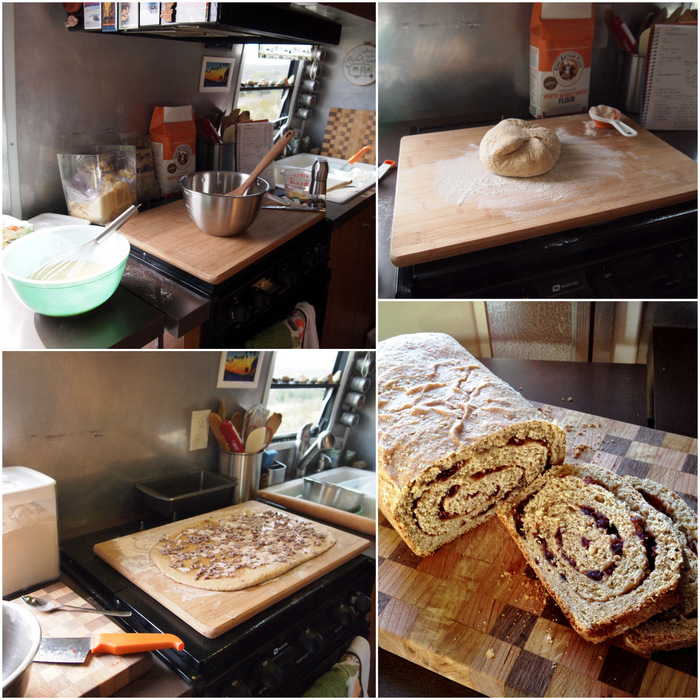
A few weeks I shared a photo of a loaf of Whole Grain Cinnamon Swirl Bread. Despite the fact that it required five rise times and various rounds of kneading, this was a fairly straight forward bread and I managed to clean up as I went.
- The first step was to make the dough, knead it briefly and let it rest for a little while. I have a large wooden cutting board that is nearly as big as the stove. This makes a great surface for kneading and rolling out dough.
- While the dough was resting I put away all the ingredients and stacked the dirty dishes in the sink.
- Next, I kneaded the dough a few more times, letting it rest in between each knead. Then into the bowl it went for the long rise.
- While it was rising I mixed together the cinnamon swirl filling.
- When it was done rising I rolled it out on my big cutting board, sprinkled it with the cinnamon filling, and rolled it up.
- Into the bread pan it went for one final rise.
- In the meantime, I cleaned everything up and washed all the dishes. By the time the bread went in the oven, I had a clean kitchen and nothing to do but wait for the bread to bake.
It can be even simpler than that though. For example, you could make a batch of muffins in a single bowl.
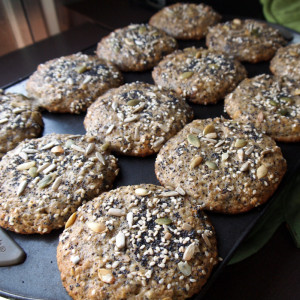
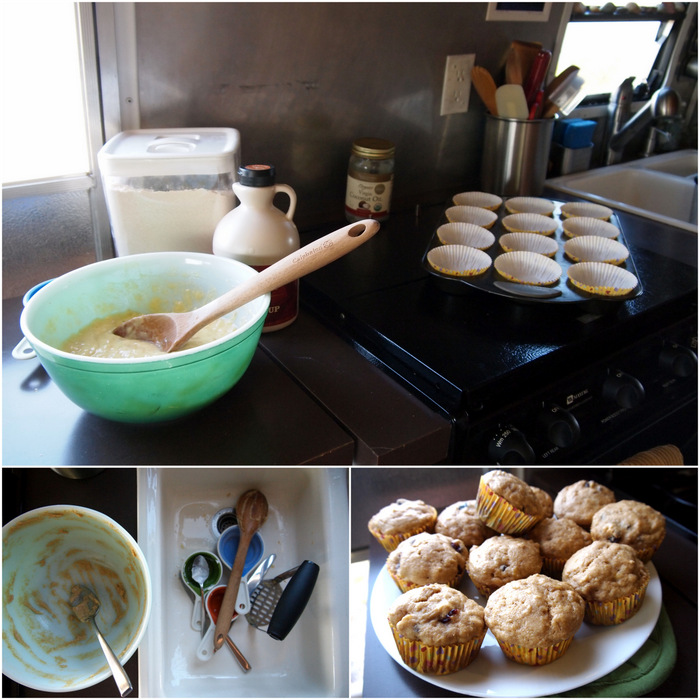
You know how so often muffin and cupcake recipes call for the dry and wet ingredients to be mixed in separate bowls and then combined? Well, I’ll let you in on a little secret. This isn’t always necessary. Last week I made some really easy banana muffins by simply mixing all the ingredients together in one bowl. At the end, all I had to wash was a bowl, the banana masher, a few spoons and measuring cups. Simple and little mess. Perfect for the tiny RV kitchen.
And with that, I proclaim this post finished. You made to the end. In one verrrry long post, you have learned everything there is to know about how I plan, prep, and prepare all sorts of yummy foods in my tiny Airstream kitchen.
But wait! There is one final thing I would like to say about cooking in an RV. Are you ready? This might be a shocker for some people. Here it is…you don’t need full hook-ups to cook or bake in your RV. Not a single one of the photos I shared in this post was taken while we stayed in a park with full hook-ups. In fact, I just went back and counted, and five of the ten meals/baked goods I showed you were prepared while we were boondocking with no hook-ups. The remaining five were made at campgrounds with only electric & water hook-ups. So there are no excuses. Now go cook something!
If you liked this post be sure to check out My Airstream Kitchen- Part 1: Organization.
This post contains Amazon affiliate links. We receive a small portion of funds when you purchase items through these links. The price you pay is the same, and all the money goes to support this blog. Thanks so much for reading and following us on our journey!


20 comments
Great post, please keep up the good work!
Thanks Bob!
Excellent post! I salute your organizational skills when it comes to meal planning and preparation. I am going to check out the griddle for the Weber. That looks like it could be useful. Thanks for writing this.
So glad you enjoyed the post. We got our griddle through Amazon. It’s really expanded the amount of things I can cook on the grill.
I love my little RV oven. I have a tendency to use it a lot when it’s cold out….heats up the RV and bakes up some yummy goodness; win, win. Thanks for sharing the recipe links. I’m always looking for new ideas. I’m with you…..I don’t do anything differently whether we have full hook-ups in a city or boondocking in a remote location like Goosenecks SP :-)
I also use the oven when it’s cold outside. Amazing how quickly it helps warm up the RV- and as a bonus you get something yummy to eat! Glad to hear there are other boondocking chefs out there. I don’t let anything get in my way of a good meal :)
Another wonderful post, Amanda! Husband is the cook, not me, so I’m showing him this post. Also, what size Weber Q do you have? (1000, 1200, etc.) Do you keep it in the truck? Thank you for all the amazing details and photos. I can’t get enough.
Joanne
We have the smallest Weber- the 1000. I believe it’s the same size as the 1200 but without the flip up side tables. Since we always put our grill on a roll-up aluminum table (you can find those through Amazon) I don’t need the flip up tables on the grill. We do keep it in the back of the truck. It comes with a nice fabric cover and takes up very little room back there.
Love the post . Gave me some great ideas to make more space or maybe utilize it better.
We have the same frig. Getting a new one in a few days unfortunately our 11 yr ol bit the dust. Glad to see the pics of it. Now I know I can have 2 drawers at the bottom instead of one like
our AS came with from PO. Joy to read..keep having fun!
Glad to know the post gave you some ideas. Have fun with your new fridge! Ours is 15 years old and still going strong. Although I probably shouldn’t talk about it too much, because I really don’t want it to quite on us anytime soon :)
Great post. I also checked out your pins and found some great recipes. Thanks! We aren’t full time yet, but have a home made camper that we travel in on weekends and for most of our vacations. The camper has a microwave and we carry a Coleman stove. I usually also bring a blender. About 90% of my cooking is from scratch. I make fruit drinks in the blender. Got some funny like when I used our generator (very quiet Yamaha) and a long cord to make our morning fruit, kale and avocado smoothie. Love your blog!
http://www.sockmonkeytrekkers.blogspot.com
I’ve been there with the generator. We don’t have an inverter, so if we’re boondocking or dry camping everything runs off 12-volt power. That means if I want to make a smoothie I bring the my cup and immersion blender outside and plug it into the generator. It might look funny, but it works!
Hi Amanda! Thank you so much for this post and your first post on organizing a new kitchen. We’re moving things into our new TT from our old one soon & your posts are very helpful!
I clicked on the link for the plastic storage bin & got a message that there was ‘no match’ at the Container Store. Did they look something like this: http://www.amazon.com/s/ref=bl_sr_kitchen?ie=UTF8&field-brandtextbin=Storage+Containers+-+Food+Storage+By+Qvob&node=284507
Thanks again–take good care!
The ones you linked to look quite a bit smaller than the ones I have. I fixed the link so it now works. The brand is CLick Clack, and I think you might be able to find them at Bed Bath & Beyond as well.
You can have solar without an inverter? We have a generator since we just started boondocking. Later really want solar. How does solar work without an inverter?
The inverter is the piece of the puzzle that takes 12v from the batteries and turns it into 120 volts (standard US household voltage). We don’t have any 120v items we rely on, so have chosen to live without an inverter.
Electricity from the solar panels is sent to a solar charger that sends ~12v back to the battery for storage.
I enjoyed this post, you really have it down on how to cook in the air stream. When I was young my parents use to bake cakes on our grill and well as bread….it was oh so good.
So glad you enjoyed the post. I’ll have to try a cake on the grill. It’s been my experience that everything tastes better when grilled!
Hey Amanda,
OK, I am feeling a bit anxious about cooking in my trailer (and I don’t suffer from anxiety) after reading this post. You make it look so easy. Of course, as previously discussed, you actually like cooking. Me? I am a fish out of water. Makes me want to crack open a local beer and have some cashews. Does that constitute a meal?
I really enjoyed this post and I don’t even cook – but Hector will read it as well. Can relate to the one person kitchen, Hector never lets me help him. I do the dishes and I don’t let him help me – unless he washes while he’s cooking. We have the same bins! And I must tell you that Hector and I still talk about the kale dish you made in Quartzsite – and we don’t even like kale :)