I don’t know about where you are, but around here summer is in full swing and the temps are hot, hot, hot! So hot that I don’t want to even look at the stove, and the thought of turning on the oven makes me break out in a sweat. And while we could use this warm weather as an excuse to eat out every night — or indulge in ice cream for dinner — the better (healthier) solution is to bring the cooking outside and put our grill to good use.
Even when the weather is not hot I tend to grill a lot. Over the last few years of full-time RVing I’ve gotten really creative with my grill. I like to challenge myself and see just how many non-traditional grilled foods I can whip up. Since I know that lots of other RVers are into grilling as well, I thought it might be fun to share some of my grilled creations.
Over the course of the summer I’ll show you how to make everything from dessert, to salsa, to cornbread on your grill.
First up, let’s talk about my absolute favorite grilled food — Pizza! If you’ve never tried grilled pizza before then you’re in for a real treat.
Grilled Pizza
Equipment Needed:
- Grill. We have a portable Weber Q propane grill. I’ve mentioned here before how much I love this grill. You can also make grilled pizza on a charcoal grill, but since I know nothing about charcoal grills, you’re on your own as far as cooking instructions go.
- Long Handled Metal Tongs & a Metal Grilling Spatula
- Small Bowl and Basting Brush
- Large Bowl
- Large Cutting Board, or Baking Sheet
- Small Sauté Pan
Step 1: Make the Dough
I always make my own dough. For one because it’s super easy, and for two because fresh dough is ah-mazing. However, if for some reason you’re against making your own dough, feel free to skip this step and just use some pre-made grocery store dough. I’ll try not to judge you too harshly :) Kidding! There’s actually some not too bad pre-made dough available out there, but I highly encourage you to at try making your own dough least once.
*A note about gluten free: It is possible to make a gluten free grilled pizza. I tried it using Bob’s Red Mill Gluten Free Pizza Crust Mix, and although it was a bit harder to work with than normal crust, it came out pretty tasty.
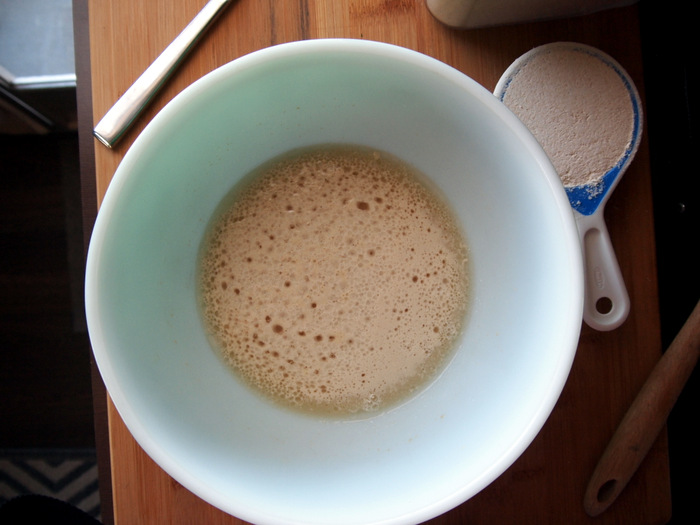
The process for making pizza dough goes like this: (scroll to the bottom of the post for the actual recipe) Combine yeast, warm water, a tad bit of honey, and a drizzle of olive oil. Let sit until foamy — about 10 minutes. If your yeast mixture does not foam up, you might have old yeast. Buy some new yeast and try again. Bad yeast = bad pizza dough.
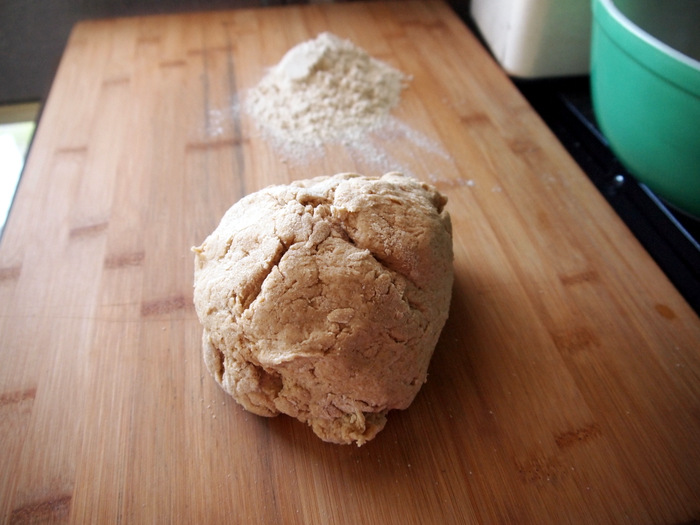
When the yeast is ready, add most of the flour plus a generous pinch salt. If you want to get fancy and add dried or fresh herbs to the dough now is the time. Mix it all up with a wooden spoon until it forms a loose ball. The dough will be rough and a little shaggy looking.
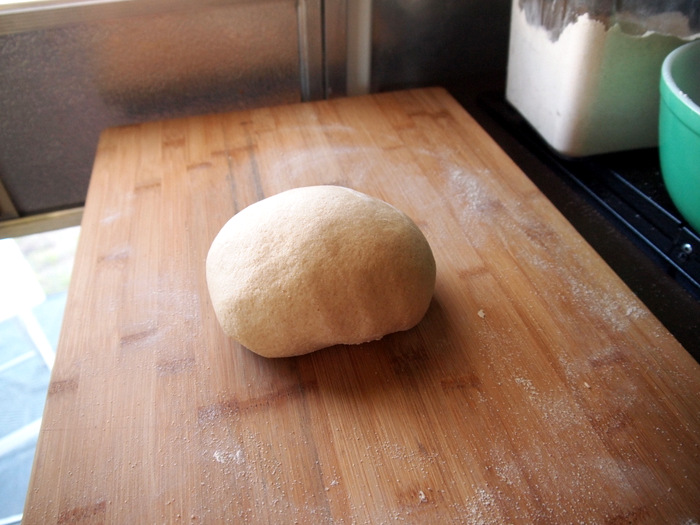
Place the dough ball on a smooth surface and knead in the remaining flour. Not sure of the correct way to knead dough? Check out this helpful video.
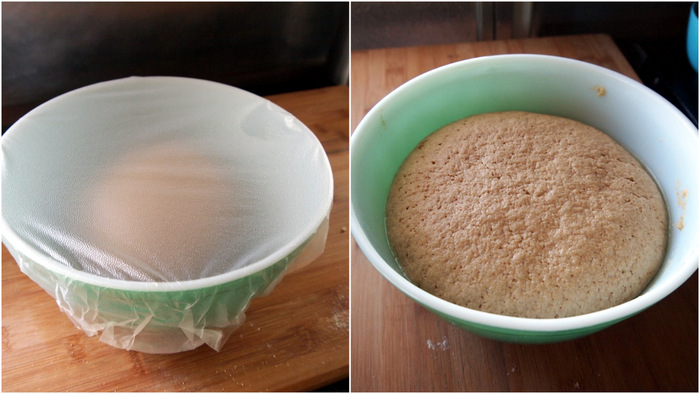
Put the dough in a lightly oiled bowl and cover. I prefer to use plastic wrap over a dish towel because the dry air out here in the desert goes right through the towel and makes my dough form a crust on the top.
Let rise in a warm spot, free of drafts, until doubled. About 1 hour, or less if you’re like us and hang out at higher elevations. The last time I made pizza crust we were at an elevation of 5,500 feet and it only took 30 minutes to double in size. If you’re below 3,000 feet your rise time will be at least one hour.
Step 2: Prepare your Toppings
One you start grilling your pizza things will move along very quickly, so it’s essential that you have all your toppings ready to go before the dough goes on the grill. It also may be necessary to pre-cook some toppings. Grilled pizza takes only minutes to cook, so you’ll want to cook ahead of time any toppings that need longer.
For example, hard vegetables like broccoli, sweet peppers, or even onions (depending on how well cooked you like them) may need a quick sauté before hand. Other things like pepperoni, ham, black olives, pineapple, spinach or kale can go without pre-cooking.
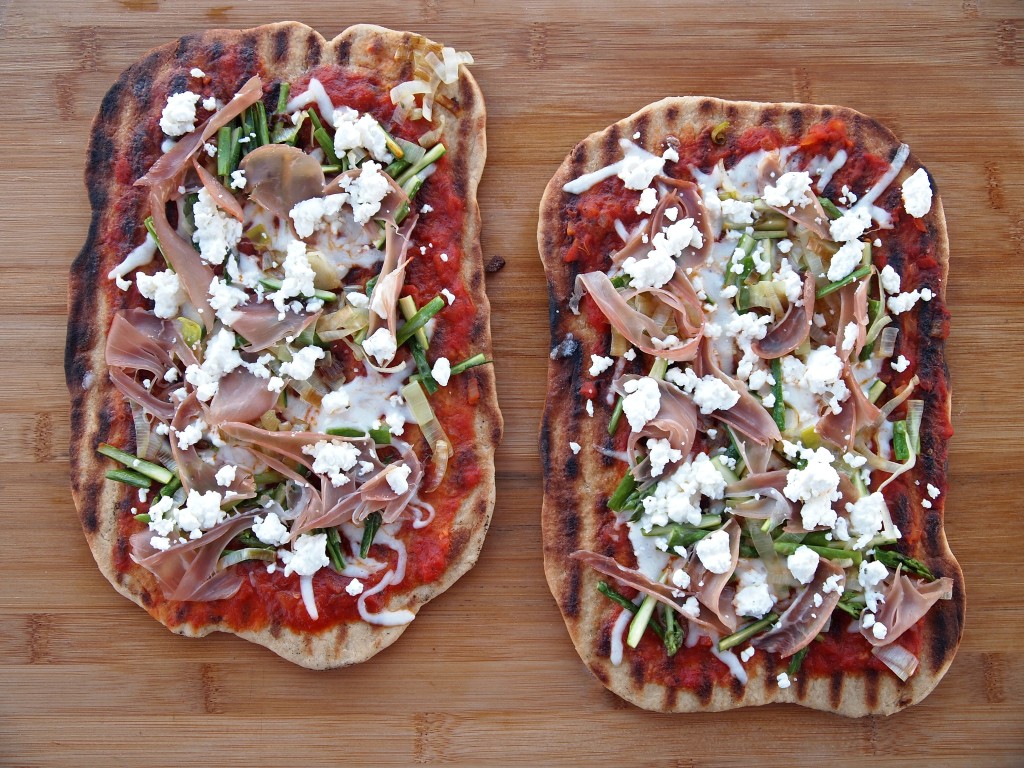
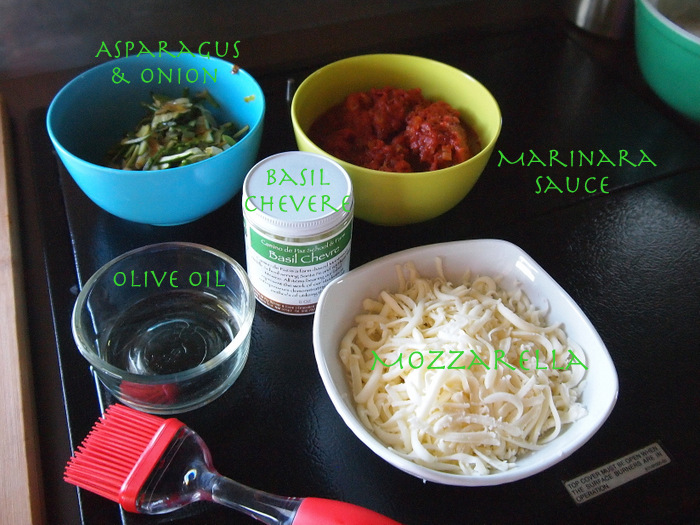
For today’s pizza I’m using asparagus, onions, and prosciutto. While the dough was rising I sliced the asparagus into very thin pieces and sautéed them with the onion. I then gathered all the rest of my ingredients together in one spot, including a bowl of olive oil for brushing the dough, some freshly grated mozzarella, a jar of basil chévre, and a bowl of homemade marinara sauce that I took out of the freezer that morning. You will notice that the prosciutto is missing from this photo. That’s because I forgot about it and had to quickly run back inside to retrieve it from the fridge when I was about to top the pizza. So much for my plan to be prepared.
Step 3: Prepare the Dough
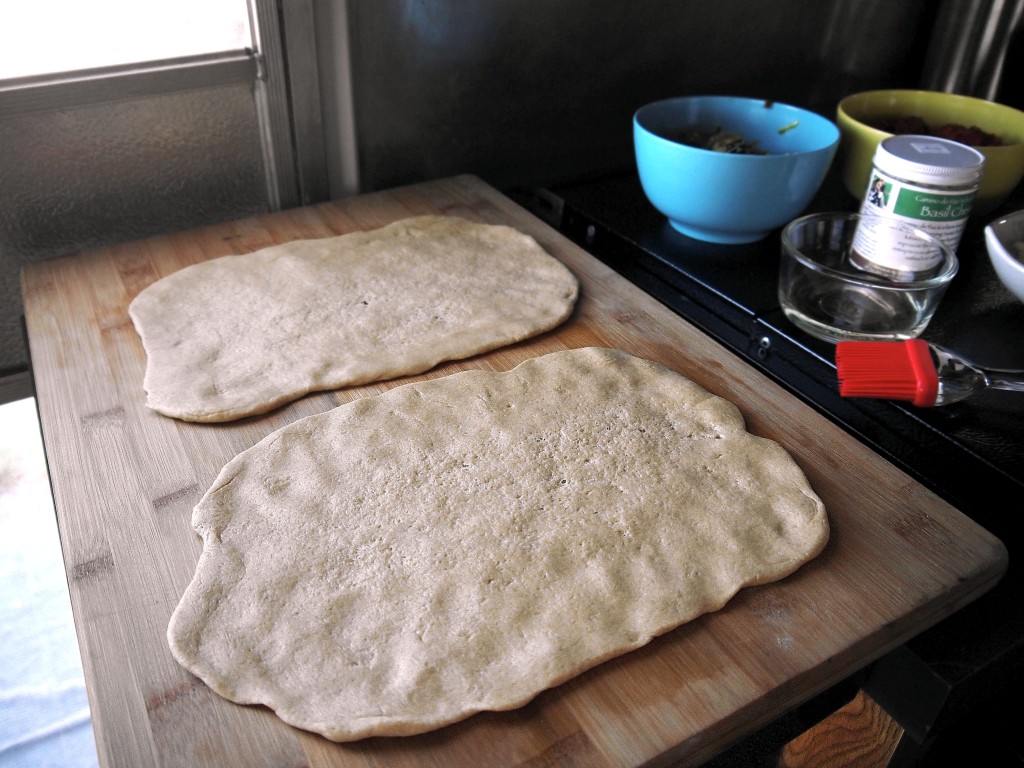
When the dough is done rising punch it down in the middle and let sit for a few minutes. Then divide it into pieces and stretch into the desired shape(s). You can use a rolling pin if you want, but I’ve found that fresh dough stretches nicely and I usually don’t need the rolling pin. For ease of maneuverability I like to stretch my dough onto a large wooden cutting board. That way I can simply carry the board out to the grill without disturbing the dough.
This recipe will make two medium or four small thin crust pizzas. My best advice when it comes to successful grilled pizza is that smaller is better. A small piece of dough is much easier to work with than a big piece. For that reason I always make small personal size grilled pizzas. I stretch my dough into four oblong shapes roughly 8″ long x 6″ wide. I’ve figured out that 2 pizzas of this shape & size will fit on my grill perfectly. If you don’t want to use all the dough at one time, just keep it in a ball, wrap it well with plastic wrap, and stick it in the freezer.
Step 4: Grill it up!
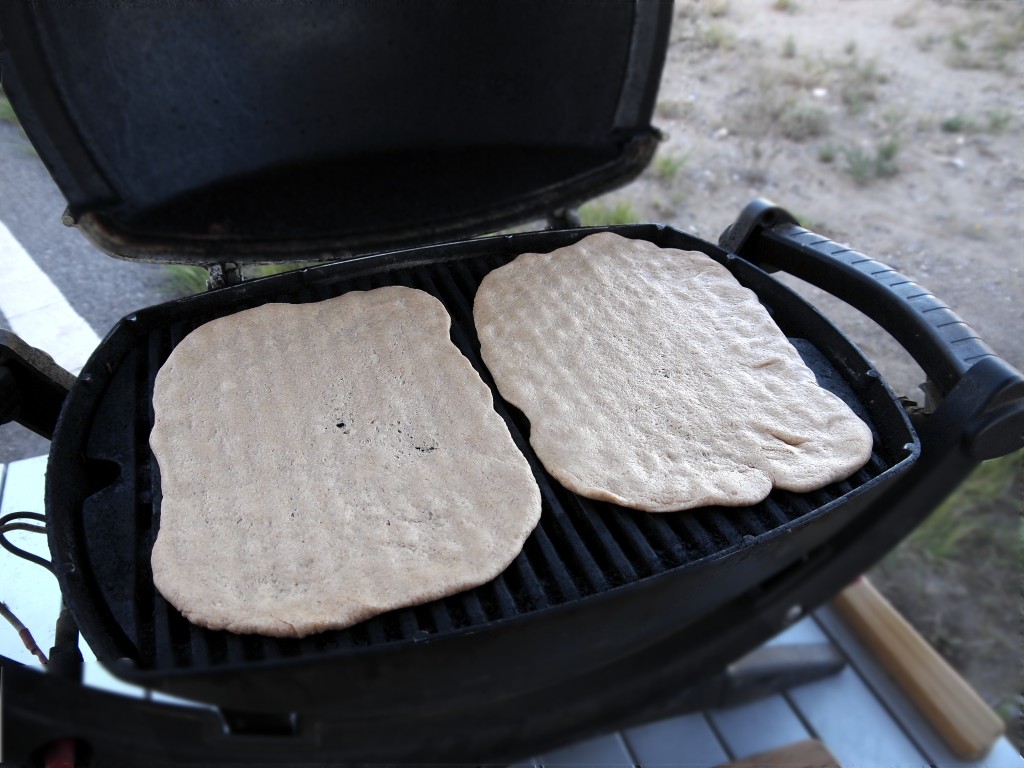
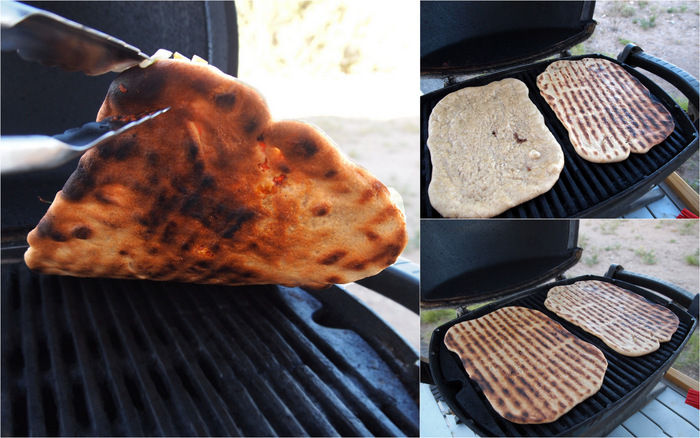
When the dough is ready and the grill is heated bring the dough outside to your grill table. Brush the dough generously with olive oil and place it oil side down on the grill.
Close the lid and let it cook for 2-4 minutes. Every grill is going to vary a bit, but be warned that it won’t take long. Do NOT walk away! Check the bottom after a few minutes by gently lifting with tongs. If it has dark brown/black grill marks then you are ready to flip the dough. Brush the top with oil, and using a long handled spatula carefully flip over.
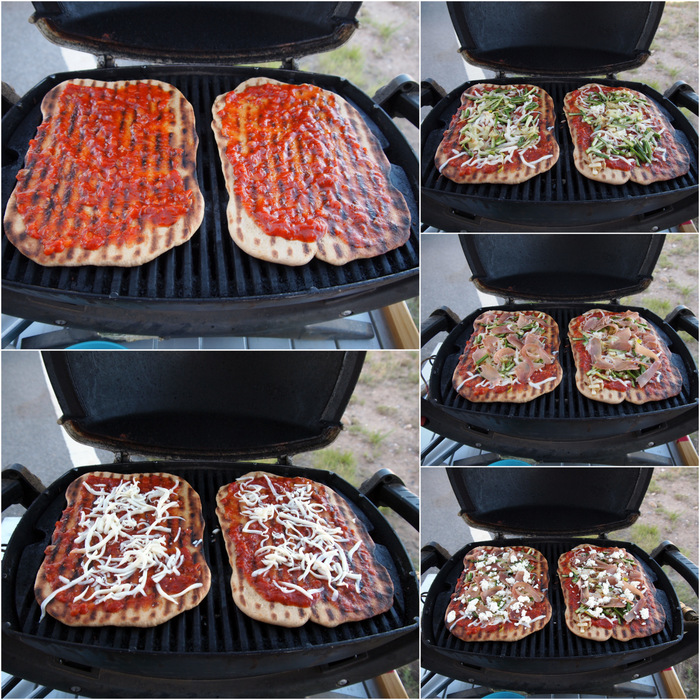
Turn down the heat to medium and as quickly as you can start piling on the toppings. Speed is essential here. The crust is already cooking, and if you dawdle around making artful arrangements with your pepperoni then the crust will be burnt to a crisp before the cheese even has to a chance to melt.
The ideal set up here is to have a grill big enough so that you can have a hot and cool side. That way you can move the dough to the cool side while you dress it up, then back to the hot side to cook the crust. Since most RVers I know don’t travel around with giant grills, the alternative method is to turn the heat down and get those toppings on as quick as possible.
Since you’ve turned the heat down it will take 5-6 minutes for the second side to cook. Try to keep the lid closed as much as possible to help the cheese melt, but you also may want to check the bottom of the dough periodically after about 4 minutes to make sure it’s not too crispy.
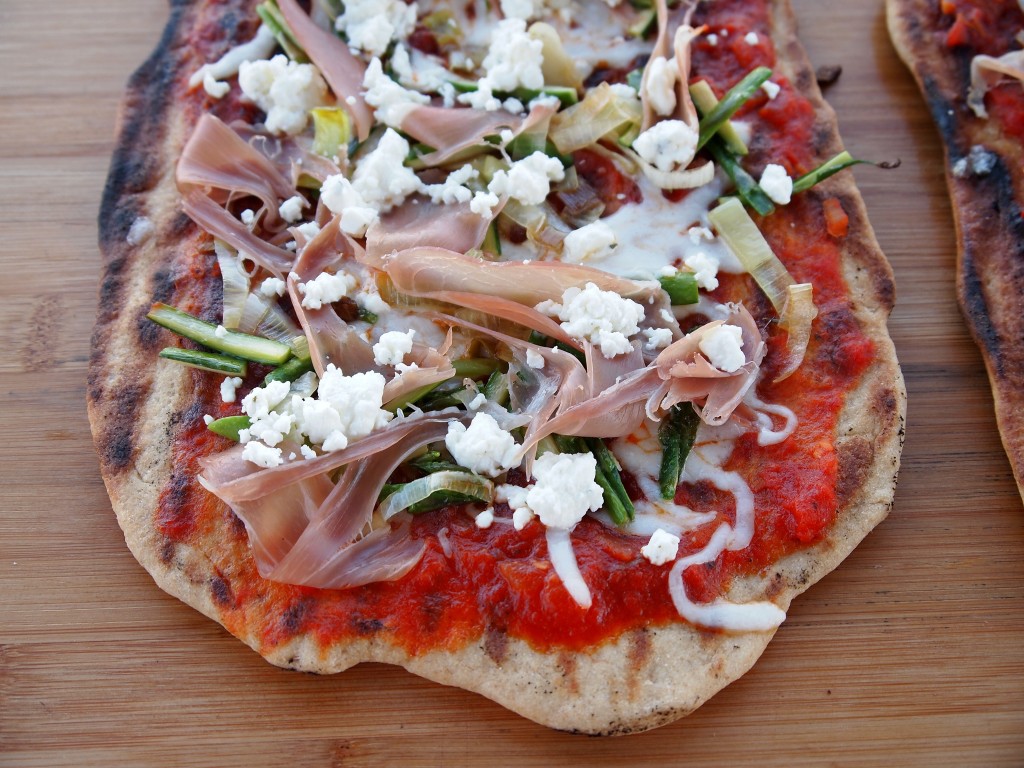
When the dough has cooked to your liking and the cheese is ooey gooey, remove, slice and devour!
Grilled Pizza
Makes 2 medium or 4 small thin crust pizzas
For the Dough
- 1 1/8 cup warm water (about 90-degrees is ideal)
- 1 package or 2.5 teaspoons yeast
- 1 tablespoon honey or sugar
- 1 tablespoon olive oil
- 3 cups flour (I use all White Whole Wheat Flour made by King Arthur Flour, but you could also use half white & half whole wheat, or just all white. I would not recommend all whole wheat because your dough will be stiff and not rise properly)
- 1 teaspoon salt
Toppings
For my pizza I used:
- 2 cups of thinly shaved asparagus and onion, sautéed
- 1 four-ounce package of prosciutto
- 1 four-ounce jar of basil chévre
- 6 ounces mozzarella, grated
- 1/2 cup marinara sauce
- 2 tablespoons olive oil for brushing on the dough
* The sky is the limit as far as pizza toppings go. I sometimes go old school and make a simple pepperoni pizza, or if I want to get all fancy I combine roasted sweet potatoes, caramelized onions and smoked mozzarella. Just keep in mind that if the topping needs to cook for more than 4-5 minutes you will want to pre-sauté, or in some cases roast, ahead of time.
Make the crust
- In a large bowl combine the warm water, yeast, honey and olive oil. Whisk and set aside for 10 minutes or until foamy.
- Add the salt and 2 1/2 cups of flour and stir with a wooden spoon until the dough forms into a ball.
- Place the dough onto a well floured surface and knead for about 6-10 minuets, incorporating in the remaining 1/2 cup of flour a little at a time.
- The dough with be soft, elastic and slightly sticky.
- Put it in a bowl brushed with a bit of oil and roll to coat. Cover with plastic wrap or a clean dish towel and let rise until doubled in size, one to one and half hours. *Less rising time is needed if you are at an elevation above 3,000 feet.
Prepare the toppings
- Slice and sauté any toppings that need to cook for more than 4 to 5 minutes.
- Set aside and gather all of your toppings including the cheese, sauce, and a bowl with 2 tablespoons of olive oil.
Grilling
- Roughy 20 minutes before the dough is done rising preheat the grill on medium high.
- Once it’s heated clean the grates well with a wire brush.
- When the dough is done rising punch it down and let it rest for a few minutes. Remove it from the bowl and cut into 2 or 4 pieces. Place all but one piece back in the bowl and recover with plastic or the towel to prevent it from drying out.
- Stretch or roll the dough into the shape you desire (it’s best to make a shape that fits your grill).
- If you have a large cutting board or baking sheet form the dough on that to make it easier to transport to the grill.
- Before you start grilling the crust make sure everything you will need (toppings, olive oil, tongs) are close by because once you start cooking there is little time to run back and forth to the kitchen.
- Brush the top of one crust with olive oil and place it oil side down on the grill. The best method it to put one side down first and stretch the rest out over the grates. Don’t worry if it becomes misshapen. Believe me, your mouth won’t care what it looks like.
- Let the crust cook for 2-4 minutes with the lid closed, occasionally lifting the dough with the tongs to check for burning.
- When it looks nice and golden brown on the bottom brush the top with olive oil and flip it over. Turn the grill down to medium and place the toppings on the pizza as quickly as you can.
- Close the lid and cook for another 4-6 minutes until the crust is done and the cheese it melted. Remove from the grill, slice and serve immediately.
*Make ahead tip: After the dough is done rising you can punch it down, divide it into pieces, roll into balls and refrigerate in a sealed plastic bag until the next day, or place in the freezer for up to two weeks.
This post contains Amazon affiliate links. We receive a small portion of funds when you purchase items though these links. The price you pay is the same, and all the money goes to support this blog. Thanks so much for reading and following us on our journey!

15 comments
Back in 2004 after Hurricane Ivan hit Pensacola we were without power for almost 2 weeks. We learned then that you can cook just about anything on a grill, and pizza was one of our favorites.
By the way, we rode our bikes on the trails at Phil’s today. Went around the locked gate and found the spot where you boondocked. What a great location! It would have been nice to just ride our bikes from there. It’s a shame they won’t let people camp there anymore.
Gayle
It’s so true. So many people only think of meat on the grill, but I’ve learned that you really can make just about anything on there if you get a little creative about it. Aren’t the Phil’s trails great? Such a shame that they closed off the area to camping :(
Wow — not only do you make your own pizza, but you went to all the trouble to create a beautiful post to inspire everyone! How fun that we have a summer grilling series to look forward to! We’re also avid grillers (we’re on our third Weber gas grill) but I must confess, Eric is the grill master (although I do the marinades/rubs/creative touches). I’m impressed by your skills.
So glad you enjoyed the post! I have some other fun grilled recipes that I am looking forward to sharing. Tim sets up the grill and sometimes turns it on, but I’m definitely the grill master in this house!
Fun….I love making my own pizza but it’s tooooo hot now to use the oven. Great idea to use the grill. Look forward to more ideas :-)
If you already enjoy making your own pizza then you should definitely try it on the grill. Once you get the method down, you’ll find that it’s actually quite simple, and the flavor is way beyond what comes out of the oven.
Love the recipe..gotta try it..pardon but have a question..headed towards Durango..where is the meadow..love the pics and remembered you being there. thanks..know you are having fun! Cannot ever enter our website your provided space..www.lifeonthebluehighways.com.
Hmmm…not sure why it won’t let you put in your site. I was able to edit your comment and add it to your name. The coordinates for the meadow near Durango are 37.353371,-108.20002. It’s actually about 30 minutes west of Durango. Look on freecampsites.net for more info and some really great directions. There are a couple different sites on that road, but be sure not to go any farther than where we stayed because the road gets very narrow and twisty. Enjoy!
Thank you ..thank you! Staying at Lucy’s in La Veta for the 4th. They have 2 rental AS..Lucy and Rickie.
Hi Amanda,
This is a great post and I’m sure relevant to anyone whether they RV or not. We’ve grilled pizza at home a couple of times. I’m not much of a cook so didn’t make our own crust. We bought whole wheat pizza crust dough from Trader Joe’s. Thanks for the recipe, I’m sure I can make homemade now.
We actually took the pizza off the grill when we put our toppings on. I wonder if you could just put it back on your board to decorate and then back on the grill. It’s been awhile so I don’t recall if this was a hassle or not.
Anyway, thanks and I’m enjoying your New Mexico State Parks tour. Something that I hope is in our future!
Grace (in Tucson)
I’ve had the Trader Joe’s crust and it is quite good, but nothing compares to homemade. I’m glad you’re going to give it a shot. It’s not too much of a hassle to take the dough off, top it, and then put it back on. These days I’ve gotten so good at quickly topping the pie that I don’t have any issues with leaving it on, although I suppose if you wanted to take your time this would be the best method. Glad you’re enjoying our tour of the New Mexico SPs. We have at least one more on our list for the year.
We love to grill pizza! I am so impressed with how wonderful your crust looks on the grill. The recipe we have been using for our dough looks much looser and we usually have issues getting it on the grill. I will try your recipe for the next time. We usually cook the first side, then remove from grill, back on to the board, to load up the toppings then put them back on the grill. This seems to help us not burn the bottom.
After trying several different dough recipes I realized that a stiffer dough would be much easier to work with on the grill. I have tried the cook one side, remove & top, and then cook the second side method and it does work well. Sometimes I just to lazy to take that extra step :)
Yummy! We tried your pizza dough recipe tonight. It is much firmer than our other recipe and held together very well when placed on the grill. A yummy success! Thanks!
Yay! So glad it worked out for you. There’s nothing better than a grilled pizza success :)