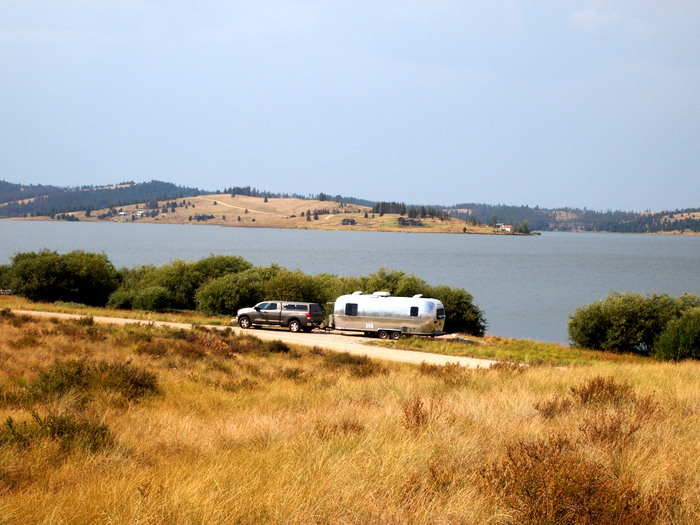
In our opinion, the best campgrounds are the ones deep in the wilderness, far from power lines and civilization. Amanda literally spends hours scouring the internet; seeking out cheap and awesome campsites. She does an amazing job, finding us lakefront sites from Michigan to Montana, river views from NY to Oregon and wide open desert vistas deep in the southwest. Since we call these campsites home for a few days, and sometimes even a week or longer, we want all the comforts of home. For us this includes a generous supply of electricity to power lights, laptops, tv, etc… Our Airstream batteries will work great for a day and maybe even two, but sooner or later we need to break camp and go in search of a power pole, or generate some electricity of our own.
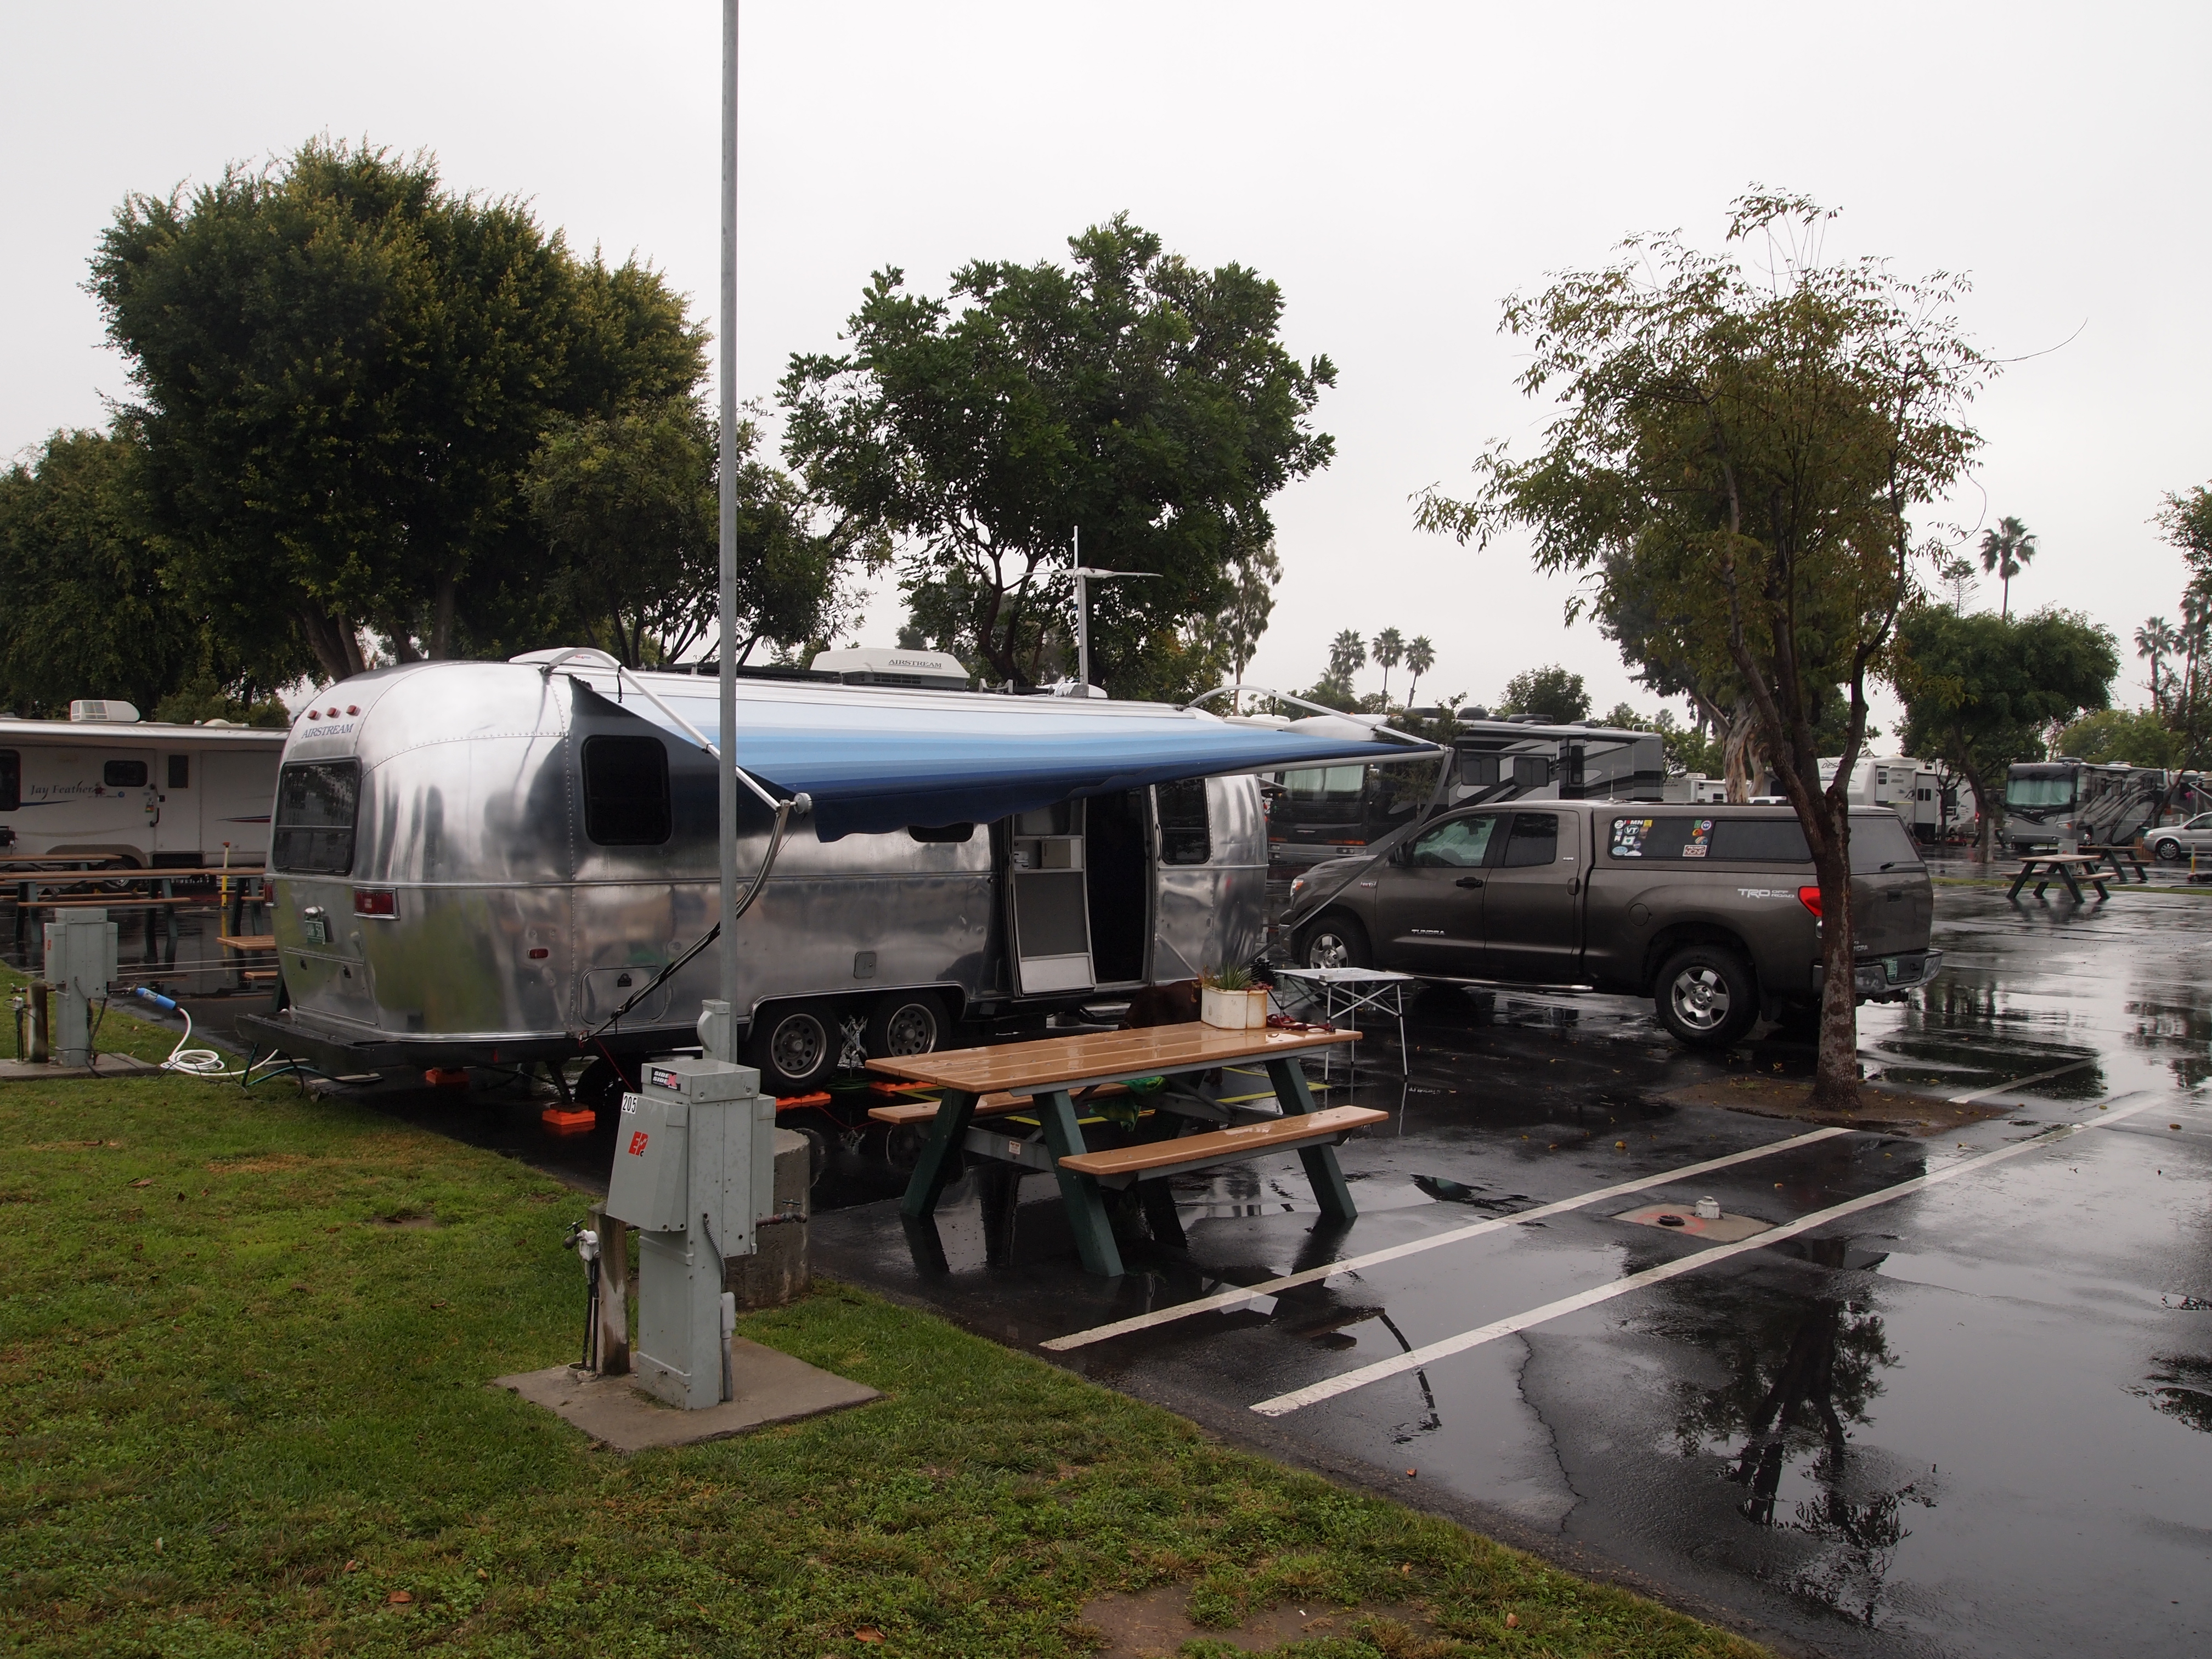
Recharging batteries can be done in 3 different methods. The first is obviously finding a campsite where we can plug into “shore power”. These campgrounds, with some exceptions, tend to be pricier and not of the atmosphere we seek.
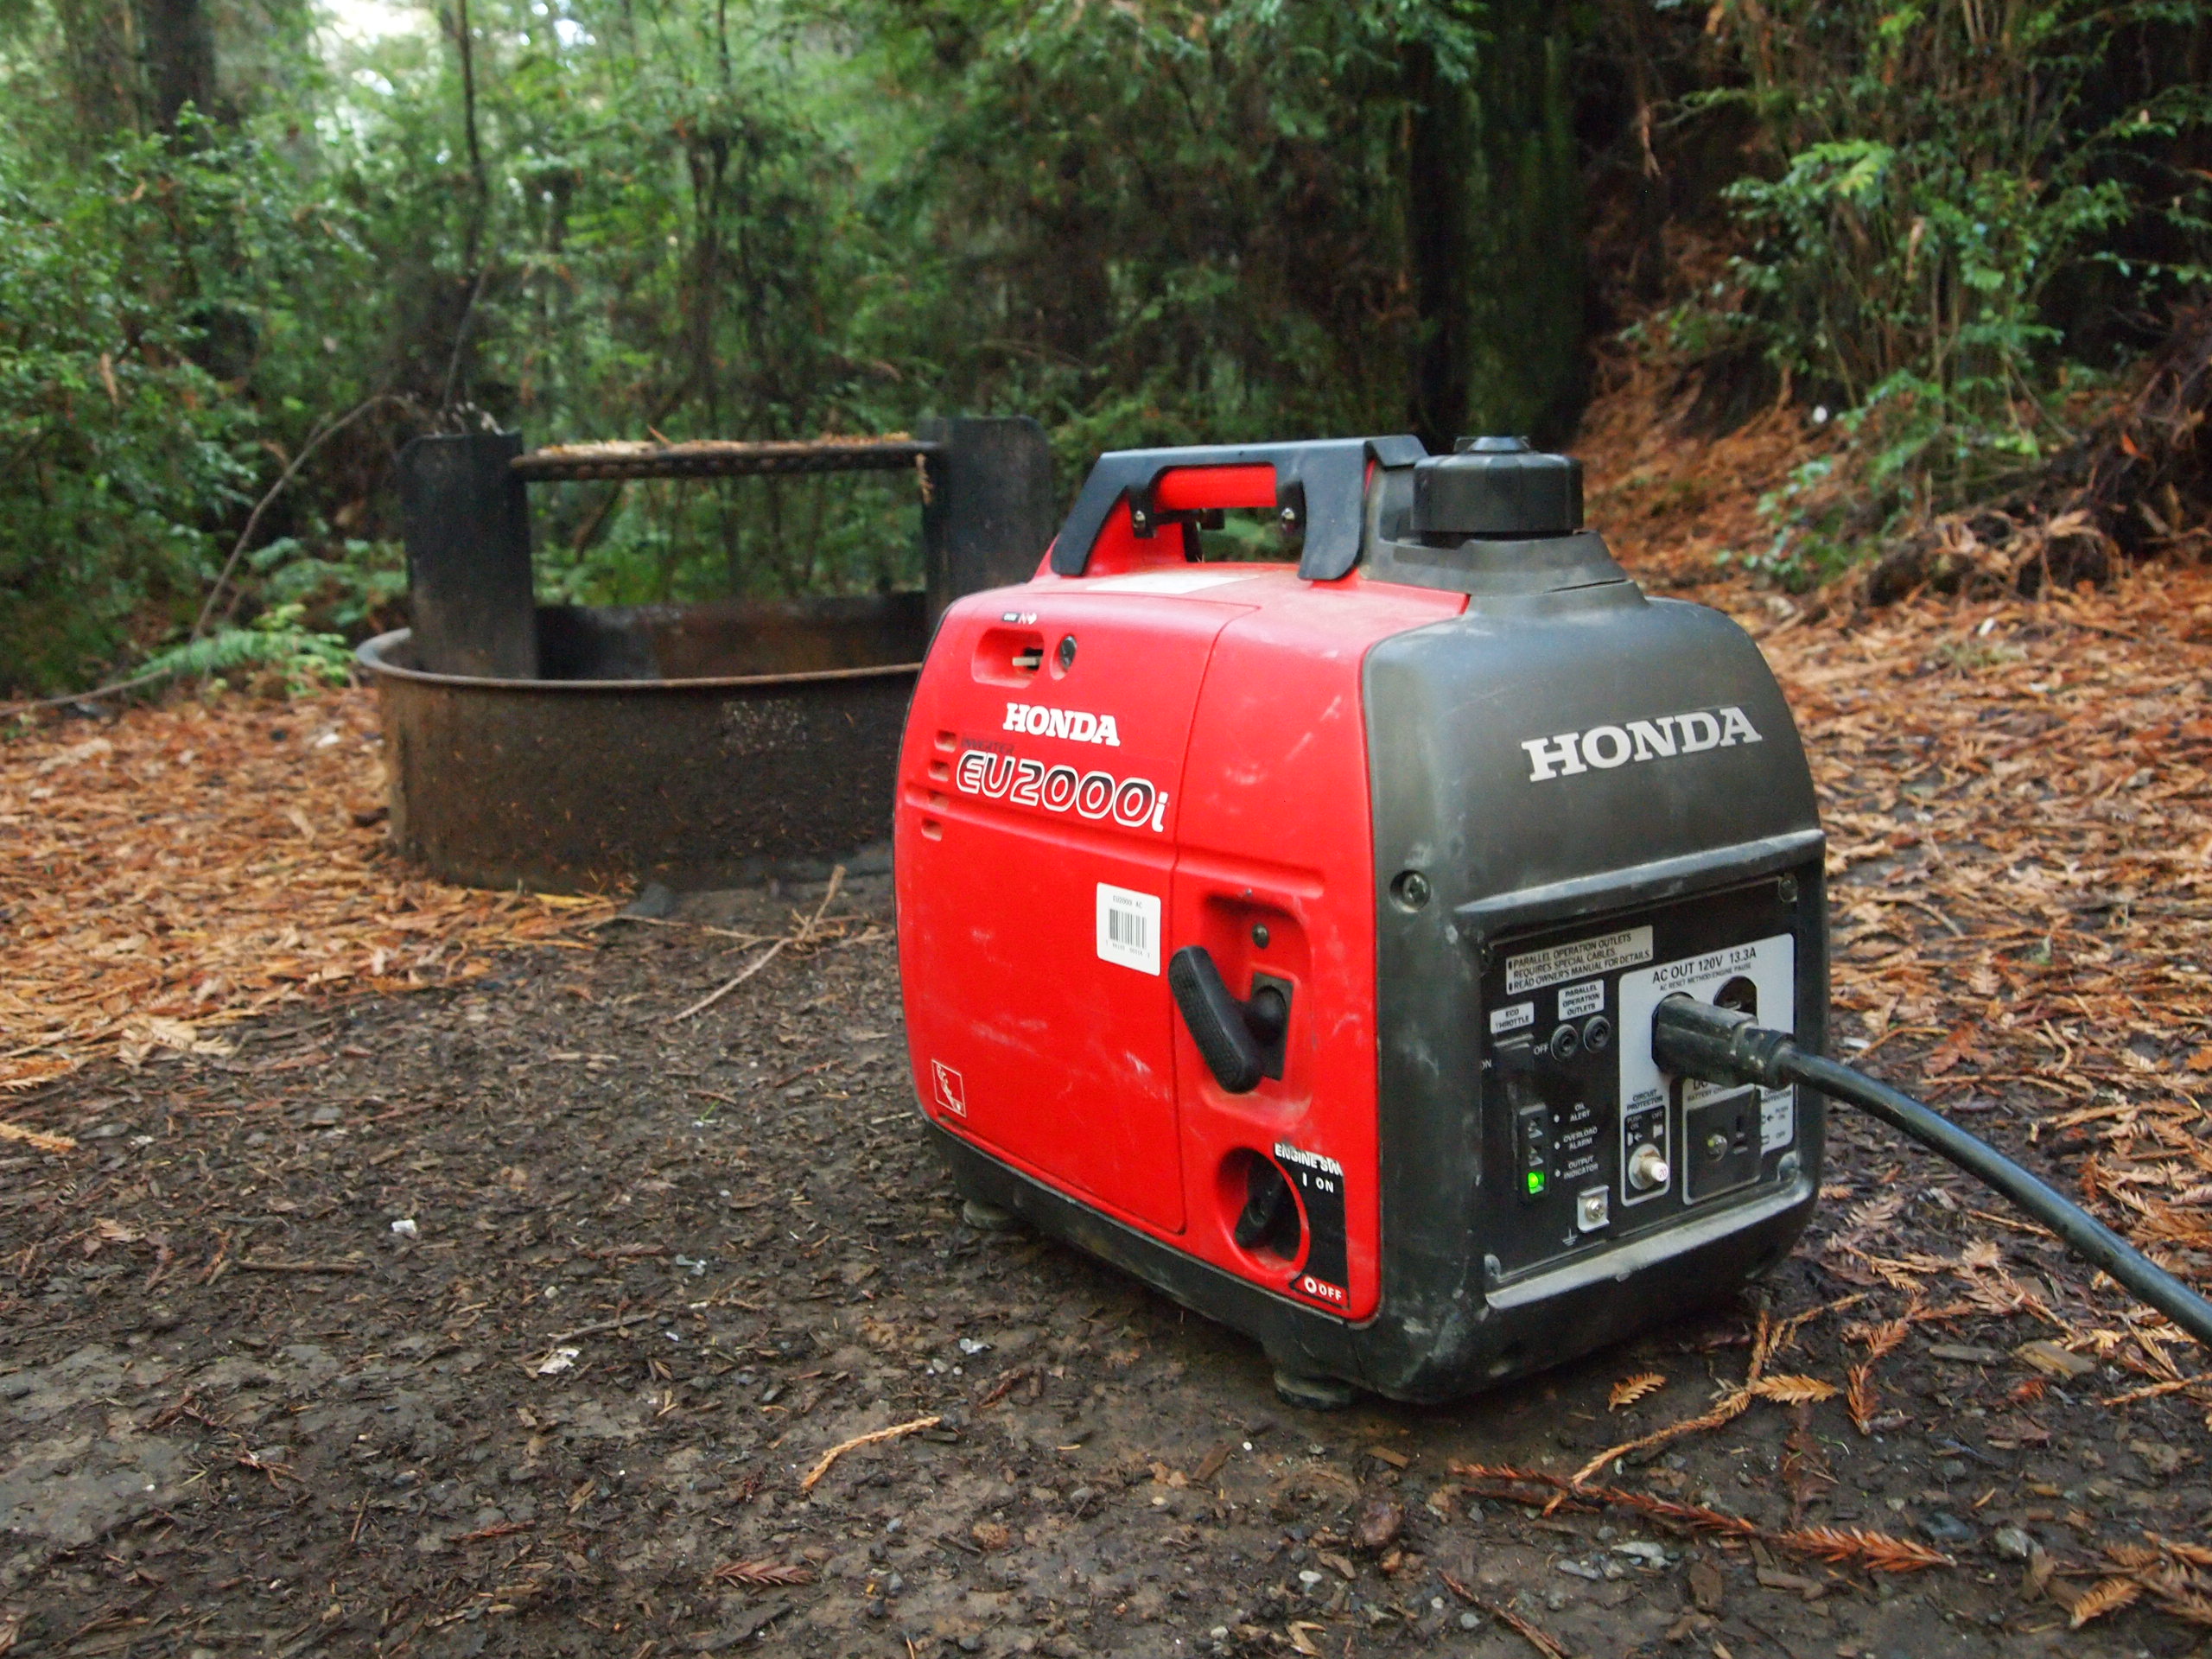
The next is by using an internal combustion generator. This is the method we have used throughout the summer and fall. While it only takes 2 hours to charge our batteries, it is disruptive and inconvenient. Airstreams do not have built in generators, so we keep a portable one in the truck bed. Using the generator requires us to unlock it, gas it up and tote it to the back of the airstream. (It weighs ~50 pounds). And it is noisy. As far as generators go, it is on the quiet end, but it is still a gas engine and this means while us and others around us are trying to enjoy the wilderness, we end up disturbing the peace for 2 hours a day.
Solar Panels are the third option. When you look it, solar has a lot going for it. The energy is green, they just work (there is no setup or teardown), and they create no noise. They even charge the batteries as you drive down the road or sit in a grocery store parking lot. There are a few downsides to solar. An obvious one is on rainy days or a at shady campsite. Another big downside is cost. After running the numbers, you will find solar is in no way cost efficient. Everyone we talked to said the luxury and convenience was well worth it though.
Our plan was always to install solar, though we decided it would be best to wait until we hit the west coast in fall. A quick departure from Vermont combined with a huge to do list and the fact that all the RV solar specialist are out west made it an easy choice. It allowed us to get a few months under our belt to figure out the Airstream and this lifestyle. All the research we did pointed us towards AM Solar out of Eugene Oregon. Add us to the big list that highly recommends them. After running a bunch of numbers, we choose to go with their SunRunner Signature 28/8/6 kit with 2 100watt GS100 panels. Initially we were going to have them install the system, but after learning that their kits contained everything we needed and they sent a pdf of the wiring set-up, we decided to tackle the install ourselves. We picked up everyhting directly from AM Solar in Eugene, where they had it all laid out, gave me a quick overview of the pieces and sent us on our way with suggestions for a few restaurants and an offer to call them if we had any questions.

All the necessary parts and pieces.
As it turns out, the install was fairly straight forward and we had no complications or issues. AM Solar provides absolutely everything that is needed, so no 5 trips to Home Depot wandering through the isles looking for that one puzzle piece. The wire that connects to the panels from the roof is fished down through the fridge vent and under the credenza. This wire is hooked into the solar controller which is installed in the credenza on the bottom shelf. From the controller runs another wire that leads to the battery through a wire chase behind the couch. Also behind the couch is the solar cutoff switch and the shunt (The shunt allows us to monitor how many amps are going in/out of the battery.. or in simpler terms, how much power we are currently using or storing). A mounting box for the monitor panel was obtained and attached to the outside wall near the TV. Its wires are neatly tucked into the wall seam for a clean look with no extra holes needed.

Solar Controller
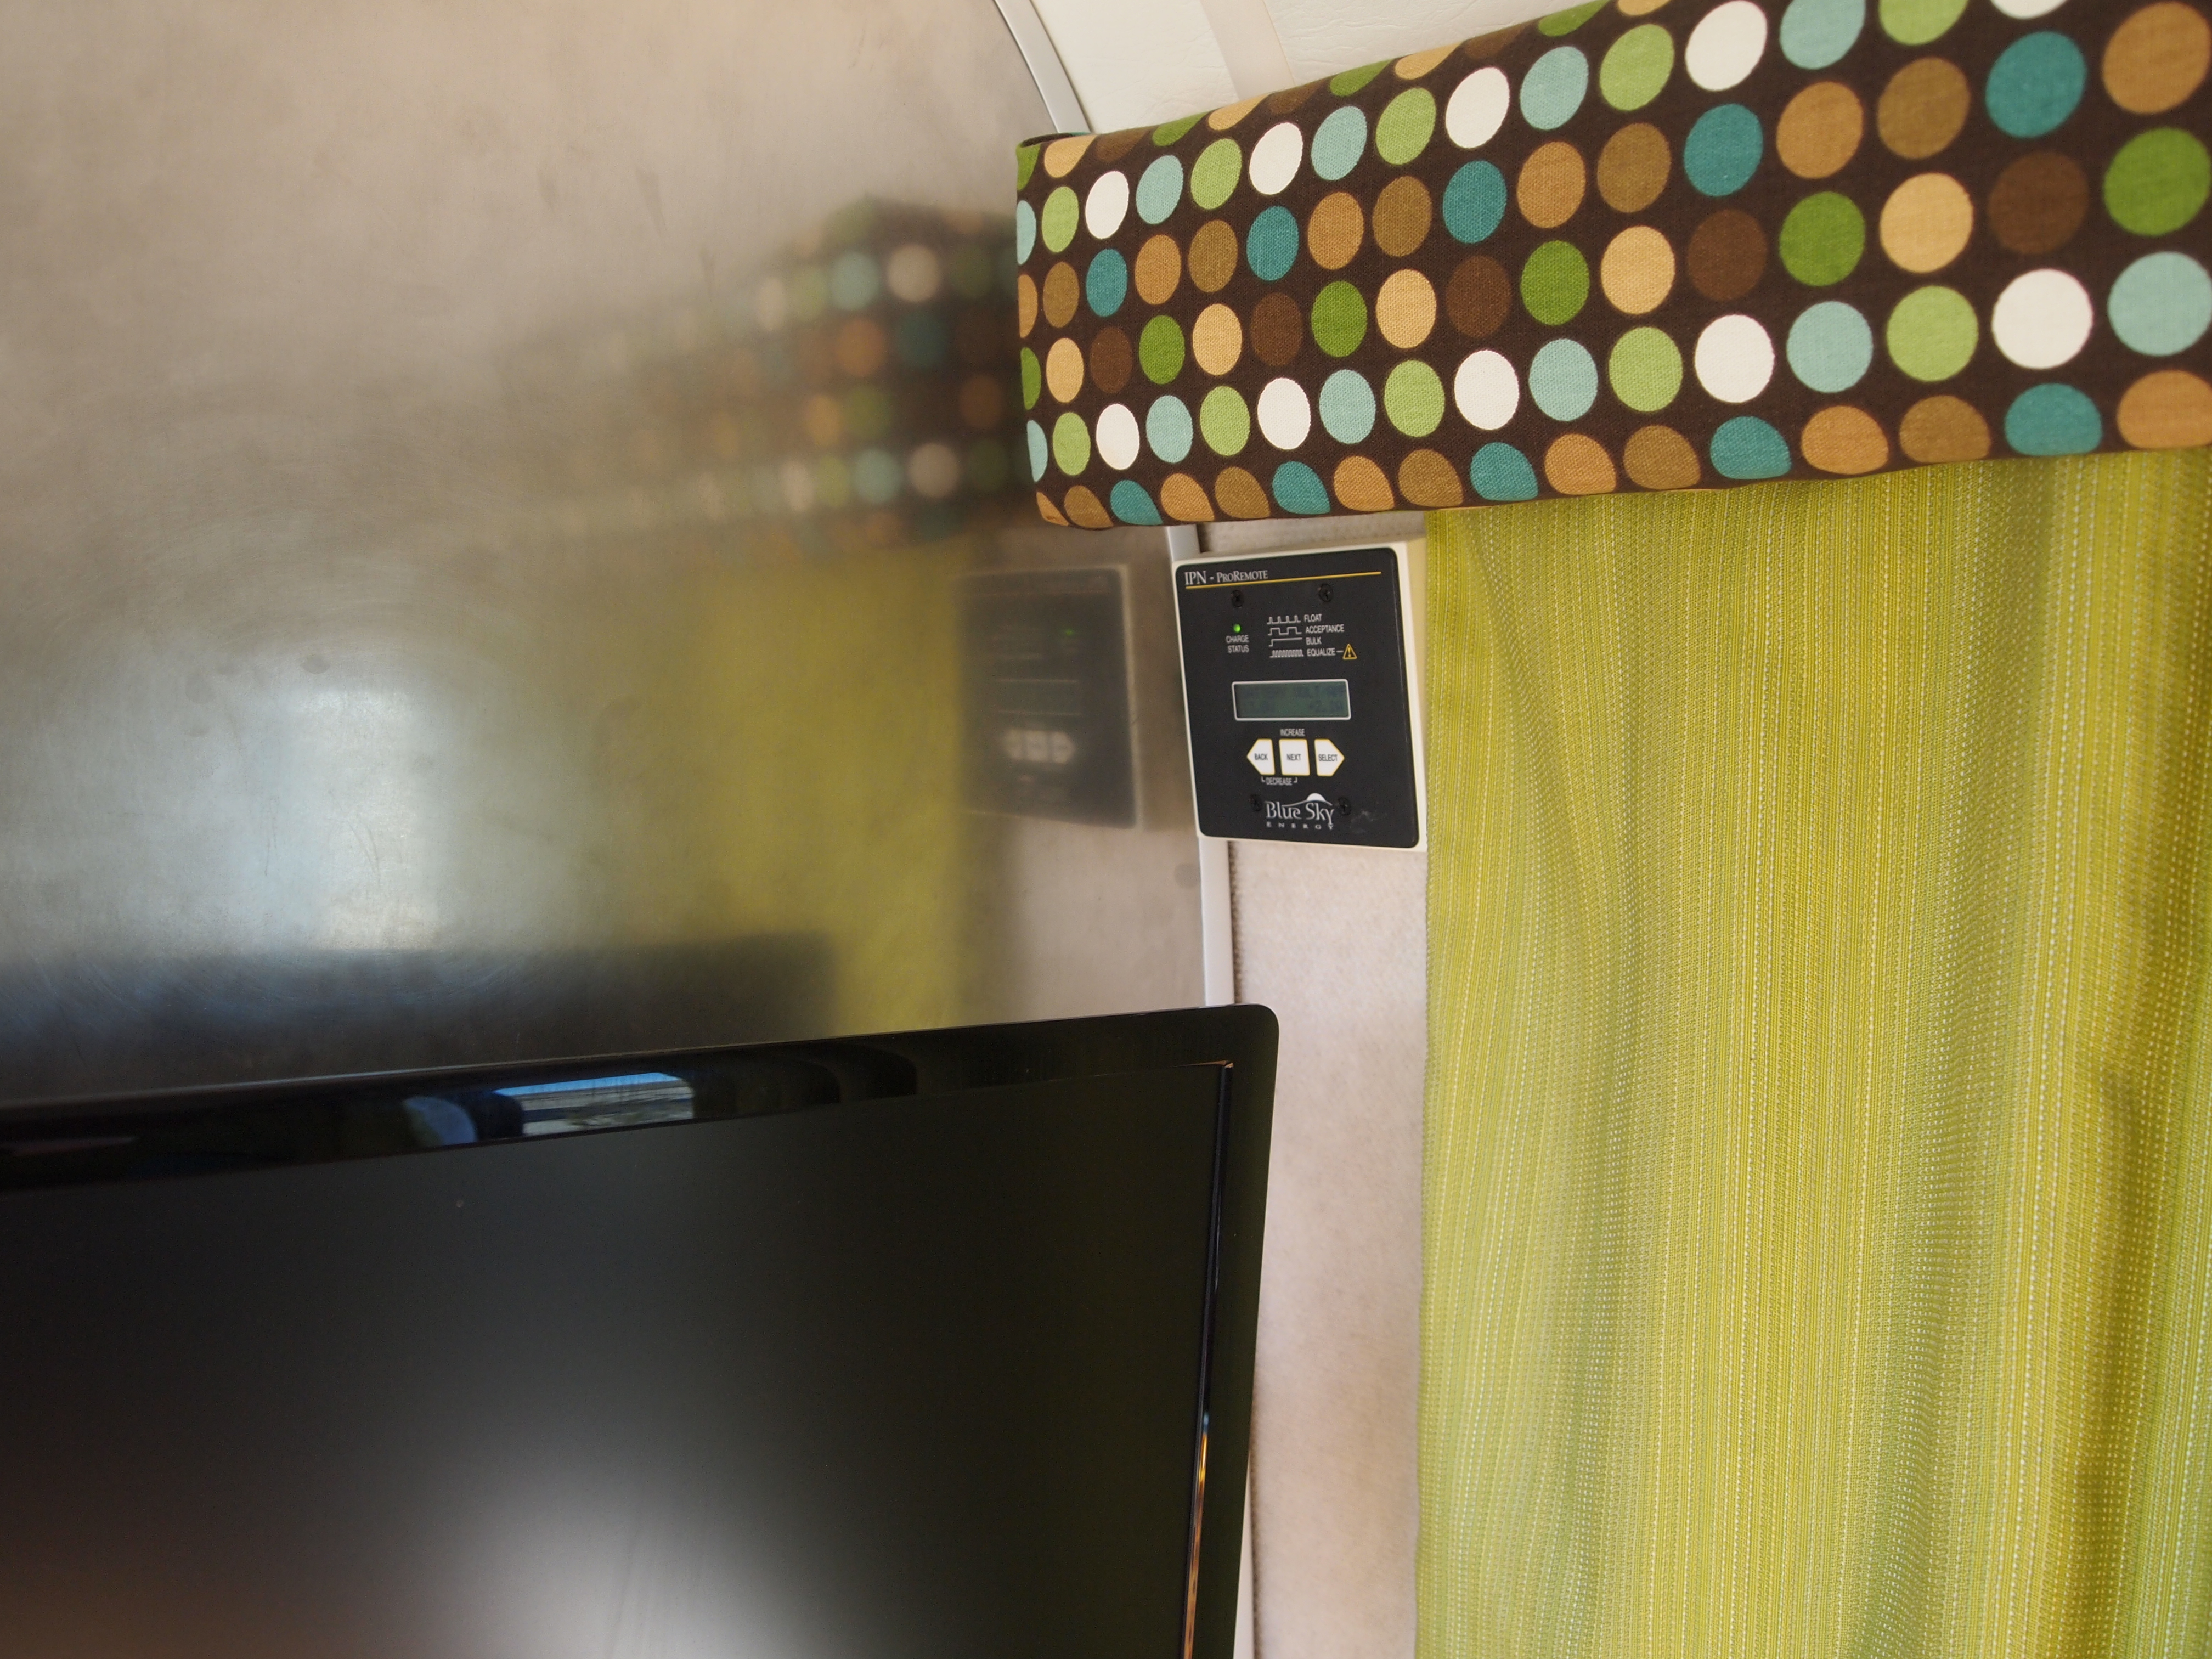
Monitor Panel
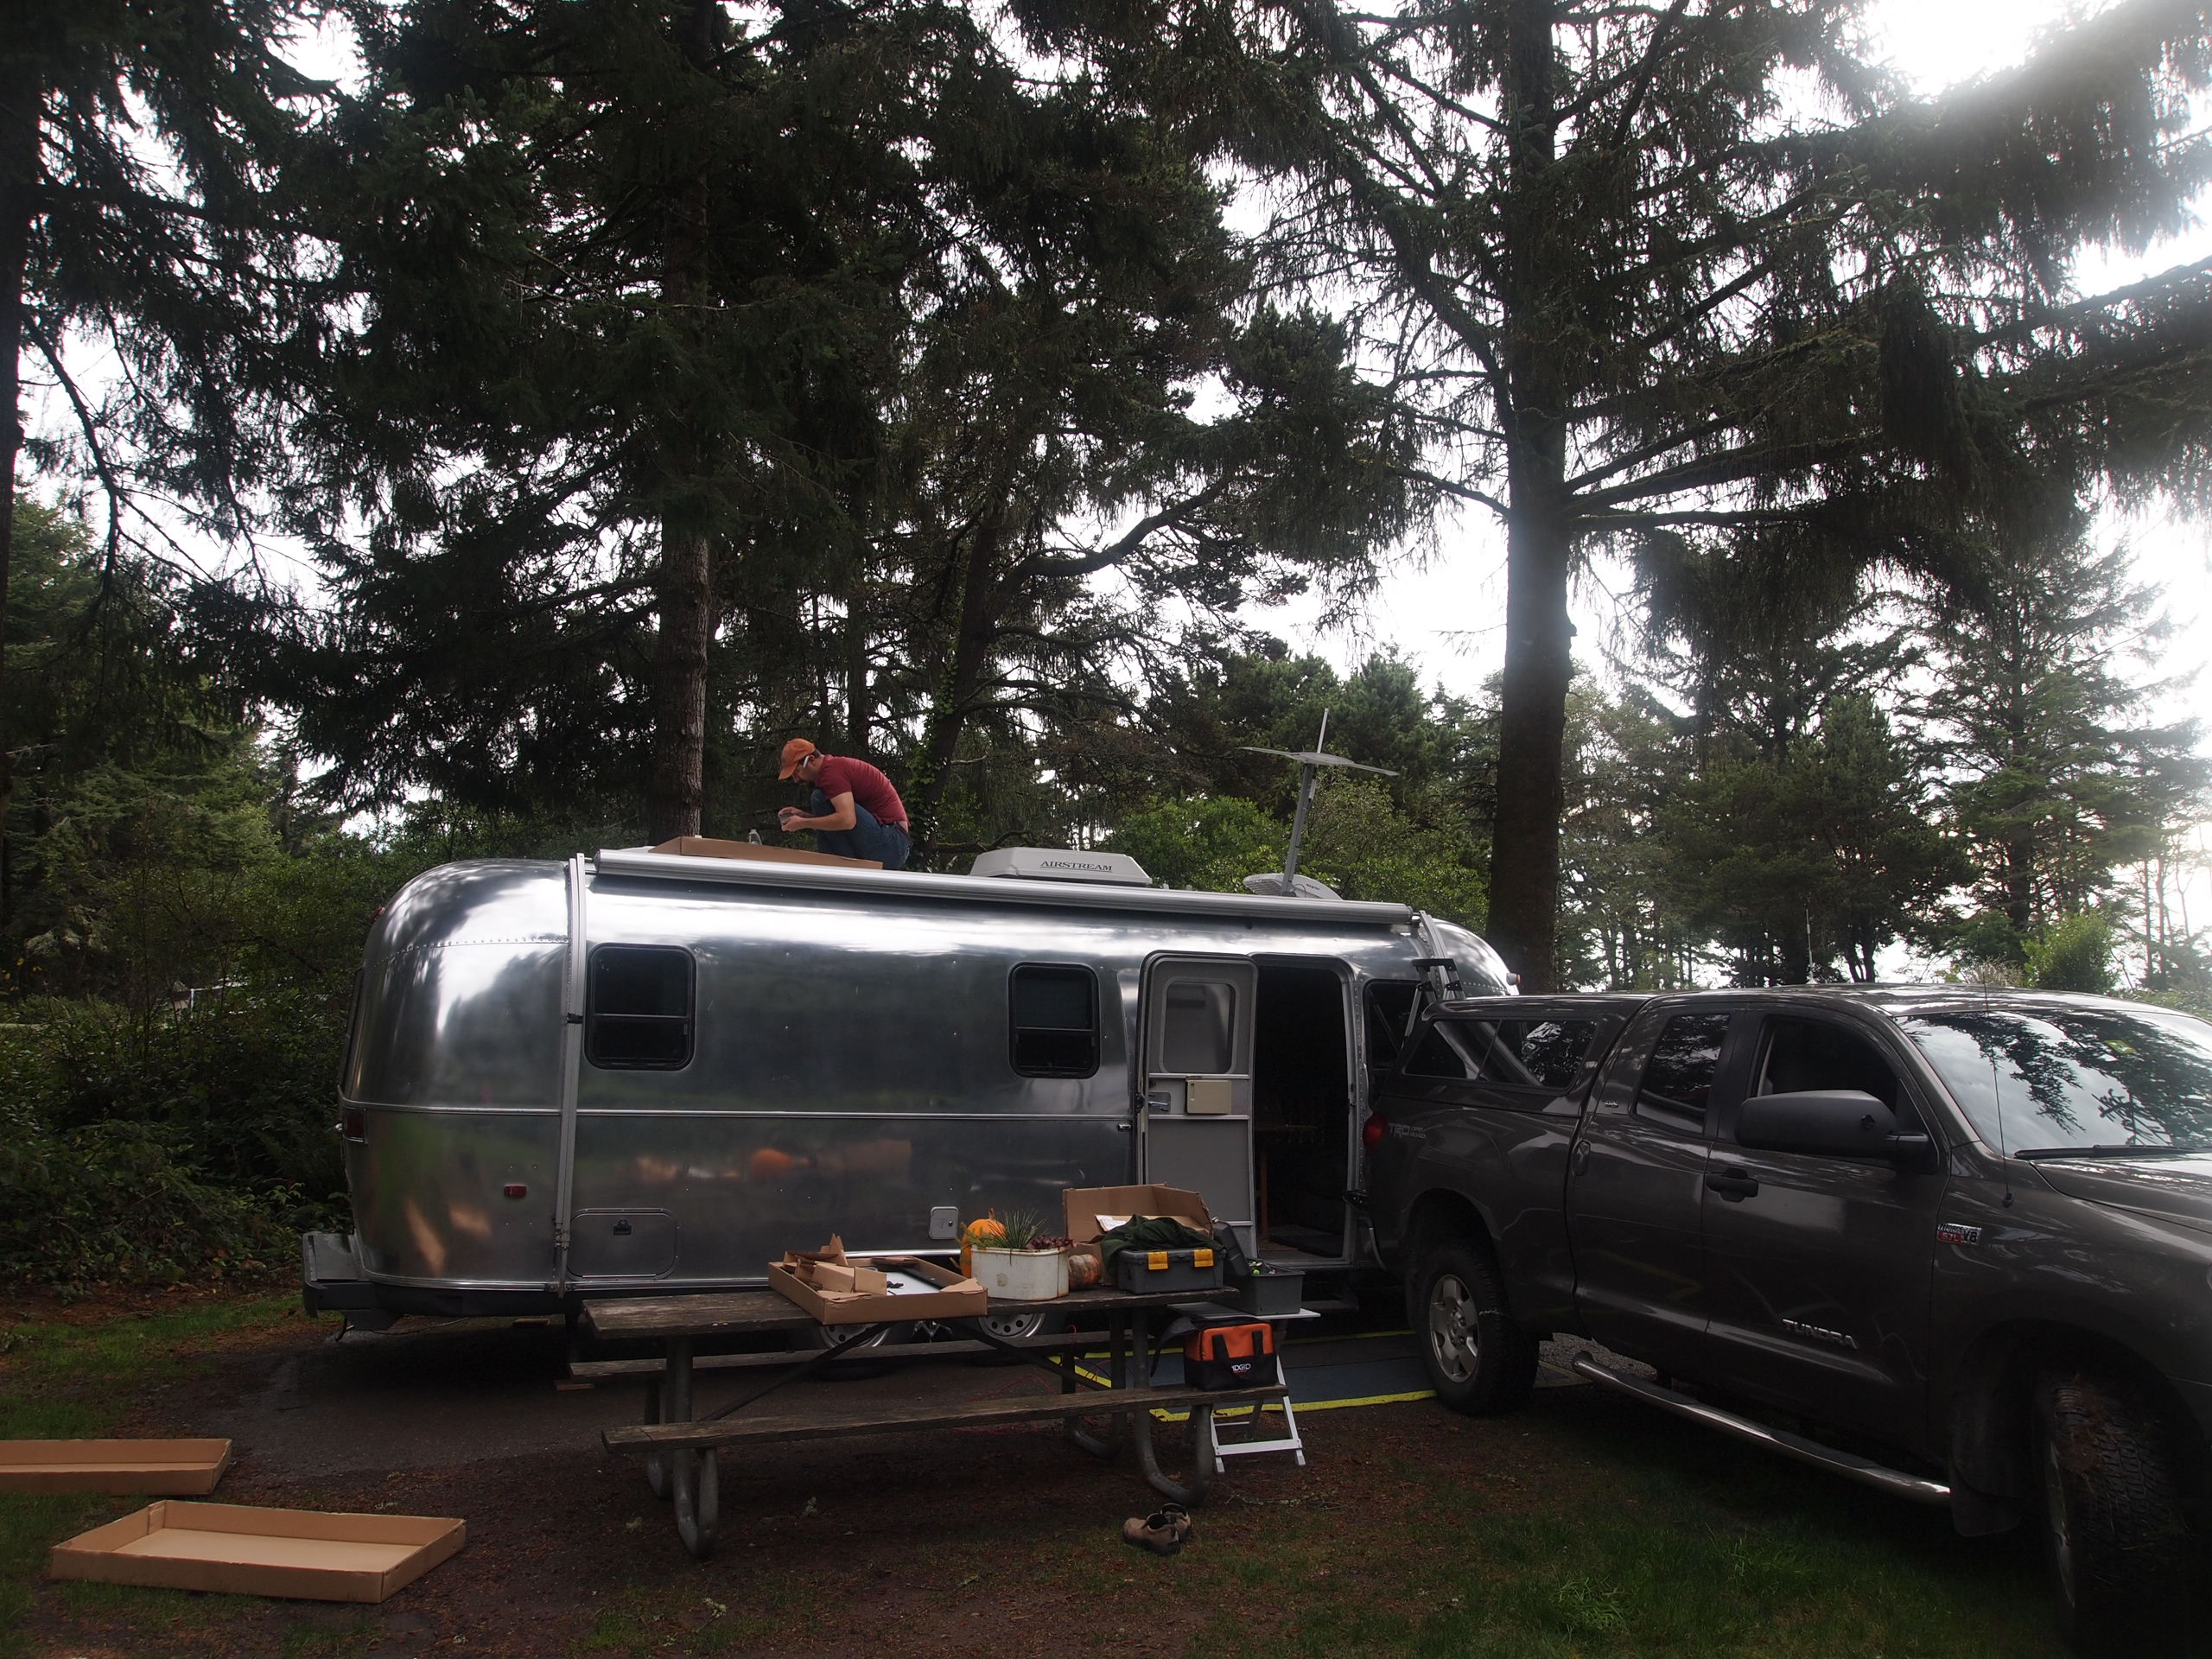
When it came time to install the panels on the roof it rained and rained, and rained some more. It was October in Oregon, so it was expected. It took a few weeks till we came upon the combo of a clear day and a campsite we could get on the roof. Not wanting to buy a big ladder that we would have to find a place to store, our solution was a step ladder on the tailgate of the truck. Once all the conditions aligned the actual installing of the panels was really simple. The 4 panel feet are attached to the roof using super high strength 3m double-sided tape. We were skeptical as well, but apparently this stuff really works.

Prepping the solar panels
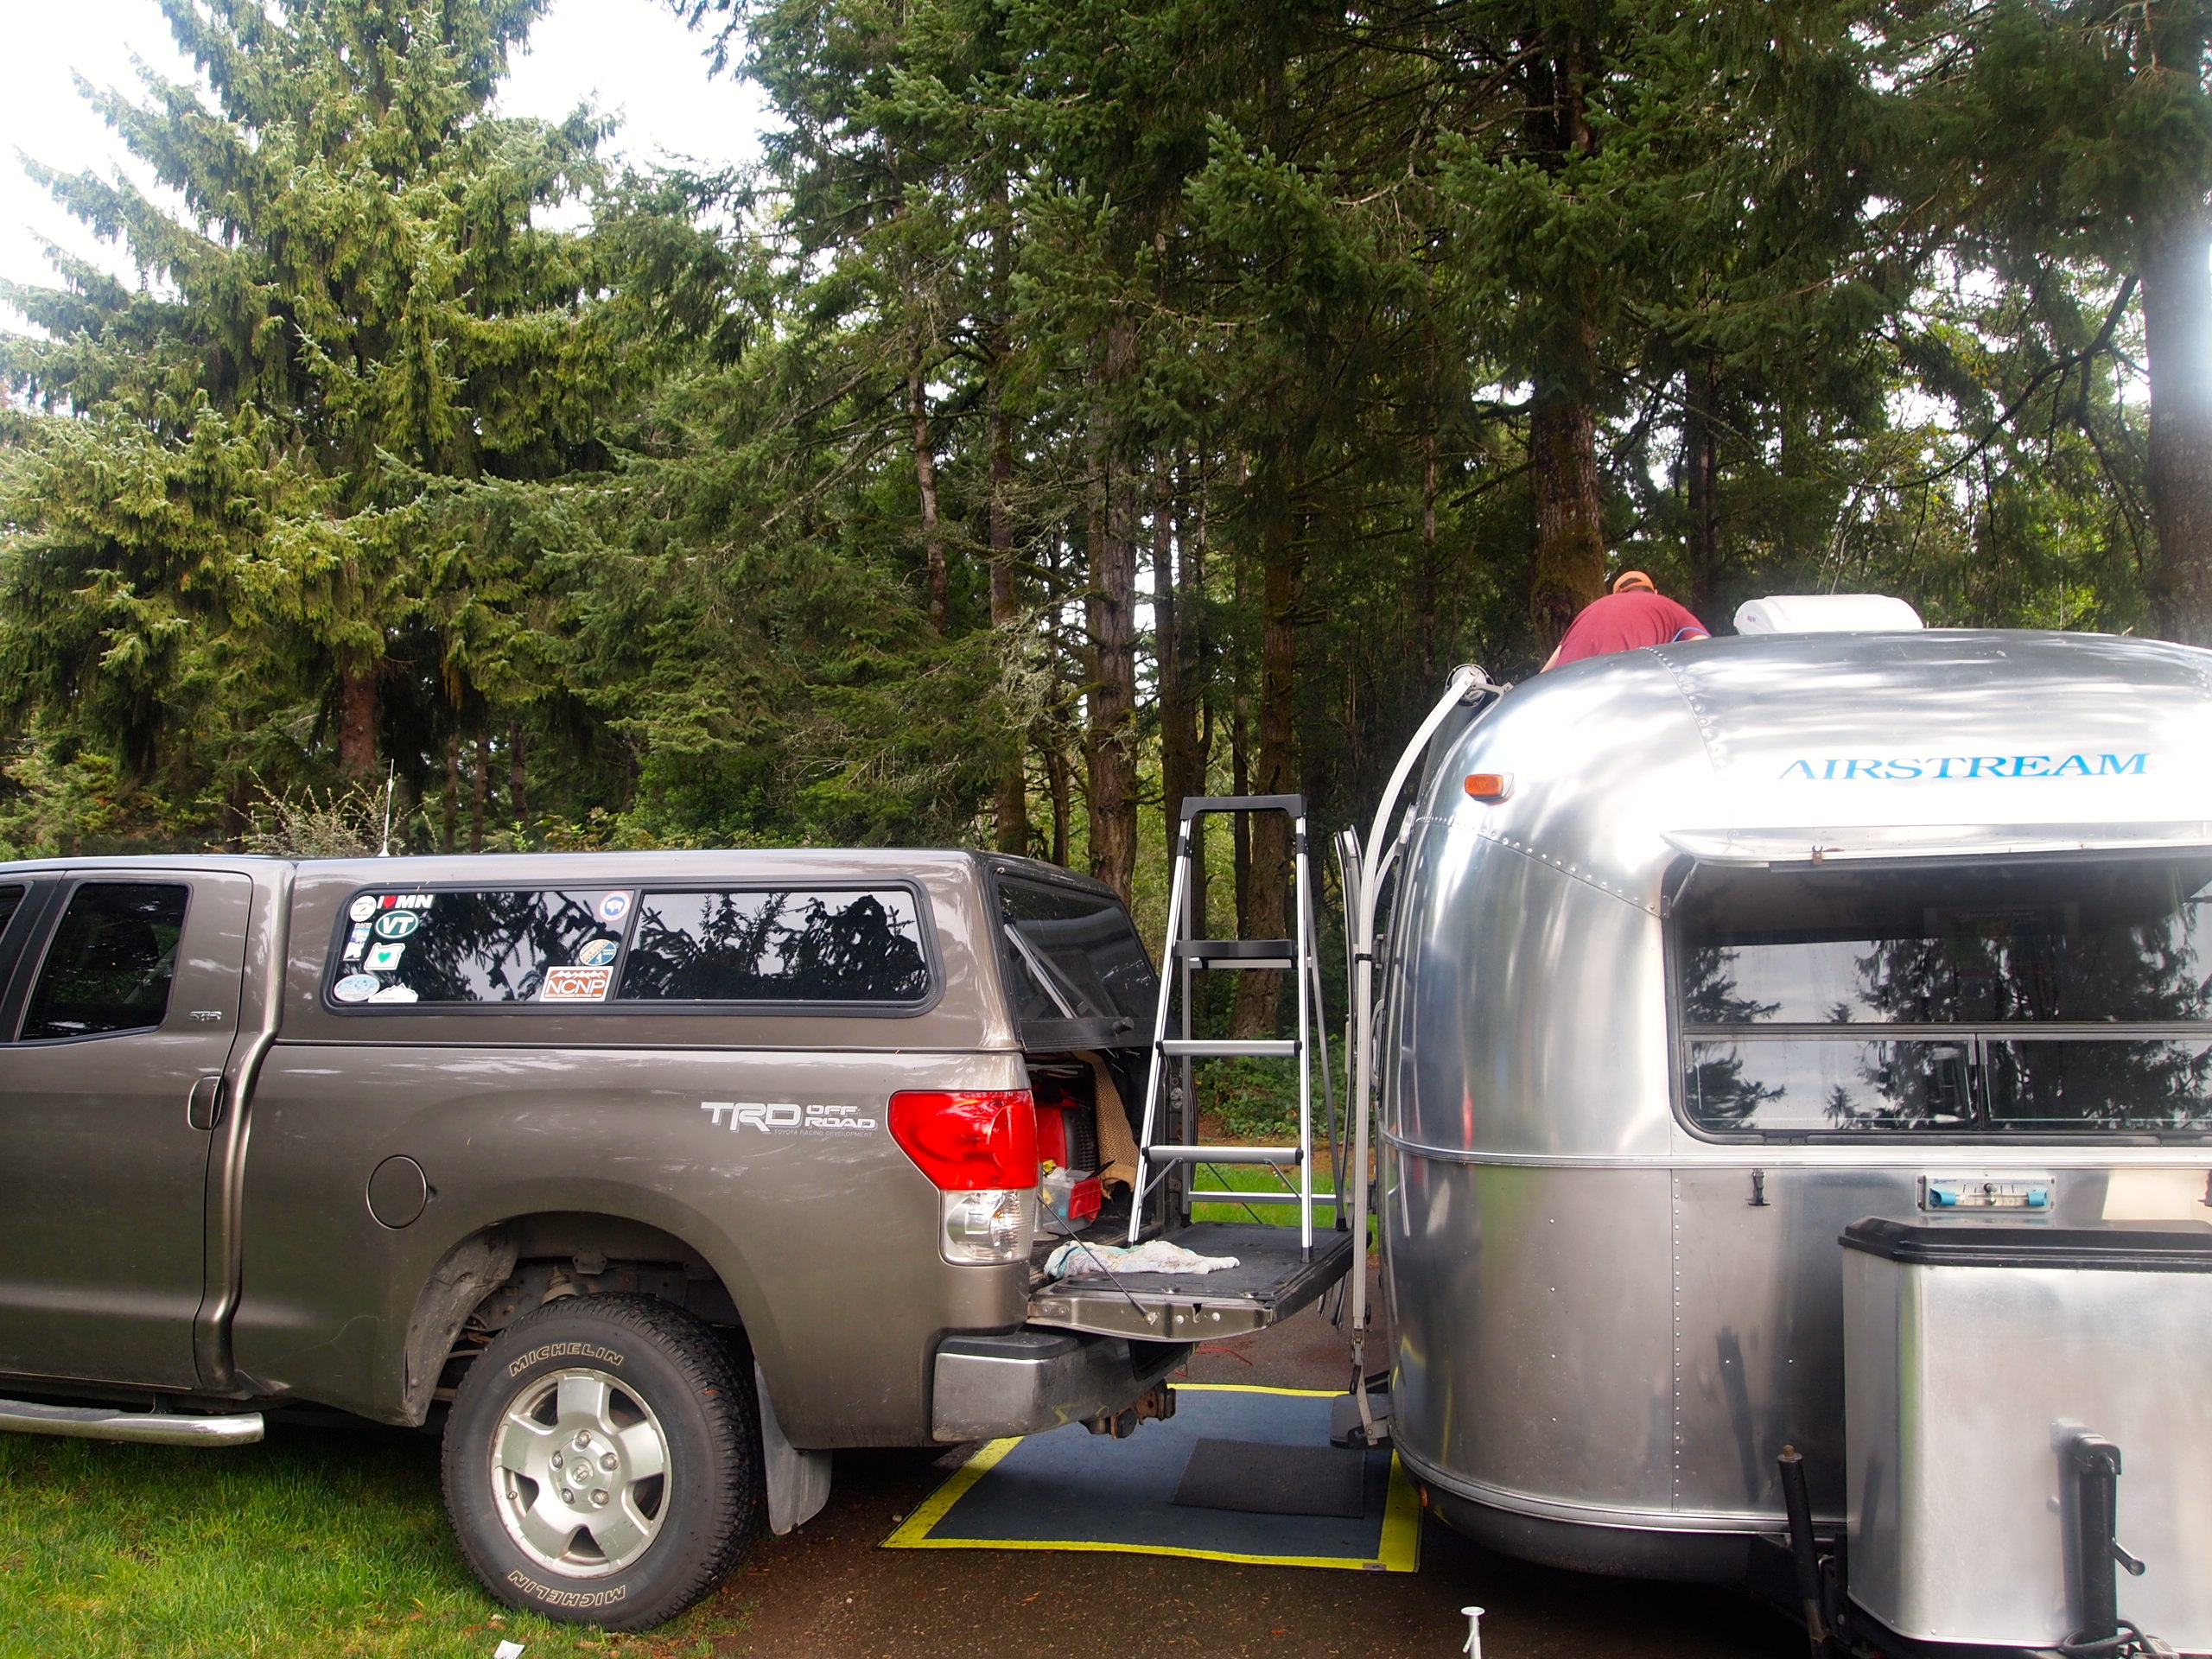
Getting on the roof
On the roof mid install
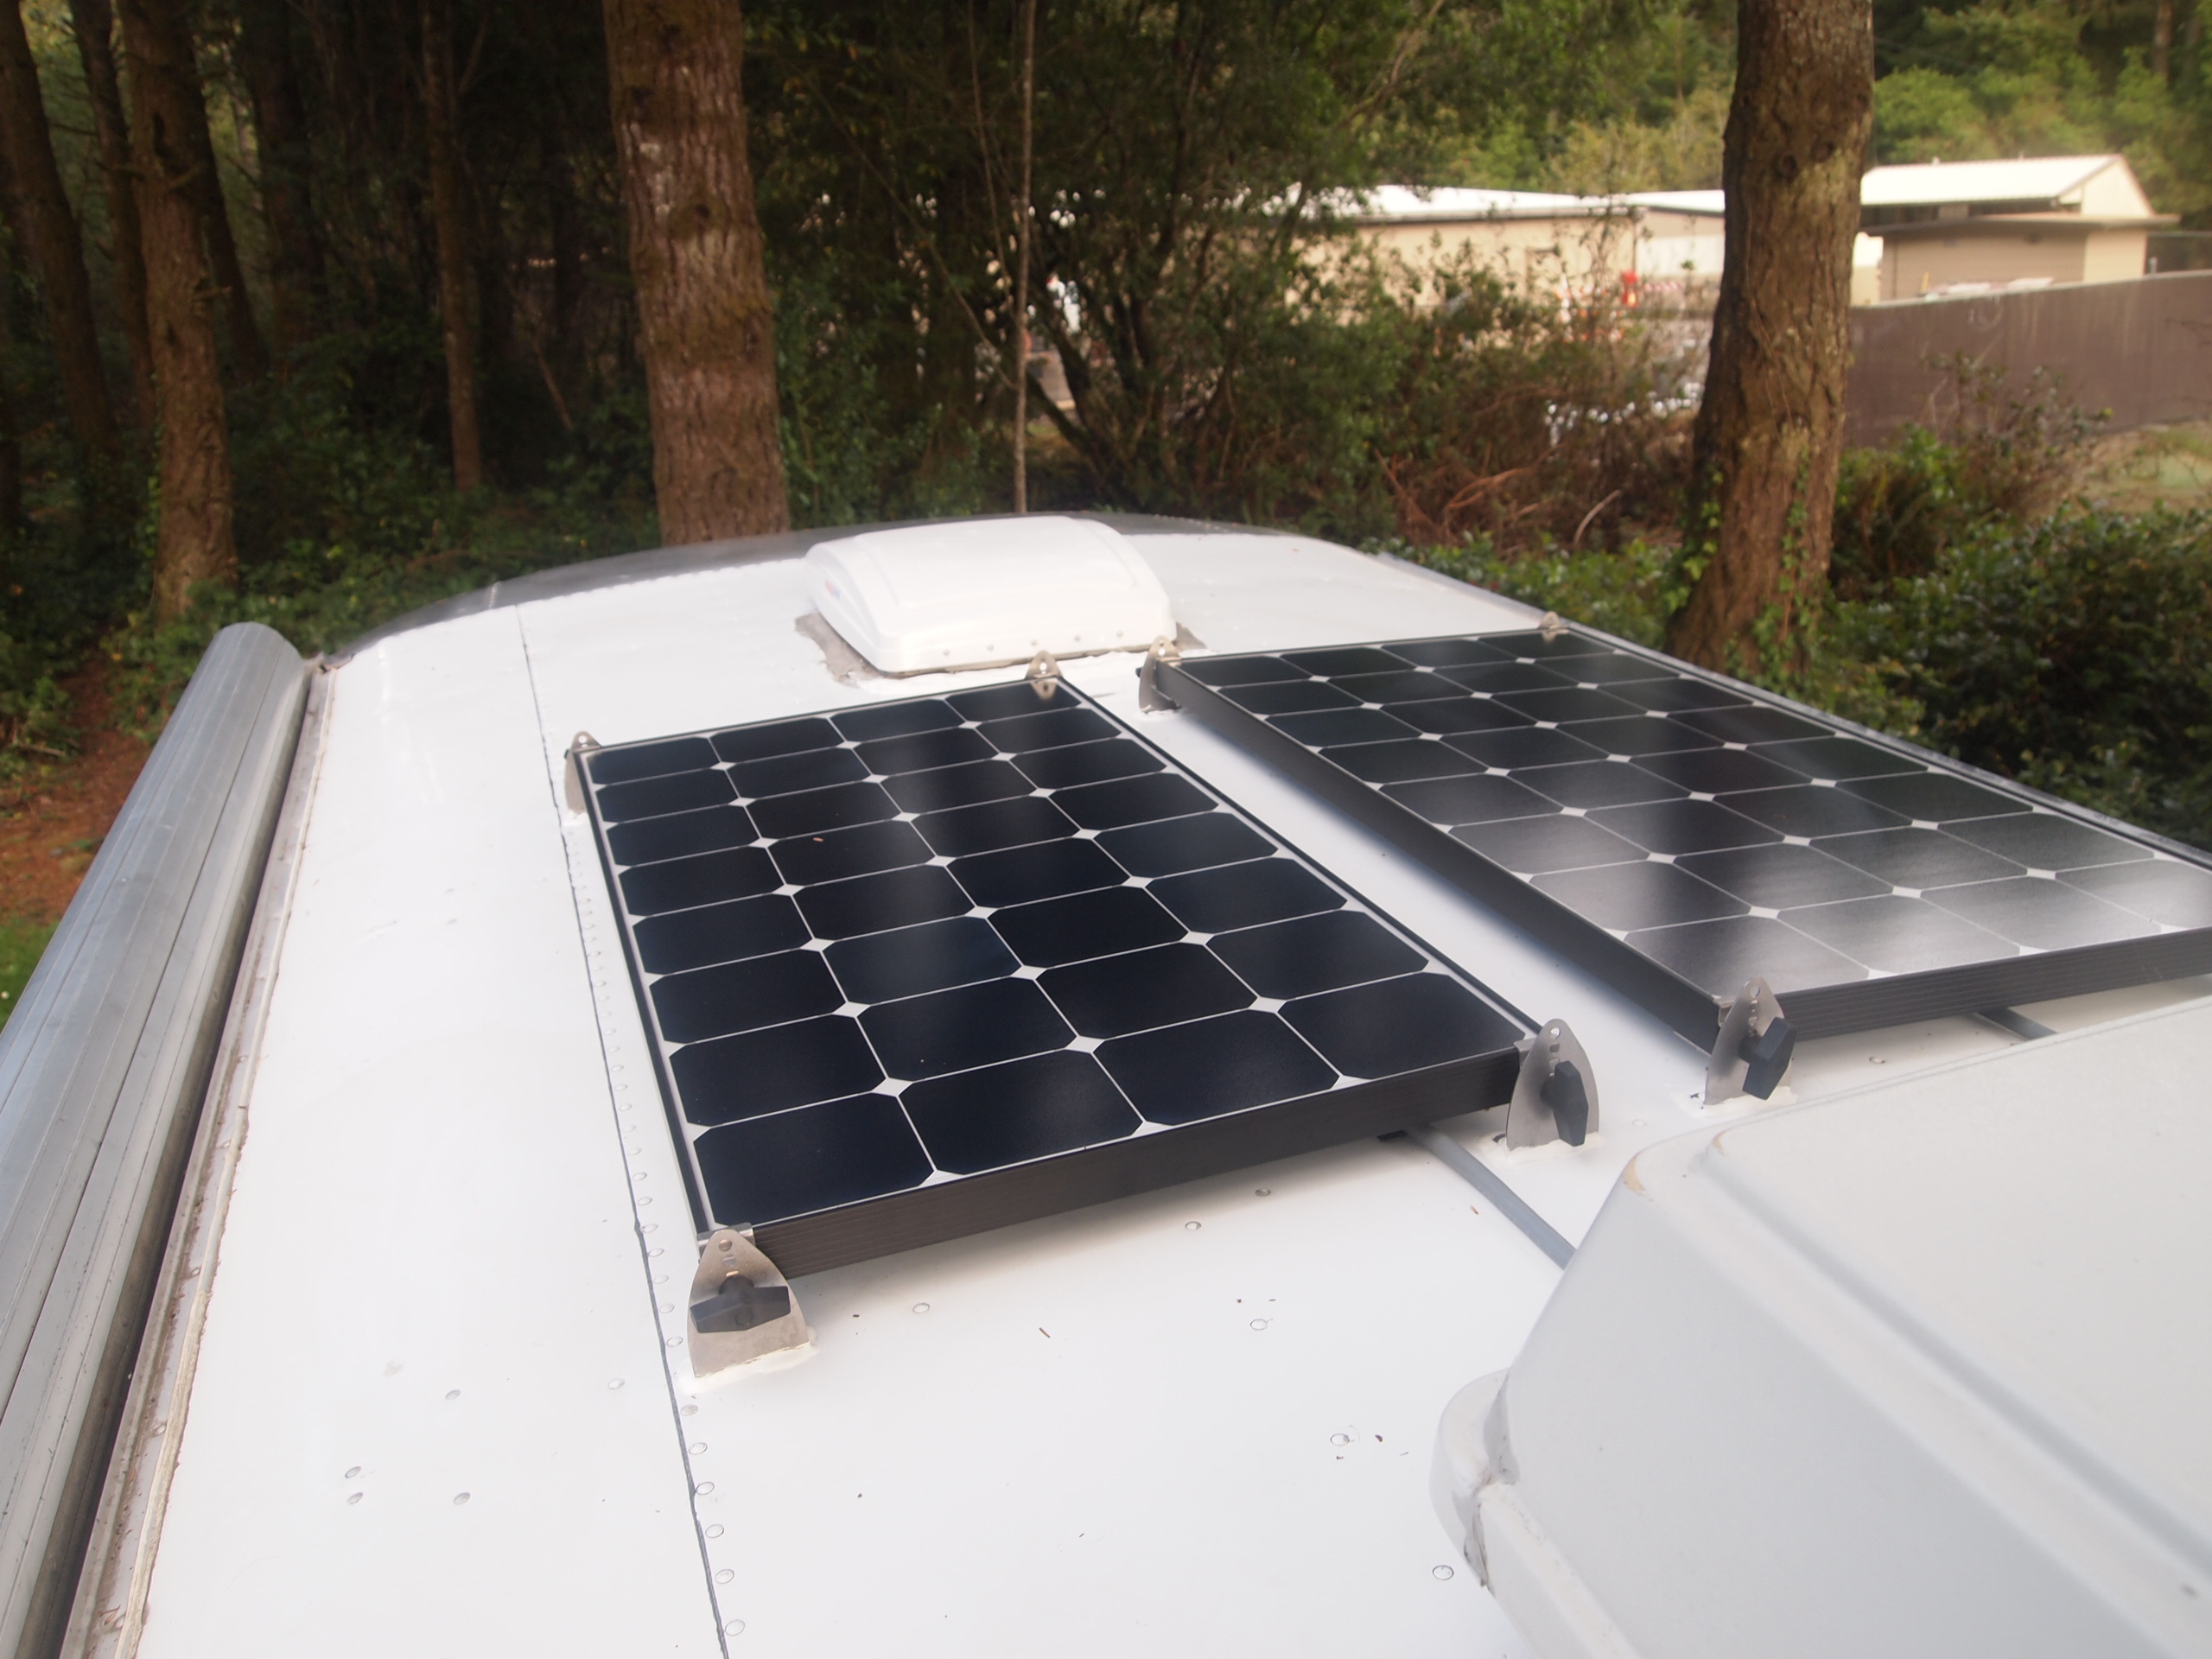
Solar installed
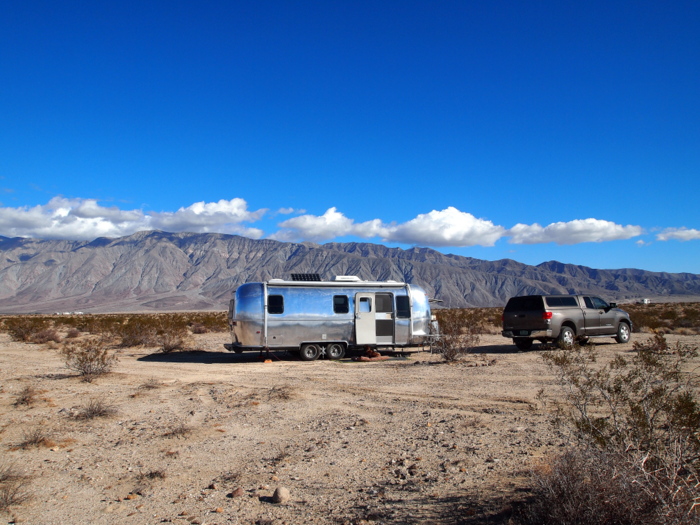
The setup has been working awesome so far and it is relaxing to not have to worry about scheduling in generator time. Our first real test was during a week out at Lake Mead. Things worked out quite well, though we had a cloudy day or two when we did have to pull out the generator.
Soaking up the solar
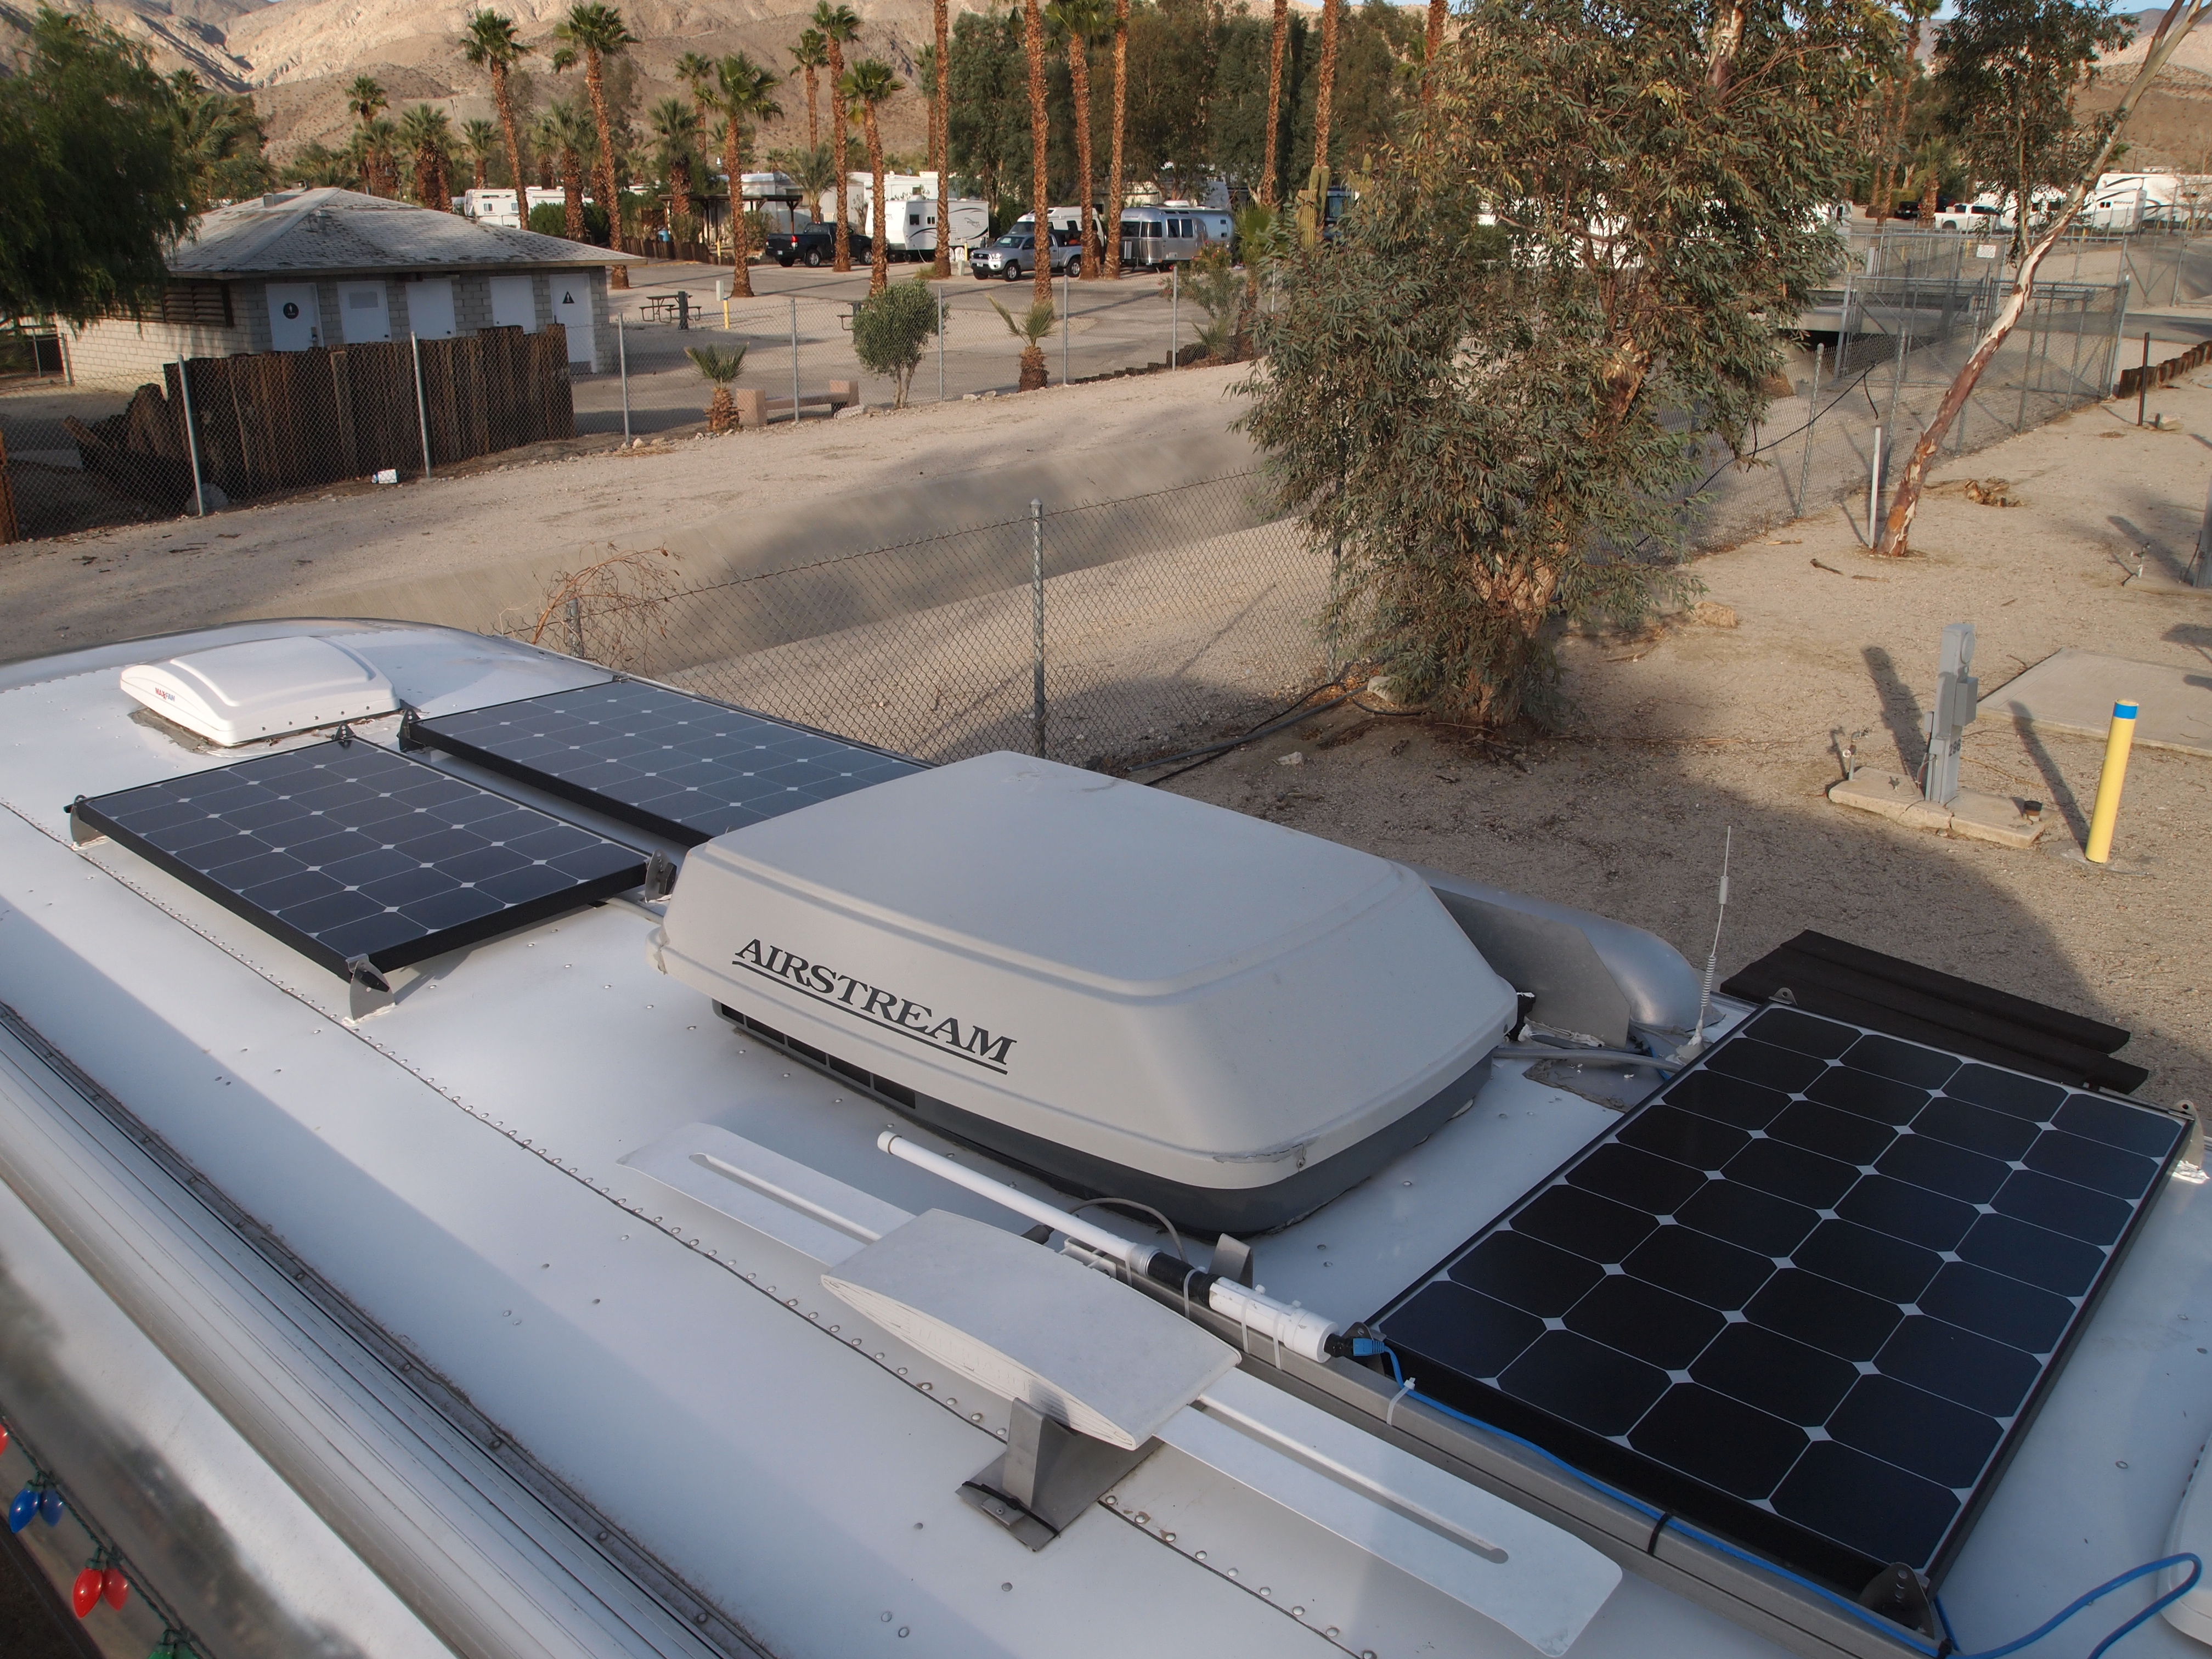
You may have noticed one of the pictures early in the post shows 3 solar panels on our roof. We added the third early in December while in Desert Hot Springs. We always knew 200 watts would probably be the absolute minimum we might need and after a few real world shakedowns, it became clear 300 watts would work out much better. With the winter sun so low in the sky and the need to recharge 2 laptops twice a day, with only 200 watts we were using just a bit more than we took in each day. After a cloudy afternoon yesterday, our 300 watts has charged both our laptops and brought the batteries from 64% to the mid 90s. Perfect.
13 comments
Thanks for the informative post.
Would you mind saying what it would have cost for labor to have AM do the installation. I hope to be out there full-timing by the end of the year and am trying to get a handle on the cost of everything.
I like the blog and have been following you for a little while now.
The cost to have our original two panels installed by AM solar was about $900. Hope this helps- thanks for following along on our adventure!
Great looking install, I’m impressed that you were willing to do it yourself. If you haven’t done so yet you can pick up some aluminum bars at Home Depot and along with some wing nuts and a few bolts build some nice inexpensive tilt bars. They will really boost your output through the winter. Just use the ones AM Solar sells for a guide on proper length. Welcome to the solar world!
It seems like tilt bars are the next step. Right now we are propping one up with a plastic box underneath and have been amazed how much this boosts our input. Thanks for the tip :)
Nice write-up Tim. This past trip in the desert only further reinforces my desire (and quest) to add solar to our rig. _dave
Great solar install. Quick question– You said you used 3M double-sided tape to secure your panels to the roof. Does this mean you did not use any screws at all for this purpose?
The pictures you included looks as though caulk was used on the hold-down flanges. Was the caulk used over the double-sided tape?
Thanks
No screws on the feet. Apparently AM Solar has done it this way for years without problems.
It is 3M VHB Tape. http://www.youtube.com/watch?v=7OtrDvDvF5I
The feet are basically just an L bracket. Once stuck into place, the bottom of the foot is covered in DiCor sealant. I guess this is just so the elements can’t get to the 3m tape.
Amanda
I have a 2001 27′ Safari. I am looking at the same install myself of AM solar products. Nice job on yours. Wondering what you are doing for batteries?
Amazing blog/website, we found stumbling upon your scrubbed classified ad list (which is pretty impressive to Pam who works in IT.) We have many RV and a camper for short trips and of course started dreaming of an Airstream someday. Happy to say your list helped us get a realistic picture of the Airstream cost and now we will dive into your site for more info. Glad you went solar, we love it on our house (we live in CA with lots of sun) and you will get the value out of it, should you ever sell your Airstream and enjoy the convenience of creating your own power in the meantime…happy trails – Pam and Tim
Tim and Amanda,
We been full-timing in our Airstream 30′ Flying Cloud for the past 5 months and will be installing solar in the next few months. I’m quite handy and will probably do it myself as you did. I’m thinking of simply going with the same setup you have but am wondering if you have any thoughts on what you might have done different now that you’ve had yours for a while. Any other advice is greatly appreciated.
Thanks, John and Cindy
Hey guys..
You can do it yourself no problem. It really was a breeze.
The only thing I would have done differently would be to position the panels on the roof a little differently. When I installed them I was not thinking about tilting them in the winter. As they are now I can only really tilt one of the three towards the sun in the winter.
Other than that.. we love them.
Good luck
We have been following your great blog for over a year. Thank you for all of the advice, tips, and locations!
We are finishing the AM Solar installation, did you use the existing airstream solar wiring? If not how did you run the 6/2 wiring to the batteries? We are also changing the interstate batteries to 6 volt AGM, any recommendations on brand?
Thanks Again! Hope to meet up with you one of these days!
Rob & Bernadette
Tim,
I was curious how you got your solar wiring into the fridge vent. I’m installing a new tv antenna wire and planned to route it thru the fridge vent. There is apparently a screen over the vent and there’s not much clearance between the opening and the vent cover. My wife and I enjoy following your blog and we have gotten some great ideas for our Airstream. We have a 1999 Safari like yours.
Thanks!!
Norm