What do you do when you have a backyard full of Coconut Palms that produce pounds and pounds of coconuts every year? You eat a lot of coconut of course! While fresh coconut is tasty on everything from oatmeal to ice cream, around these parts my dad is somewhat famous for his fresh coconut baked goods. He makes pies, bread, and the most delicious coconut cake with key lime frosting (possibly the best cake I’ve ever eaten). But the one thing he has never made is fresh coconut milk. Since there are piles of coconuts hanging around the yard, and more falling down every day, I decided to take on the task of turning a few into fresh milk. It was surprisingly easy, and the end result was waaaay better than the stuff you buy in the can.
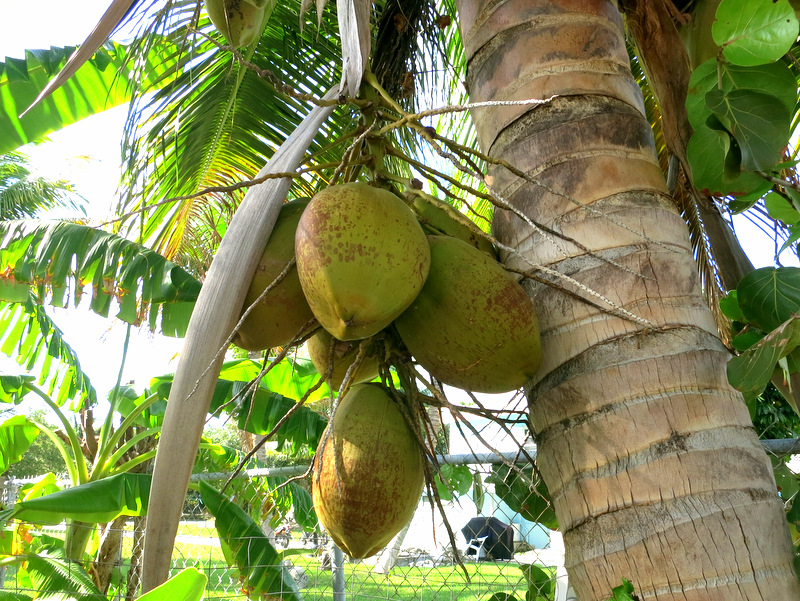
Coconuts!
Homemade Coconut Milk
First, a quick tutorial on the structure of a coconut. This funny looking fruit is comprised of an oblong shaped outer husk that starts out green and turns brown as it ripens. Inside the husk is a hard nut (technically it’s classified as both a nut and a seed). Inside the nut is the coconut water and coconut flesh. This is what we need to make our milk.
Step 1: Open the Coconut
The first step in getting to the good stuff inside the coconut is opening that baby up. There are numerous methods for opening a coconut, some (like using a machete) are more dangerous than others. Over the years my dad has devised a simple method involving two crowbars and a hammer. He sticks the crowbars in the outer husk and pushes them in opposite directions, prying open the coconut and reveling the seed inside.
*If you don’t have access to coconut from a tree, look for the inner brown nut in the produce section of the grocery store. Most major markets carry them these days.
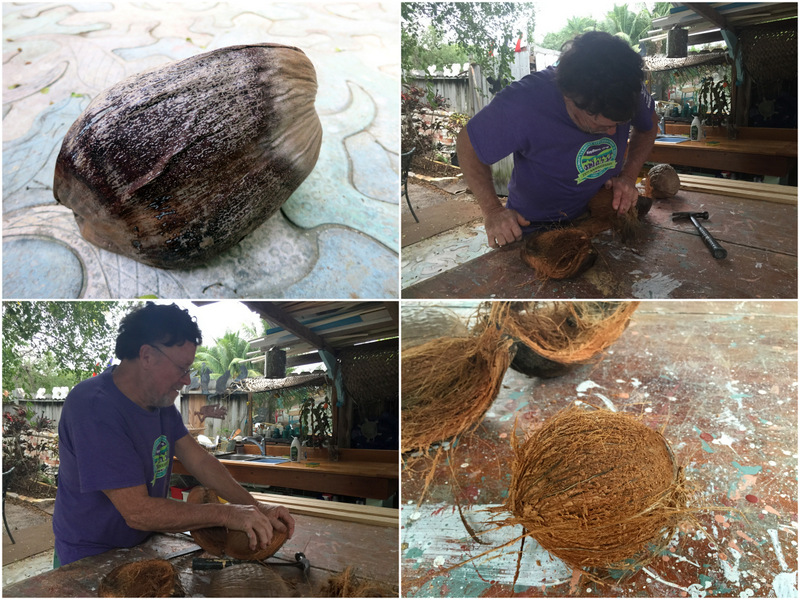
Revealing the hairy looking nut
Step 2: Let the Water Flow
Next, he taps the hard shell of the seed with a hammer until it cracks. Out comes the coconut water. This is the same stuff you buy in the store for $6/bottle.

Fresh coconut water
Step 3: Extract the Flesh
The final step is to separate the flesh from the shell. A few more taps with the hammer splits the coconut into manageable pieces. He then gently persuades the coconut flesh away from the shell with a small paring knife. A second thin layer of shell is easily removed with either a vegetable peeler or a small knife. When all the coconut flesh is free we wash away the remaining bits of shell and shred it into a giant pile.
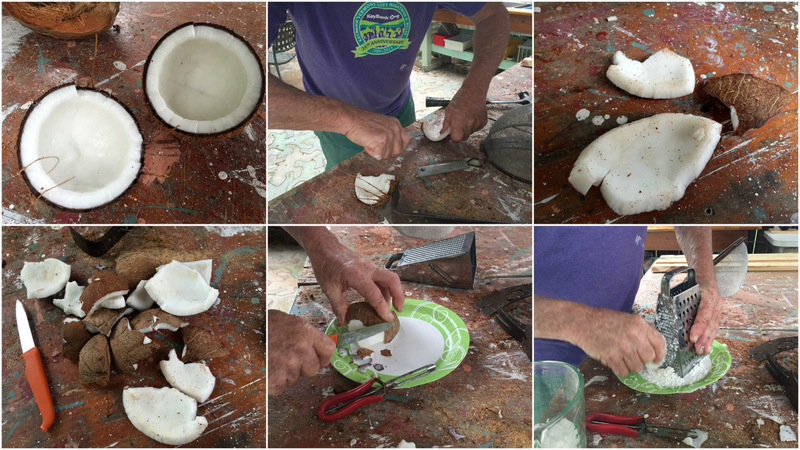
The final step is removing the coconut flesh, or meat, from the shell
Step 4: Gather & Measure
Now that the hard part is done, the making of the milk is actually quite easy. The ratio for coconut milk is 4 parts shredded coconut to 2 parts coconut water and 1 part plain hot water. I only had 2 cups of coconut water, so I combined that with 4 cups shredded coconut, and 1 cup plain hot (but not boiling) water.
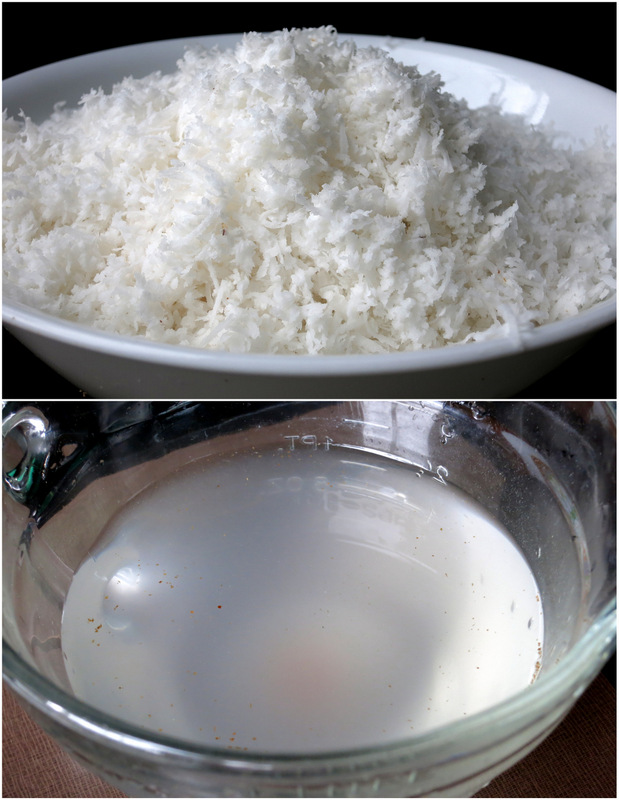
Coconut Flesh + Coconut Water
Step 5: Mix & Squeeze
Combine the three ingredients and blend, blend, blend. I only have an immersion blender, and although I worried that it might not be strong enough to break down the shredded coconut, after only a few minutes the mixture had turned into a mushy puree. Working in batches I poured the mixture into a piece of clean linen (you could use cheesecloth, but I didn’t have any) and squeezed as tight as I could. What came out was a beautiful, silky coconut milk with a pure flavor far superior to the store-bought version.
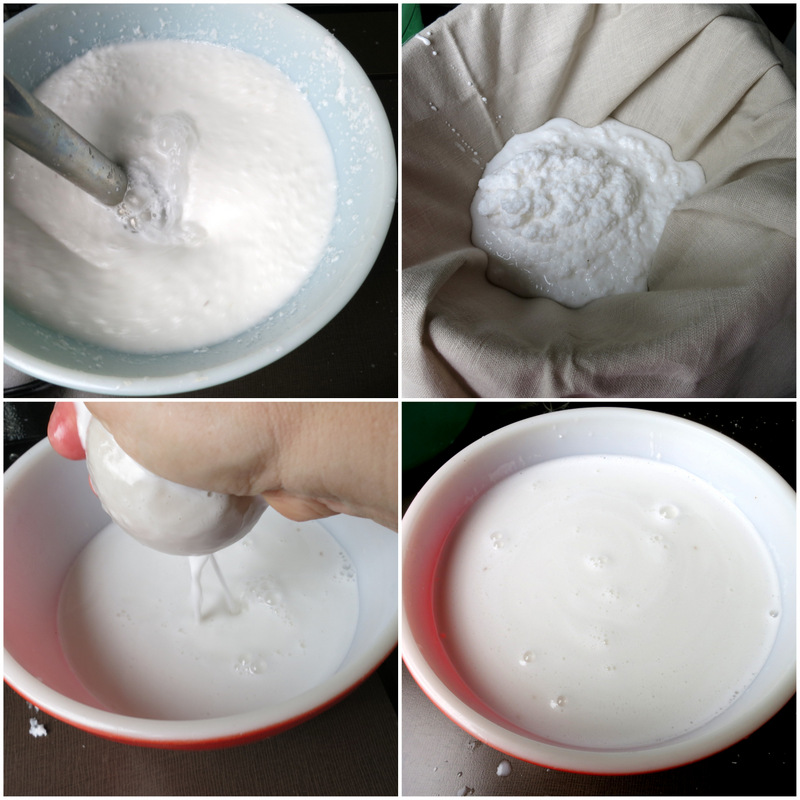
Blend & Squeeze
By the way, this coconut milk is similar to the kind that you buy in a can and use for cooking. It has a high-fat content and will separate after sitting for awhile. Don’t worry, it will come together when you heat it. Or you could scoop off the creamy top and make coconut whipped cream. Yum!
Okay, now that we have a delicious bowl of fresh coconut milk, what should we make? How about…
Spicy Noodles & Veggies with Coconut Sauce!!!
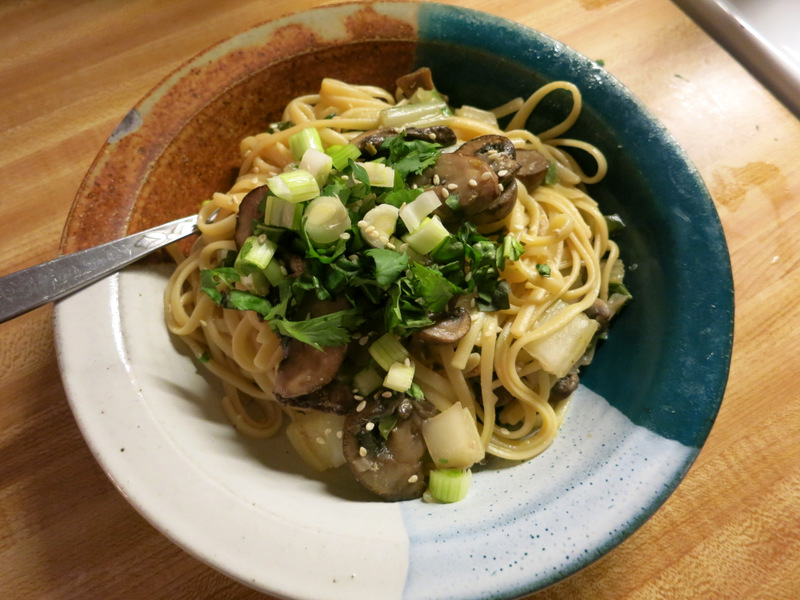
Spicy Noodles & Veggies with Coconut Sauce
Pasta and rice pair wonderfully with coconut milk because they readily soak up all that creamy goodness. I wanted a dish with fresh flavors and a bit of spice, and when I came across a recipe with lemongrass, lime zest, and a jalapeño pepper, I knew I had a winner.

So much goodness in this dish
A few tweaks to the original recipe and I was in business. This dish is fairly versatile. It would be equally as tasty with broccoli, carrots, kale, or any number of other other vegetables. Also, the pasta could be substituted for rice or another grain.
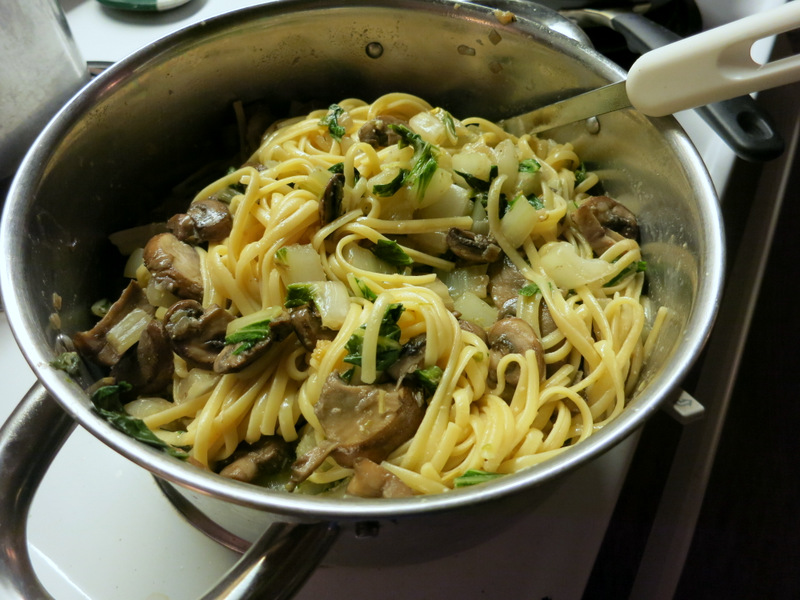
A pot full of yum
Spicy Noodles & Veggies with Coconut Sauce
Serves: 4
- 1/2 tablespoon olive oil
- 2 shallots, finely chopped
- 2 tablespoon ginger, finely chopped
- 1 jalapeño chile, ribs & seeds removed, finely chopped
- 1-2 stalks of Lemongrass, tender inner stalk only, finely sliced
- 2-3 cups baby bella mushrooms, sliced
- 3-4 heads bok choy, thinly sliced
- 2 cups of fresh (or canned) coconut milk
- 3 tablespoons soy sauce
- zest of 1 lime
- red chili flakes
- 8 oz soba noodles (linguine or fettuccini works well too)
- 1/2 cup fresh cilantro
- 1/2 cup fresh basil
- 4 scallions, sliced
- Sriracha sauce, Lime wedges & Sesame seeds for topping
- In a large pot, boil water and cook the pasta. Set aside.
- Heat the oil in a large saucepan over medium heat. Sauté the shallots, jalapeño, ginger and lemongrass for 2-3 minutes, until the shallots become translucent.
- Add the mushrooms and cook for an additional 5-6 minutes until they have released their juices and began to brown slightly. Add the bok choy and cook until it begins to wilt, 3-4 more minutes.
- If you have room in the pan add the coconut milk, soy sauce, lime juice, and a dash or two of chili flakes (to your taste). If not, combine these ingredients in a separate pot. Simmer until the sauce thickens slightly, about 3-5 minutes.
- In a large bowl or pot toss together the pasta, veggies, and sauce. Let sit for a few minutes before serving so the pasta can soak up the sauce.
- Serve into individual bowls and top with fresh cilantro, basil, scallions, Sriracha, and lime wedges if desired. Sprinkle with a few sesame seeds for crunch.
8 comments
Love the tutorial and the whole idea of fresh coconut milk! Yum!
I am thinking I need to make another batch soon :)
We love coconut milk and use it in many different recipes. It would be fun to try making it from fresh coconut. Thanks for the great step-by-step instructions –now I just need your dad to open the coconuts for me! ;-)
Come on down. He’d love to open some for you :)
Drooling! We use coconut in our oatmeal most morning and love cooking with coconut milk. Will have to try your yummy recipe with our gluten free pasta.
I think the recipe would also be great with rice.
I too cook with coconut milk quite often and have tried making my own. I created quite a mess. I will have to see how I do with your great tutorial. This recipe looks yummy!
There was a bit of a mess, I just didn’t show the milk splattered counter in the photos :)