Ever since concluding my series of grilled recipes this past summer (Grilled Pizza, Grilled Cake Kabobs, Grilled Potato Salad) I’ve been trying to come up with another set of recipes to share. At one point I thought I might do a series on fall soups, but as we went farther and farther south, and the temps got warmer and warmer, I never really felt up to fall-like meals.
Instead, I decided to wait until we got down to the Keys, knowing that there would be a wealth of fresh fruit, veggies, and seafood just waiting to turn into delicious meals. So over the next few weeks I’ll be sharing recipes that are either traditional in the Keys or made with ingredients that grow (or live) down here. This first post includes one of each. Let’s start with some pie!
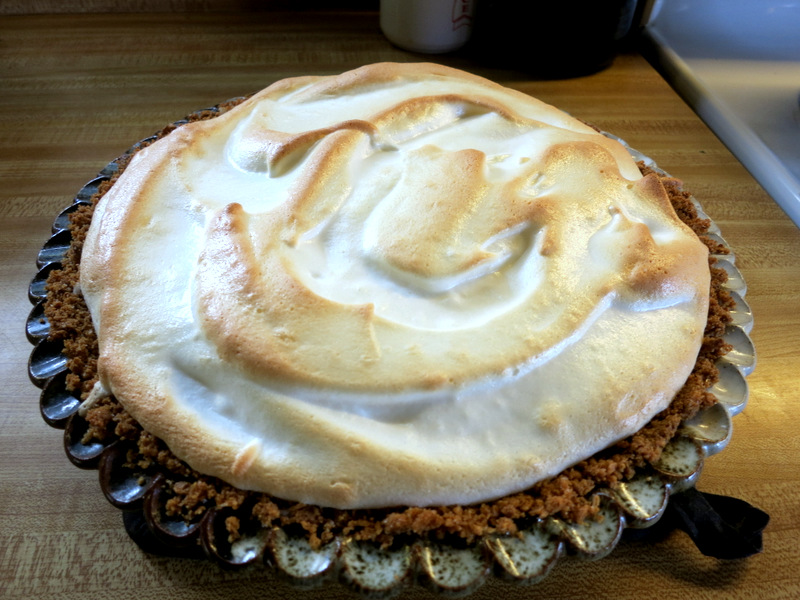
Key Lime Pie with Meringue Topping
Key Lime Pie
Key Lime Pie is the desert of the Florida Keys. It’s on the menu at nearly every restaurant, and you can even buy it and have it shipped anywhere in the world at several bakeries around the keys. OR you could just make your own. Making Key Lime Pie is, well, as easy as pie. All you need are the right ingredients. And the most important of those ingredients is…you guessed it, key limes.
I mentioned in my garden tour post that most of the key limes you buy in the store are actually gown in Mexico and picked before the peak of ripeness. Let me show you the difference. The yellow limes on the left are from a local tree, the green limes on the right are from a produce seller out of Homestead Florida. Most likely those limes come from Mexico or Guatemala.
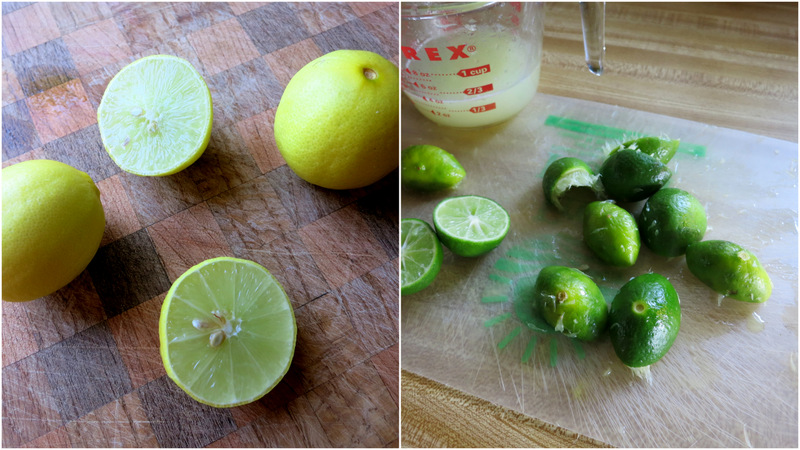
Local Key Limes vs. not so local Key Limes
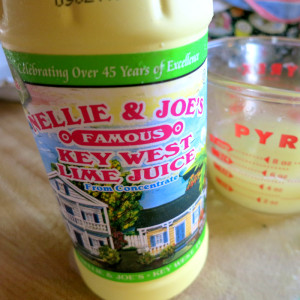
Bottled key lime juice will work in a pinch
There is undoubtably a difference in taste. The local limes are a bit sweeter and juicier. But as I only had a few local limes, the ones grown abroad had to do.
Wanna know a secret? You can make Key Lime pie with bottled juice. There’s actually a fairly good source of bottled Key Lime juice. It’s called Nellie & Joe’s. Yes, it is made from real key limes. No, it’s not fresh, it comes from concentrate, but you can buy it at nearly any supermarket, and it makes a pretty good pie if you can’t get fresh key limes. So fresh or bottled, the first step to a good key lime pie is the key lime juice.
***By the way, contrary to what the Internet might tell you, I wouldn’t recommend making Key Lime Pie with regular old limes. Then you just have lime pie, which is not the same as key lime pie.
Crust:
After you have your lime juice it’s time to make the crust. Sure you can buy a pre-made graham cracker crust. But they are soooo easy to make that it seems silly not to make your own. The process only takes minutes and can be completed in three simple steps.
First, crush the graham crackers. I like to put them in a plastic bag and roll them until crushed into a fine powder with my rolling pin. Other people use a food processor. Combine the crushed crackers with sugar, shredded coconut (optional) and melted butter. Press this mixture into a pie plate and you’re done.
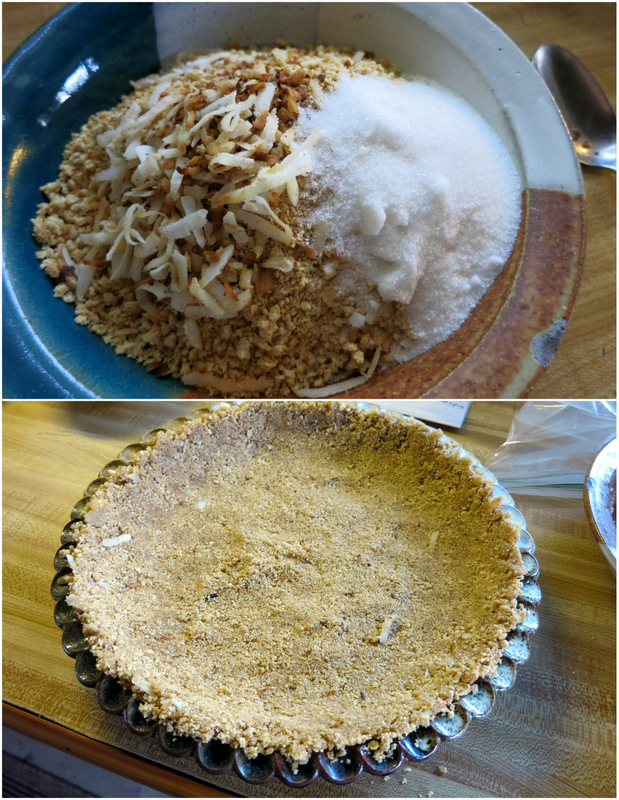
Graham Cracker Crust
Filling:
As simple as beating together the egg yolks, sweetened condensed milk, and lime juice until mixed together. Oh yeah, I forgot to mention…this is NOT a health conscious recipe.
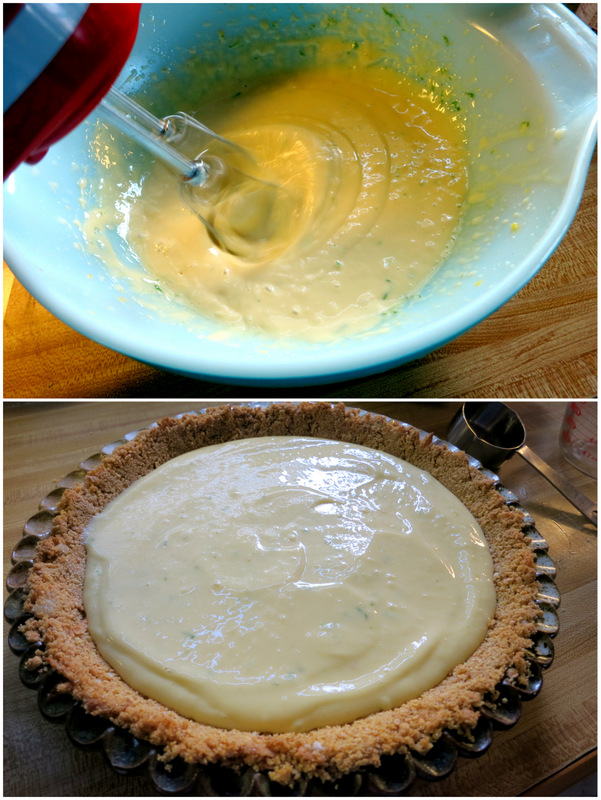
Make the filling – lots of room left for meringue
Topping:
Some people top their pie with a squirt of canned whipped cream. I prefer a meringue topping. Simply whip the egg whites and sugar until stiff and glossy, then bake until brown. That’s it. Simple, simple, simple.
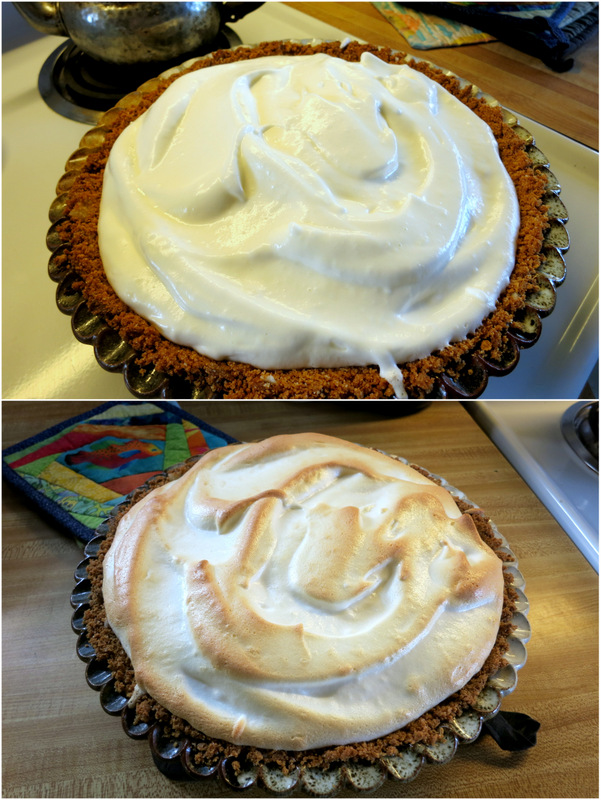
Meringue
It was dark when I served the pie, so no beauty shots. Here it is all dished out and about to be devoured. We had 11 people and 12 pieces of pie, which meant one leftover for some lucky person the next day.
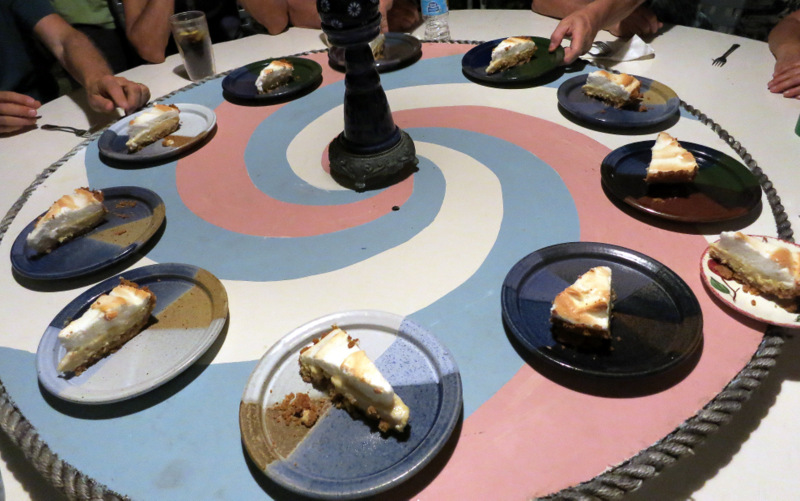
Just enough to go around
Key Lime Pie with Meringue Topping
Makes: 1 9-inch pie
For the crust:
- 10 Graham Crackers (about 1 1/4 cups crushed)
- 1/4 cup white sugar
- 6 tablespoons unsalted butter, melted
- 2 tablespoons shredded, toasted coconut (optional)
For the filling:
- 2/3 cup freshly squeezed lime juice (you will need about 20 key limes) or Nellie & Joe’s Juice
- 2 teaspoons lime zest
- 1 can (14 oz) sweetened condensed milk (the full-fat version)
- 3 large egg yolks
For the meringue:
- 6 large egg whites
- pinch of salt
- 1/4 teaspoon cream of tartar
- 1/3 cup white sugar
- Preheat the oven to 375 degrees. Spray a 9″ pie plate with baking spray.
- Make the crust: Crush the graham crackers in a large plastic bag or using a food processor. Mix with the sugar, melted butter and coconut if using. Press firmly into the bottom and sides of the prepared pie plate.
- Bake for 8-10 minutes or until it is firm and beginning to brown. Remove and lower the oven temperature to 325 degrees.
- Make the filling: Using an electric mixer beat the egg yolks on medium speed until fluffy, about 3 minutes. Add the sweetened condensed milk and beat for another 3 minutes. Add the lime juice and zest and beat until just combined.
- Pour the filling into the crust and bake for 15-17 minutes until the center is firm but still wiggles when nudged. Increase the oven temperature to 450 degrees.
- Make the meringue: In a large bowl beat the egg whites and salt until foamy. Add the cream of tartar and beat until soft peaks form. Gradually add the sugar, about 1 tablespoon at a time, and beat until stiff, glossy peaks form.
- Immediately scoop the meringue onto the filling, making swoops and swirls in the meringue with the back of the spatula. Bake for 2 to 5 minutes, until the meringue is set and browned in spots. ****Don’t walk away during this time. The meringue will turn from perfectly browned to completely burnt in a matter of seconds if you let it go too long.
- Remove from oven and let cool completely before slicing and serving.
Starfruit Upside Down Cake

Starfruit Upside Down Cake
Up next we have another tropical desert. This is in no way a traditional Florida Keys dessert, but when a neighbor gave us a bag of starfruit I knew right away I wanted to incorporate them into a desert. The first recipe I came across was for a spiced cake baked with sliced pieces of starfruit at the bottom and flipped over for serving. Like pineapple upside down cake, but with starfruit. Prior to making this cake, I don’t think I’d ever eaten starfruit and was a bit intimidated by their strange shape.
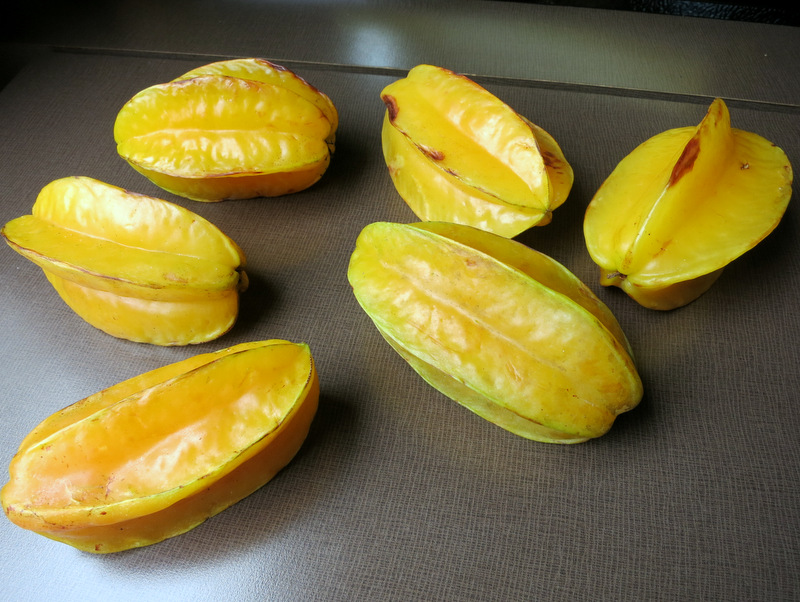
A very strange looking fruit
Turns out they’re easy to work with, although preparing them does require a few steps. First, slice off the very tip of the ridge. Second, gently slide your knife under the skin and peel it back on each section. Third, slice into roughly 1/4-inch pieces. Finally, remove the seeds. What you are left with is a pile of star-shaped, sweet, yellow fruit.
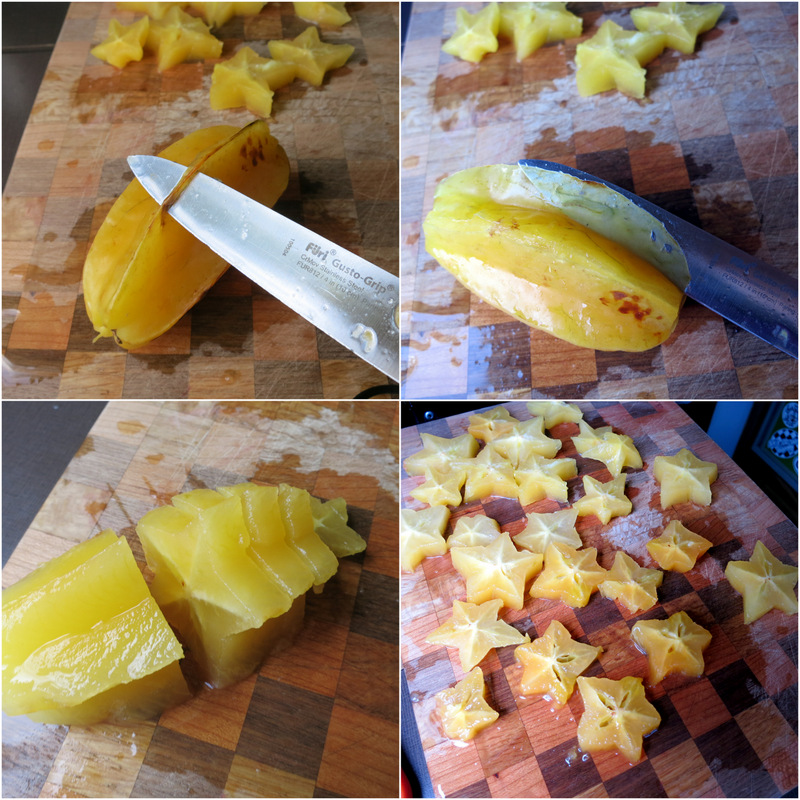
Preparing the fruit
After preparing the starfruit, making the cake was a snap. I arranged the fruit in the bottom of a 9×11-inch baking dish, mixed together the batter and poured it on top. I got lazy and didn’t take any photos while making the cake, but it followed the basic cake making strategy — mix the dry, mix the wet, and combine the two.
I popped the whole thing in the oven and 30 minutes later it was done. After a few minutes of cooling I carefully inverted it on a baking sheet, and my Starfruit Upside Down Cake was done.
Again, we ate it outside at night, so no pics of the cut cake, but I will tell you that I served it with two kinds of gelato — vanilla and coconut. The brand we’ve been loving is called Talenti, and their Caribbean Coconut gelato is just about the best thing I’ve ever eaten (and it pairs perfectly with this cake).
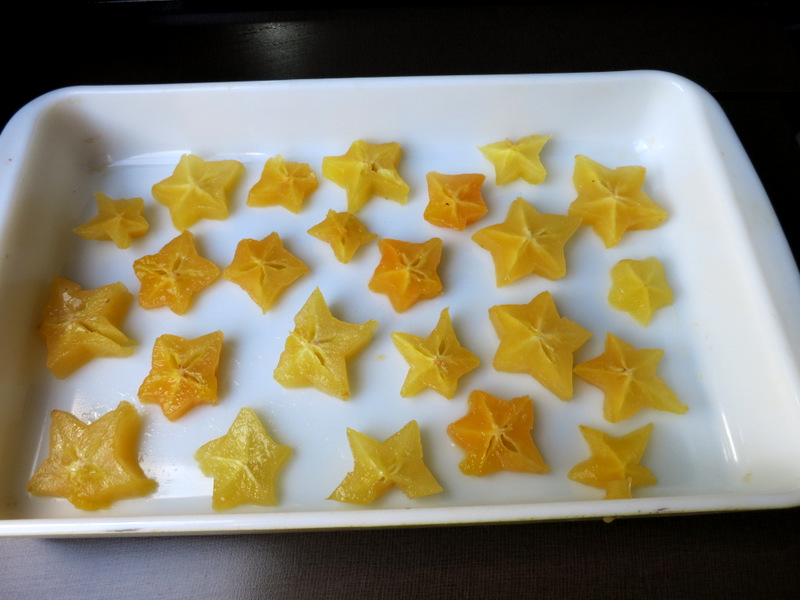
Sliced starfruit
Starfruit Upside Down Cake
Makes: 1 9×11-inch cake (for a half recipe use an 8×8-inch pan)
Adapted from Love & Olive Oil
- 1 1/2 cups flour
- 6 tablespoons almond meal
- 1 teaspoon baking powder
- 1/2 teaspoon baking soda
- 1/2 teaspoon salt
- 1/2 teaspoon ginger
- 1/2 teaspoon cinnamon
- 1/4 teaspoon cloves
- 1 1/2 sticks (12 tablespoons) unsalted butter, divided, room temperature
- 6 tablespoons light brown sugar
- 2 tablespoons spiced rum
- 3-4 starfruit, sliced into 1/4-inch thick pieces
- 3/4 cup white sugar
- 2 large eggs, room temperature
- 1 teaspoon vanilla extract
- 1 teaspoon almond extract
- 1 cup milk (any kind, I used almond, but I think coconut milk would be amazing in this cake)
- Preheat the oven to 350 degrees. Spray the baking pan with non-stick spray.
- Peel and slice the starfruit. Arrange them in the bottom of your prepared pan.
- In a medium bowl whisk together the flour through cloves. Set aside.
- In a small saucepan melt 4 tablespoons of butter. Add the brown sugar and rum, stir until combined.
- In a large bowl beat together the remaining 8 tablespoons of butter and white sugar until light and fluffy, 2-3 minutes. Add the eggs, one at a time, and mix well. Scrape down the sides of the bowl and add the vanilla and almond extracts. Slowly add the rum mixture and mix until just combined.
- With the mixer on low add half of the dry ingredients, followed by half of the milk, then the remaining dry ingredients. Add the remaining milk and mix just until combined.
- Slowly pour the batter on top of starfruit, being careful not to disturb them.
- Bake for 30 minutes, or until a wooden tester comes out clean. cool 5 minutes. Loosen the edges of the cake with a butter knife and invert onto a platter.
- Slice and serve while still warm. Don’t forget the ice cream or gelato!
14 comments
OM NOM NOM! :)
I woke up to this post and am craving sweet, tropical things. Fibre 1 is just not cutting it.
Sorry to tease you Lynda!
Beautiful set of food photos and great recipes!
Nina
Thanks Nina!
Just like my mom’s Key lime pie! I’ve tried to make it healthier by using coconut milk in place of condensed milk — not the same at all. I do buy organic condensed milk on the rare occasion that I make Key lime pie to delude myself into thinking it’s a little healthier, haha! Great job on the recipes and photos, Amanda!
I’ve decided that Key Lime Pie is just one of those things you can’t make healthy. Which is why I don’t eat it very often :) I bet coconut milk adds a good flavor though.
Yummers! Thanks for sharing
You’re very welcome!
Your pie is beautiful! I bet it tasted as good as it looked:)
Tree ripened Star fruit are really very good. I really like the sweet/tart combination. Clever idea to make the cake:)
The pie was amazing. I might have to make another one before we leave.
I’ve been thinking about your pie dish ever since I read your blog. Is it ceramic, and where can I get one. It is lovely.
Kathy
The pie plate is ceramic. It comes from a place in Michigan called Claybanks Pottery. They have an online store. http://claybankspottery.com/
Thanks.