I mentioned awhile back that we had a giant list of Airstream related projects we hoped to tackle during our month in Vermont. We’ve done our fair share of renovations and modifications while living on the road, and one thing we have learned is that it’s always easier when you’re parked in someone’s driveway with unlimited access to resources and space. So we made an ambitious list for our month of driveway surfing..and we got about a third of the projects complete. Not bad considering we were also working everyday and squeezing in as much social time as possible. Here is a run down of the two most exciting completed projects.
New Bedroom Curtains
When we did our initial round of renovations before moving into the Airstream, one of the things high on the list was to replace the terrible, bland, off-white curtains in both the living room and bedroom. I had a fair amount of prior curtain making experience and figured it was something I could easily tackle on my own.
The first set I made was for the bedroom. They came out okay, but I was never 100% satisfied with the results. For one, the bottoms didn’t line up perfectly (which Tim swears no one else would ever notice, but drove me crazy), and for two, the fabric choice was not the greatest. I still love the pale blue with white and green circles pattern, but it limited any other patterns that I might want to put in the bedroom. Patterns like the handmade quilt I have been wanting to make for us. The other issue with the fabric was that it let in too much light which meant we had to pin up dark fabric panels when we overnighted in a parking lot, at a campground with street lights, or next to an obnoxious neighbor who left their outdoor light on all night (why?????).
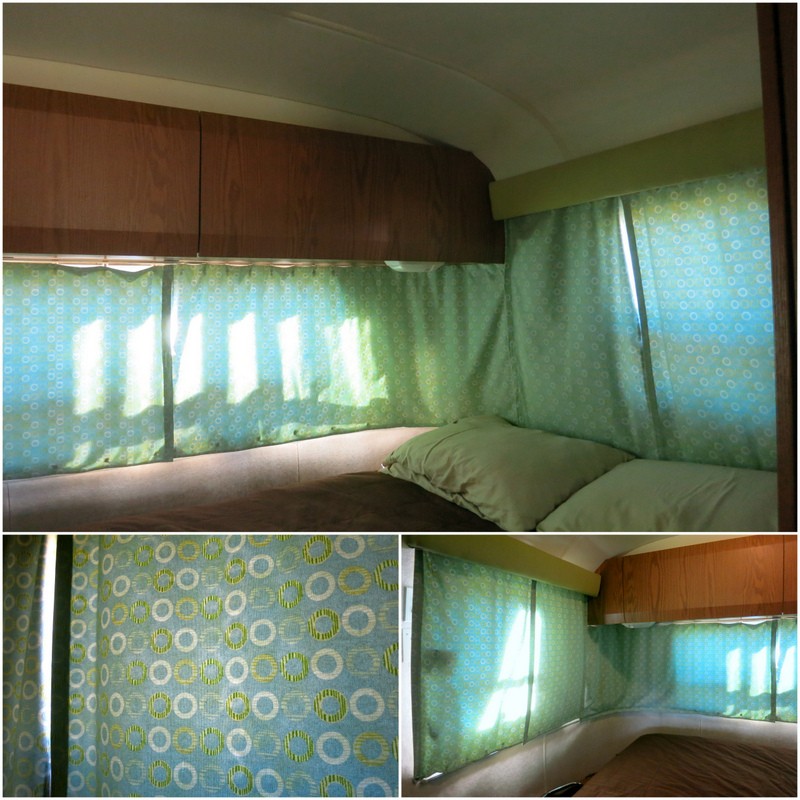
The old curtains
So I decided that while we were in VT with access to a large table for cutting and sewing it would be out with the old and in with the new. We decided on a grey-blue color, and after a few shopping trips came across this gorgeous linen fabric. Paired with a lining made of black-out fabric this would suit our needs perfectly.
As luck would have it, I started the curtain project while we were parked at my brother’s house and my mom was visiting. I swear I didn’t plan it that way, but it really couldn’t have worked out any better. I love sewing, but details like making sure that everything is cut perfectly straight and the seams line up just so is not my strong suit (you know, the minor details). Luckily my mom is much detail oriented and patient than I am and helped me carefully iron and cut out all the panels. She even did the first round of sewing for me since I was busy with work. Guess I know where we’ll be going the next time I have a sewing project :)
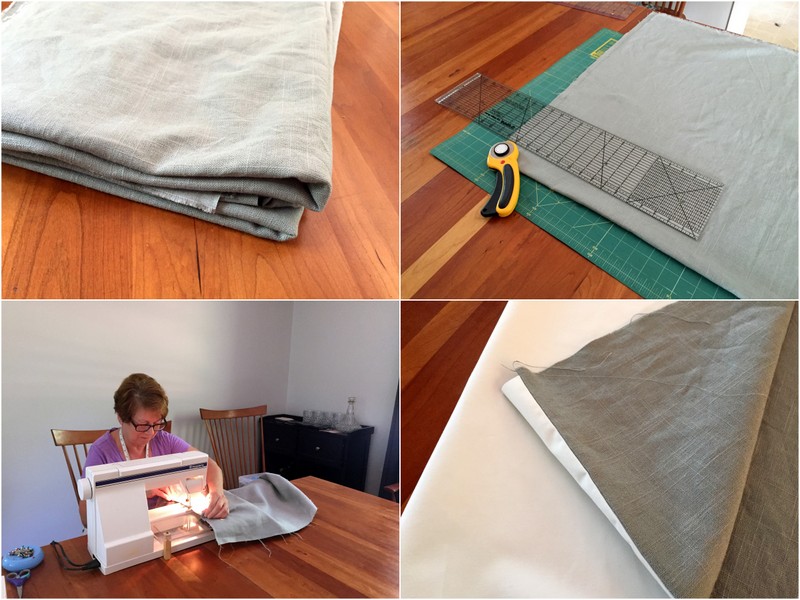
New fabric — Cutting — Free Labor
Sadly, I lost my helper and had to finish the rest on my own. She had sewn all the bottom and top seams which left me to do the sides.
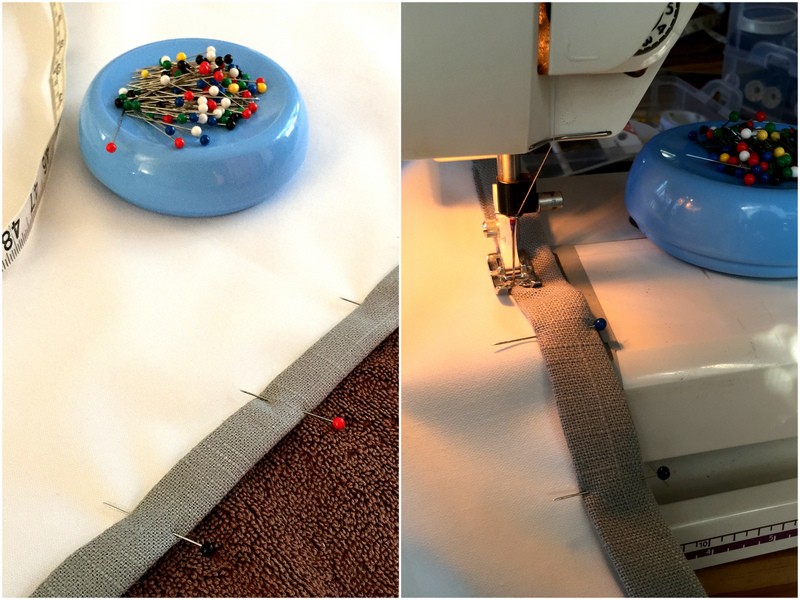
Sewing the side seams
After the curtains were all sewn I added the plastic clips. Our curtains slide on a track that wraps around the bedroom. Small plastic clips are inserted into the metal track and attached to the fabric with elastic. These clips are the original ones that I cut off the factory made curtains. This time I decided to replace the old, yellowed elastic but keep the plastic clips. I could have ordered all new clips, but it seemed like a waste. It only took me about 20 minutes to cut and insert new elastic in the clips.
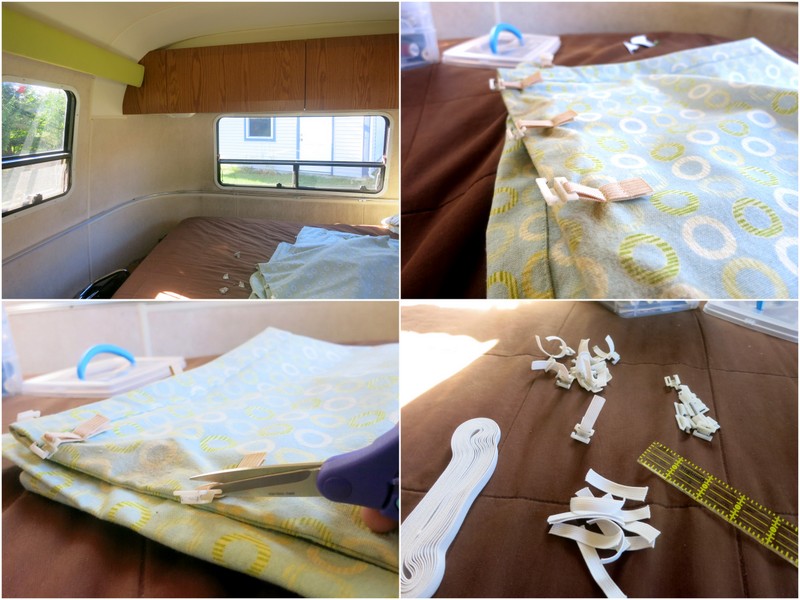
Re-using the old clips
Next I had to sew all 96 clips to the top and bottom of the curtains. I got smart this time around and did a fit test after attaching the clips to both the top and bottom of each curtain to make sure that they lined up perfectly.
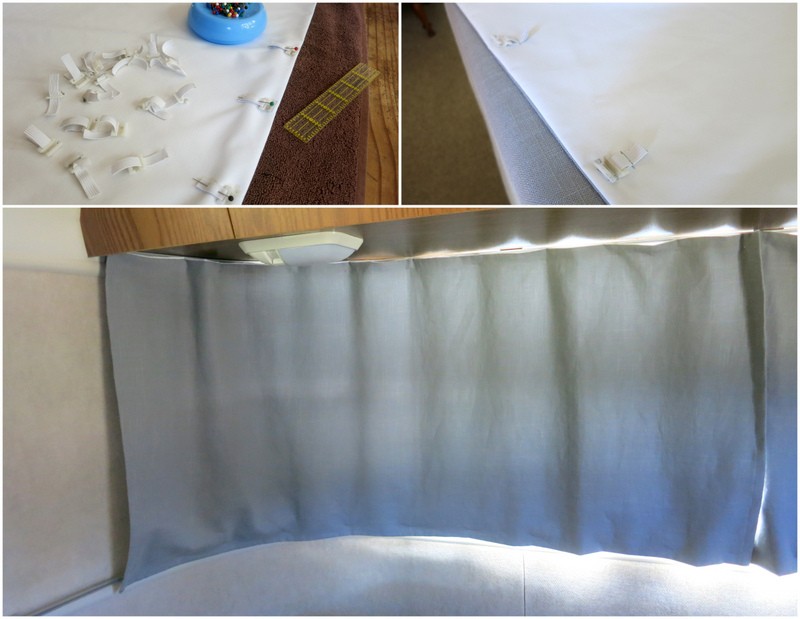
Adding the clips & test fitting
The final details were to add velcro and snaps. The velcro holds the curtains together in the middle of the windows, and the snaps connect the curtains to the walls at the edge of the outside windows.
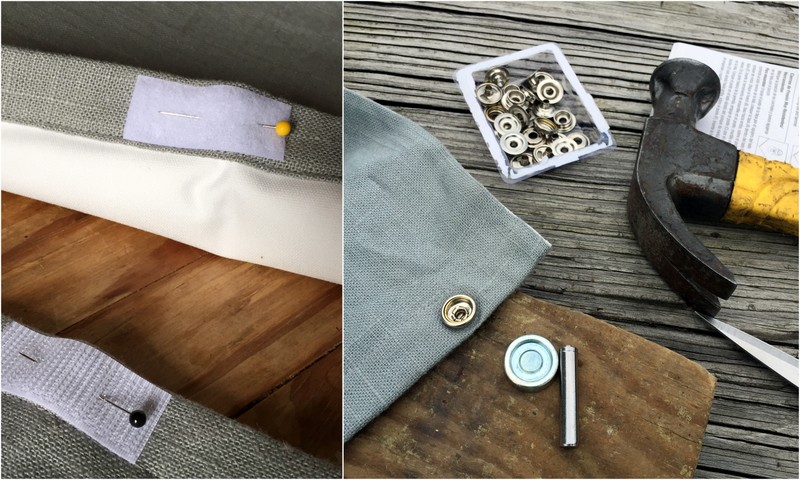
Finishing touches — velcro & snaps
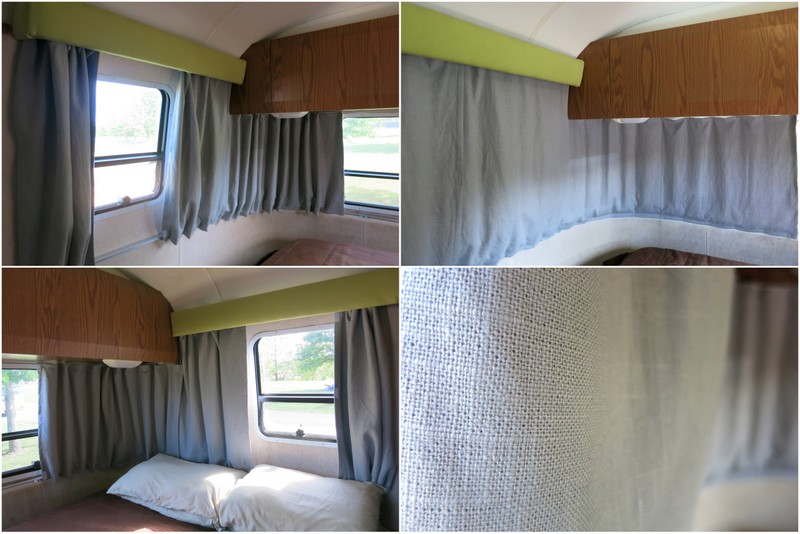
Finally, they were done. I have to say that they came out better then expected. The fit is nearly prefect, the fabric is gorgeous, and the black out lining works like a dream. Now I can start in on my quilt!
Finished!
Mini Hallway Office
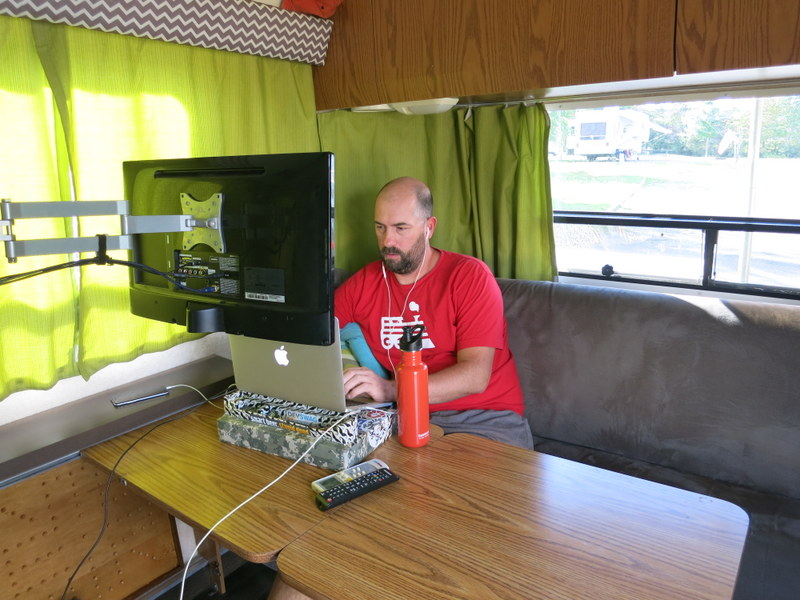
The next project was to make a mini office for me. Our main space issue in the Airstream is that we only have one table that serves as both Tim’s office, the dining room, and the coffee table. Which doesn’t leave much room for me. Over the years I’ve experimented with different places to sit when on my computer — scrunched up next to Tim on the couch, sideways on the couch with the computer on the lap, sitting on the bed with the computer on my lap, and sometimes even outside. None are ideal, and I really needed my own space where I can be comfortable and productive.
Tim’s office — I often sit next to him, but would prefer my own space
Lucky for me I have a smart husband who is good at coming up with out-of-the-box solutions. Solutions like a removable hallway desk that was simple to build and relatively inexpensive.
The first step on the road to my mini office was installing two metal shelf bracket holders on either side of the hallway on the bedroom side. We used a 1 foot piece so the the laptop shelf could be adjusted in case Tim ever wanted to use the space. Next, he cut down two metal shelf brackets, notched out a piece of wood on either end, and attached a wooden bar to the shelf brackets.
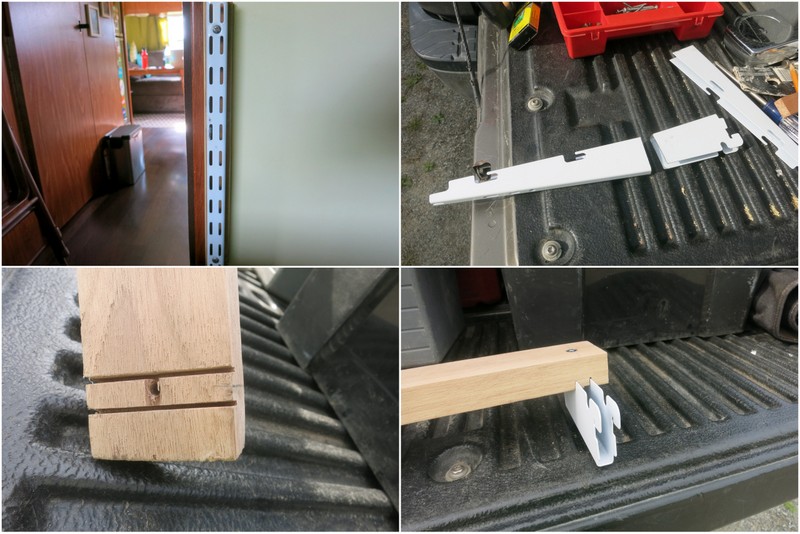
Adjustable shelf bracket holders go on the wall — A metal shelf bracket is cut down and attached to a wooden bar
We found a simple laptop stand on Amazon and mounted it on the bar. I then painted the whole thing black, waited for it to dry and popped it on the wall.
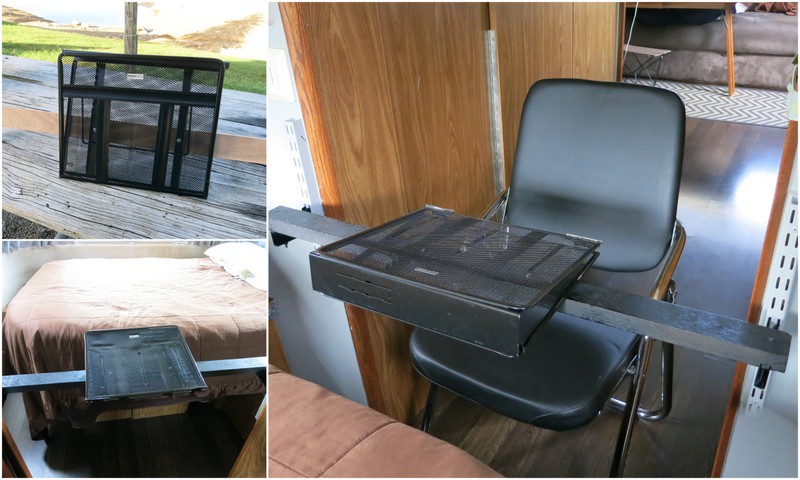
Laptop stand attached to the bar — black paint applied — ready to work!
The padded folding chair also came from Amazon. I wanted something a bit more comfortable than your typical metal folding chair, and more suitable for indoor use than a folding camp chair. I think this one fits the bill nicely, although I do have a put a pillow behind me because the back is not straight enough for me.
Mini Hallway Office
When not in use the chair and laptop bar rest on the wall at the bottom of the bed. On drive days I put both on the bed so they don’t slide around.
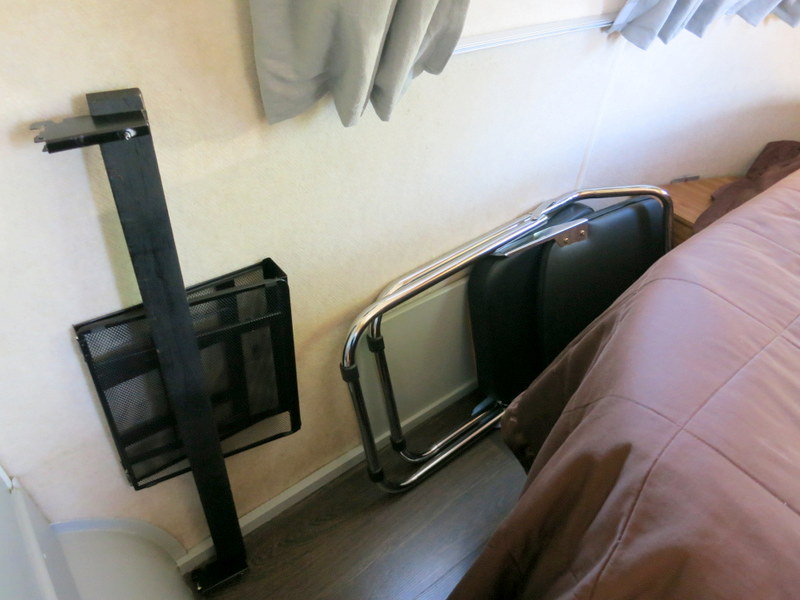
Out of the way
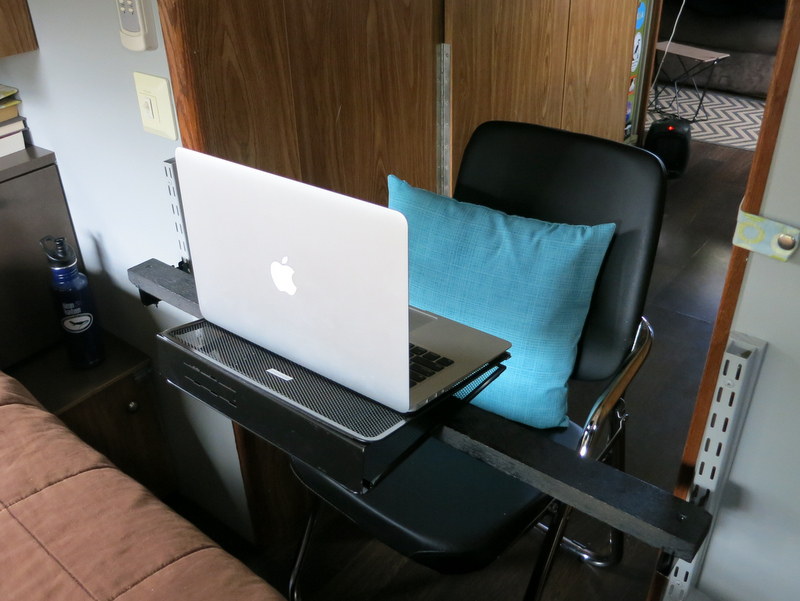
Here I am in my hallway office. It’s quite comfortable and I have great view out the bedroom window.
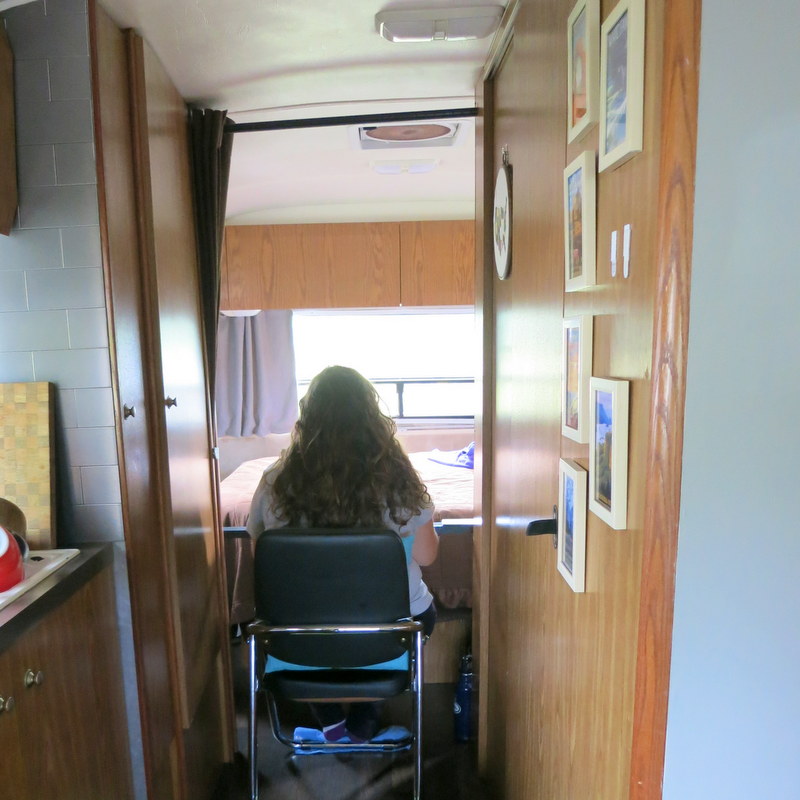
Oh just stick me in the hallway…I’ll be fine
While I was having fun sewing, Tim managed to cross a few more items of the list. Boring yet necessary things like replacing the brakes on the truck, repacking the wheel bearings on the Airstream (something everyone with a trailer should do every 10,000 miles – for great DIY instructions check out this post), and re-sealing all of our windows.
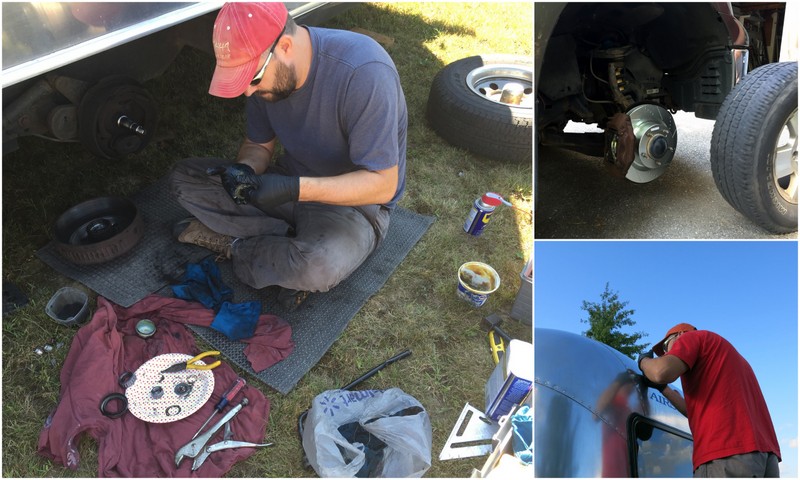
Tim doing manly things
We still have an ongoing list of around the house projects, but it feels good to have tackled some of the larger ones. By the way, if you ever want to see all of the renovations that we have done to the Airstream over the years hop on over to our What page for a full tour.
The items on this page are part of our Amazon affiliate store. We are paid a small percentage if you click through and purchase an item. The prices are the same as buying directly from Amazon and the funds help cover the cost of running this blog. Thanks so much for your support!
11 comments
Great job on the curtains! My winter project is to make new curtains for our 88 Excella. Did you cut your drapery fabric 2″ larger than your blackout fabric and fold it for a 1 inch border all around? What size did you cut the elastic? In your picture it looks shorter than the original elastic.
Thanks Robin. We only did a 1″ border on the vertical sides. The top and bottom are simply sewn together with a 1/4″ seam. Yes, I did cut the elastic shorter than the original simply because it didn’t need to be that long. I think I went with a two inch piece, and the original was 3 inch. By the way, if you are looking for new clips I found them at Vintage Trailer Supply. Good luck with your curtains!
Wow! Awesome job! The curtains looked like quite a project and it’s great your mom was there to help out.
The desk idea is a great invention!
Thanks Lisa! It was quite a project and I am very grateful that my mom was there to help!
Both projects turned out great. Love that soft gray fabric! Nice that you’re both so handy – getting all that done yourselves saved a ton of money, and you know it’s done right.
Well, I don’t know about done right, but definitely done to our satisfaction :) I also love the soft grey color and now I can’t wait to add some color with a new quilt!
The curtains look great. The light coming in would have drove me nuts too. And your new office has a view out the window. Sweet! We made some kitty beds yesterday out of an old sheet of Syd’s that had finally ripped. I’ll Send you a pic.
Thanks Gretchen! The only downside to the light blocking liner is that I have been sleeping later in the morning because its so dark in there.
Gosh you guys are the worker bees. Looks great and very well thought through. We are getting new curtains but daughter is so kind to make them. We are also doing blackout in the bedroom.
Keep having fun! Kat and Jackson
You’re going to love the blackout curtains. It has made a big difference in the bedroom!
Awesome job Amanda! The gray works very nicely with the beautiful green cornice covers…
And what an inventive way to have a computer space….you have me looking around our Belle for a solution to space of my own!